How to speed up Bitcoin transactions
Whenever you send BTC with Proton Wallet, you pay miners (someone who uses a computer to solve complex mathematical problems to validate transactions and add new blocks to the Bitcoin blockchain) a network fee of your choice for adding your transaction to the blockchain. Note that these fees go entirely to the miners, not to Proton.
The higher its fee, the faster miners will confirm that transaction. During high network activity, the increased demand means miners can charge greater fees before they add your transaction to the blockchain. In this situation, if the network fee you chose is too low, your transaction could take some time to be confirmed or risk getting canceled. If your ongoing transaction has been pending confirmation for a long time or you want to accelerate it, the Bitcoin network offers a Replace-by-Fee (RBF) feature, which lets you replace an unconfirmed transaction with a newer version that offers a higher network fee.
You can take advantage of RBF in Proton Wallet using our boost transaction priority feature.
How to boost the priority of an ongoing send transaction
1. Log in to your Proton Wallet account
Open the Proton Wallet app on your mobile device or open your browser and go to wallet.proton.me.(nové okno)
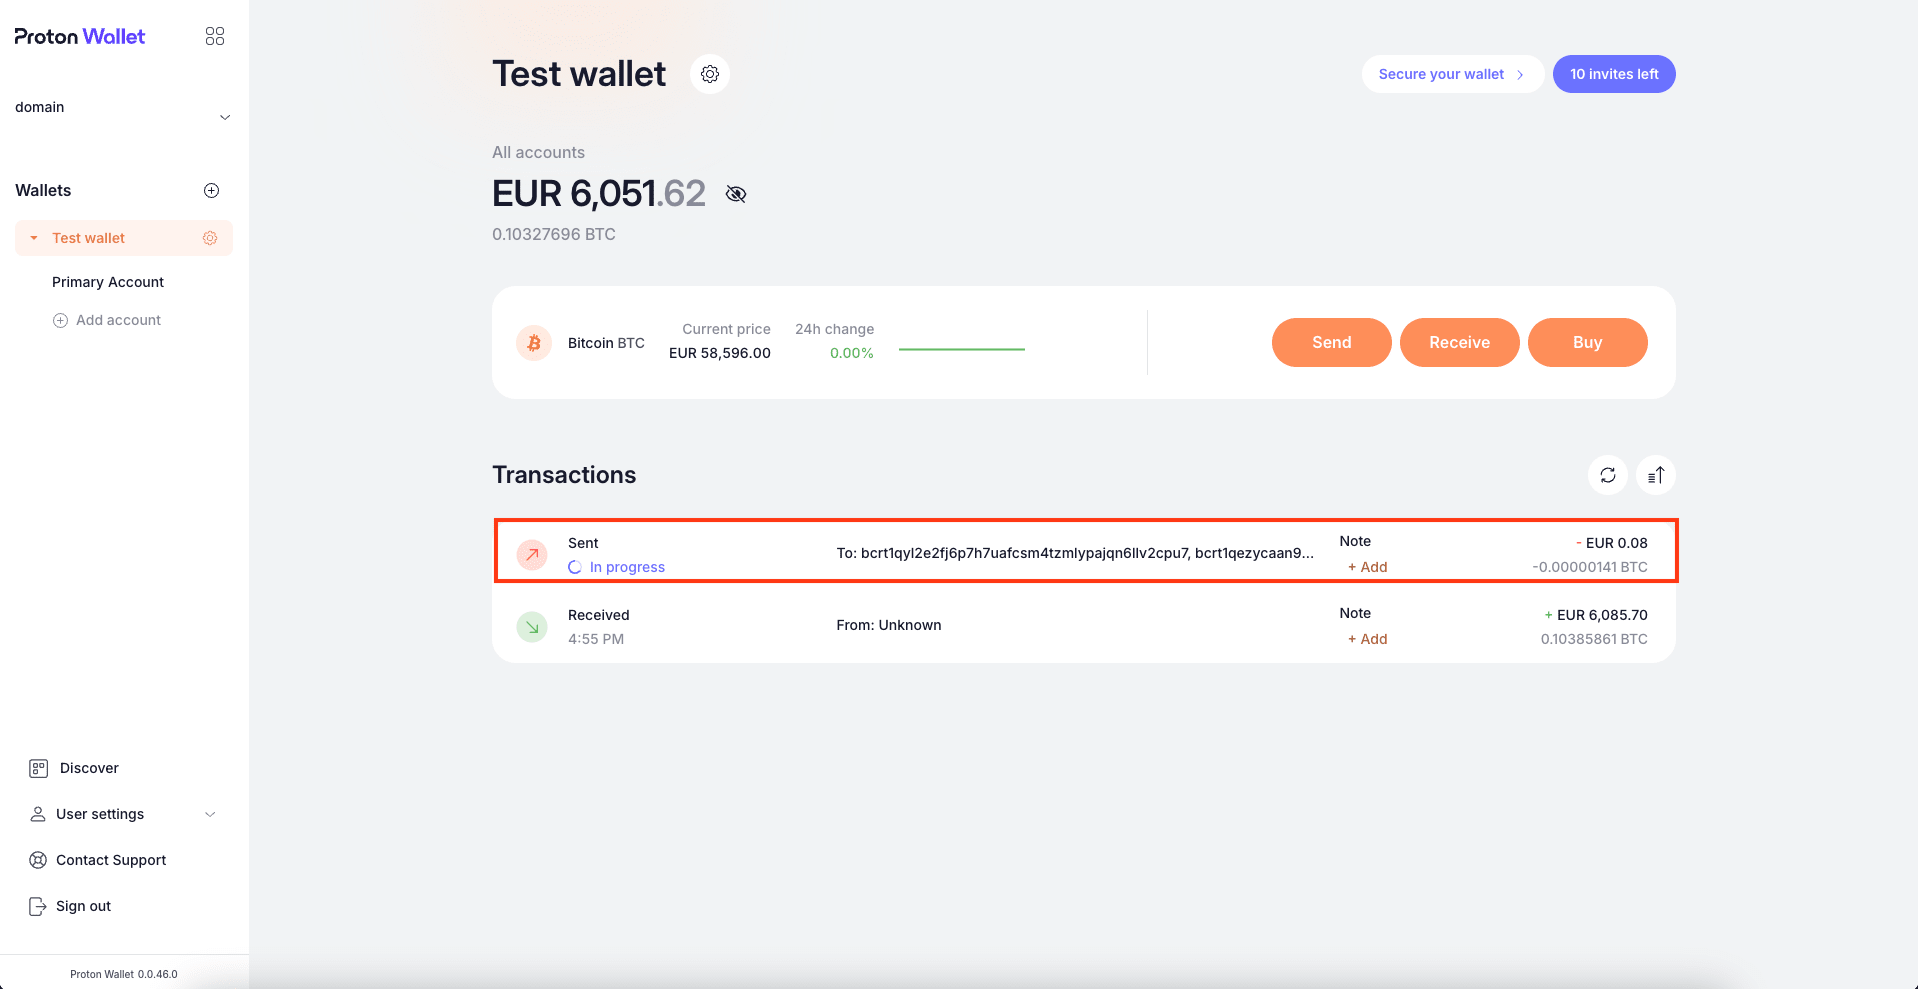
Select the in progress transaction you want to accelerate. You can find your transactions listed on the main screen under the wallet or account you used to initiate them.

2. Click Boost priority on the right-side panel
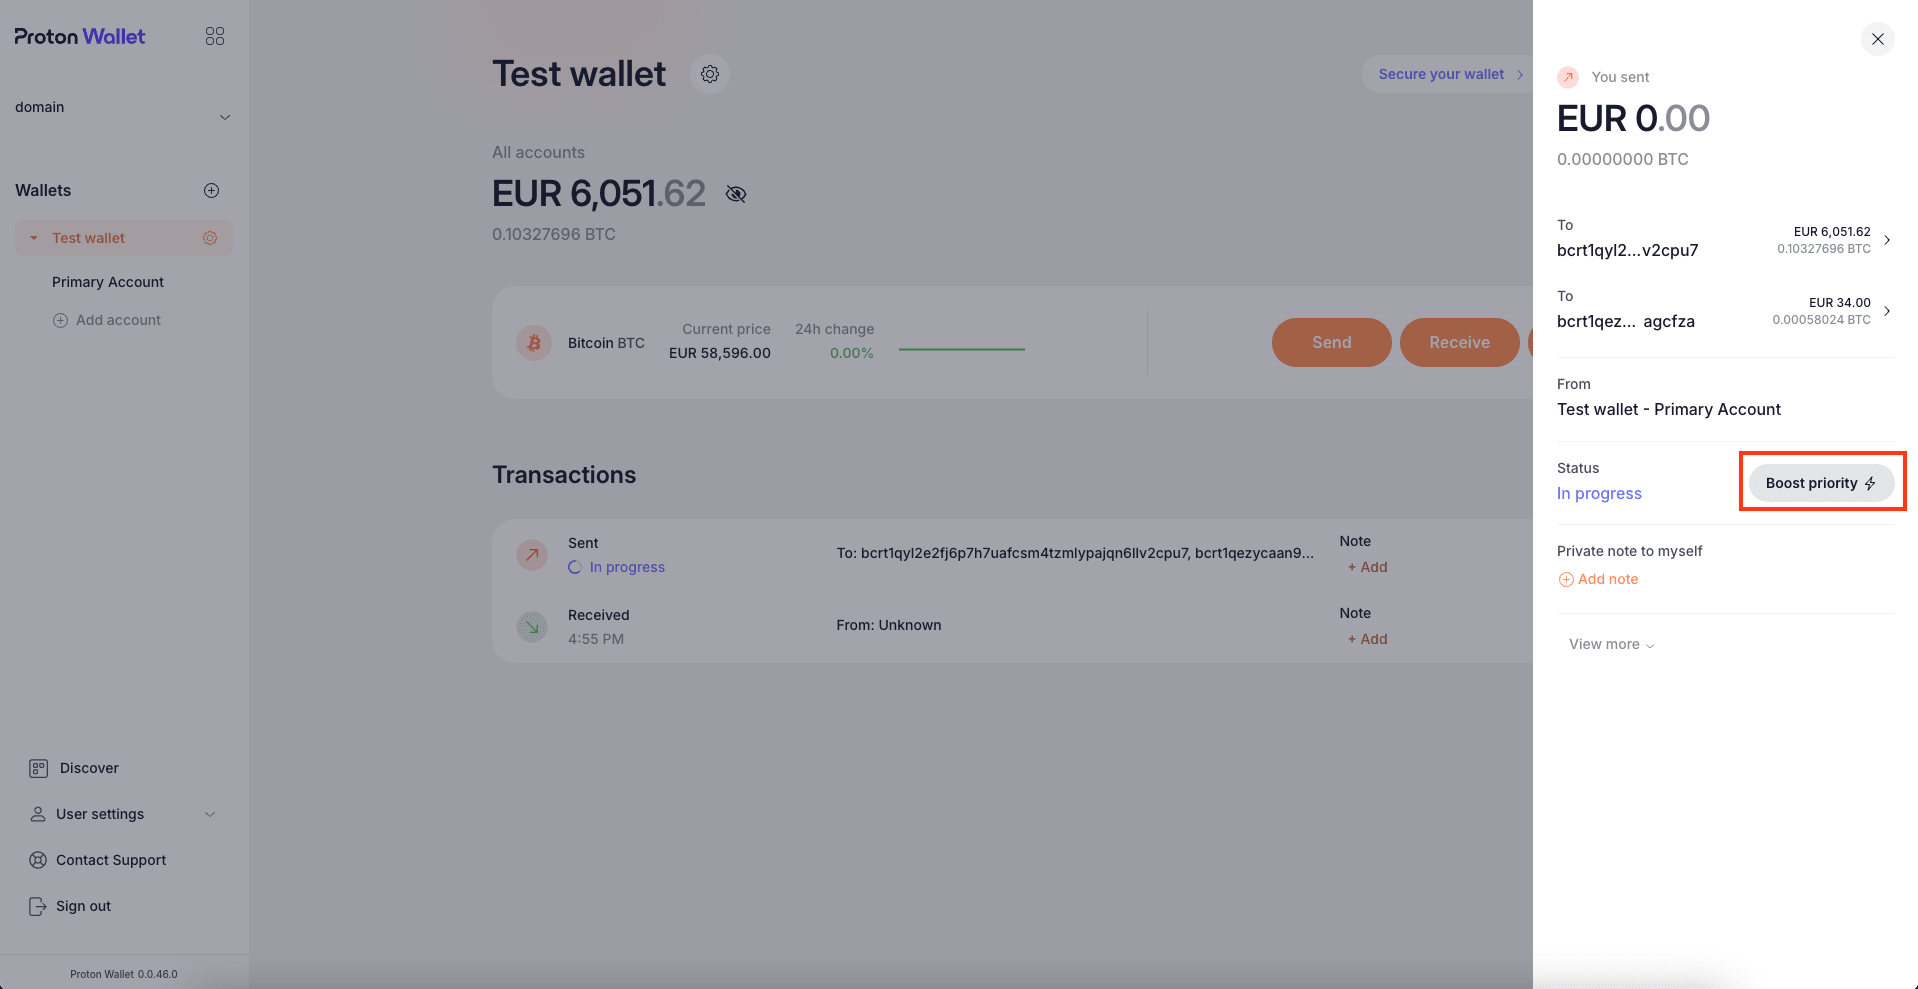
A right-side panel will appear displaying the ongoing transaction’s details. In the Status category, click the Boost priority button. Note that this feature is only available for transactions that are “In progress”.

3. Select a new network fee
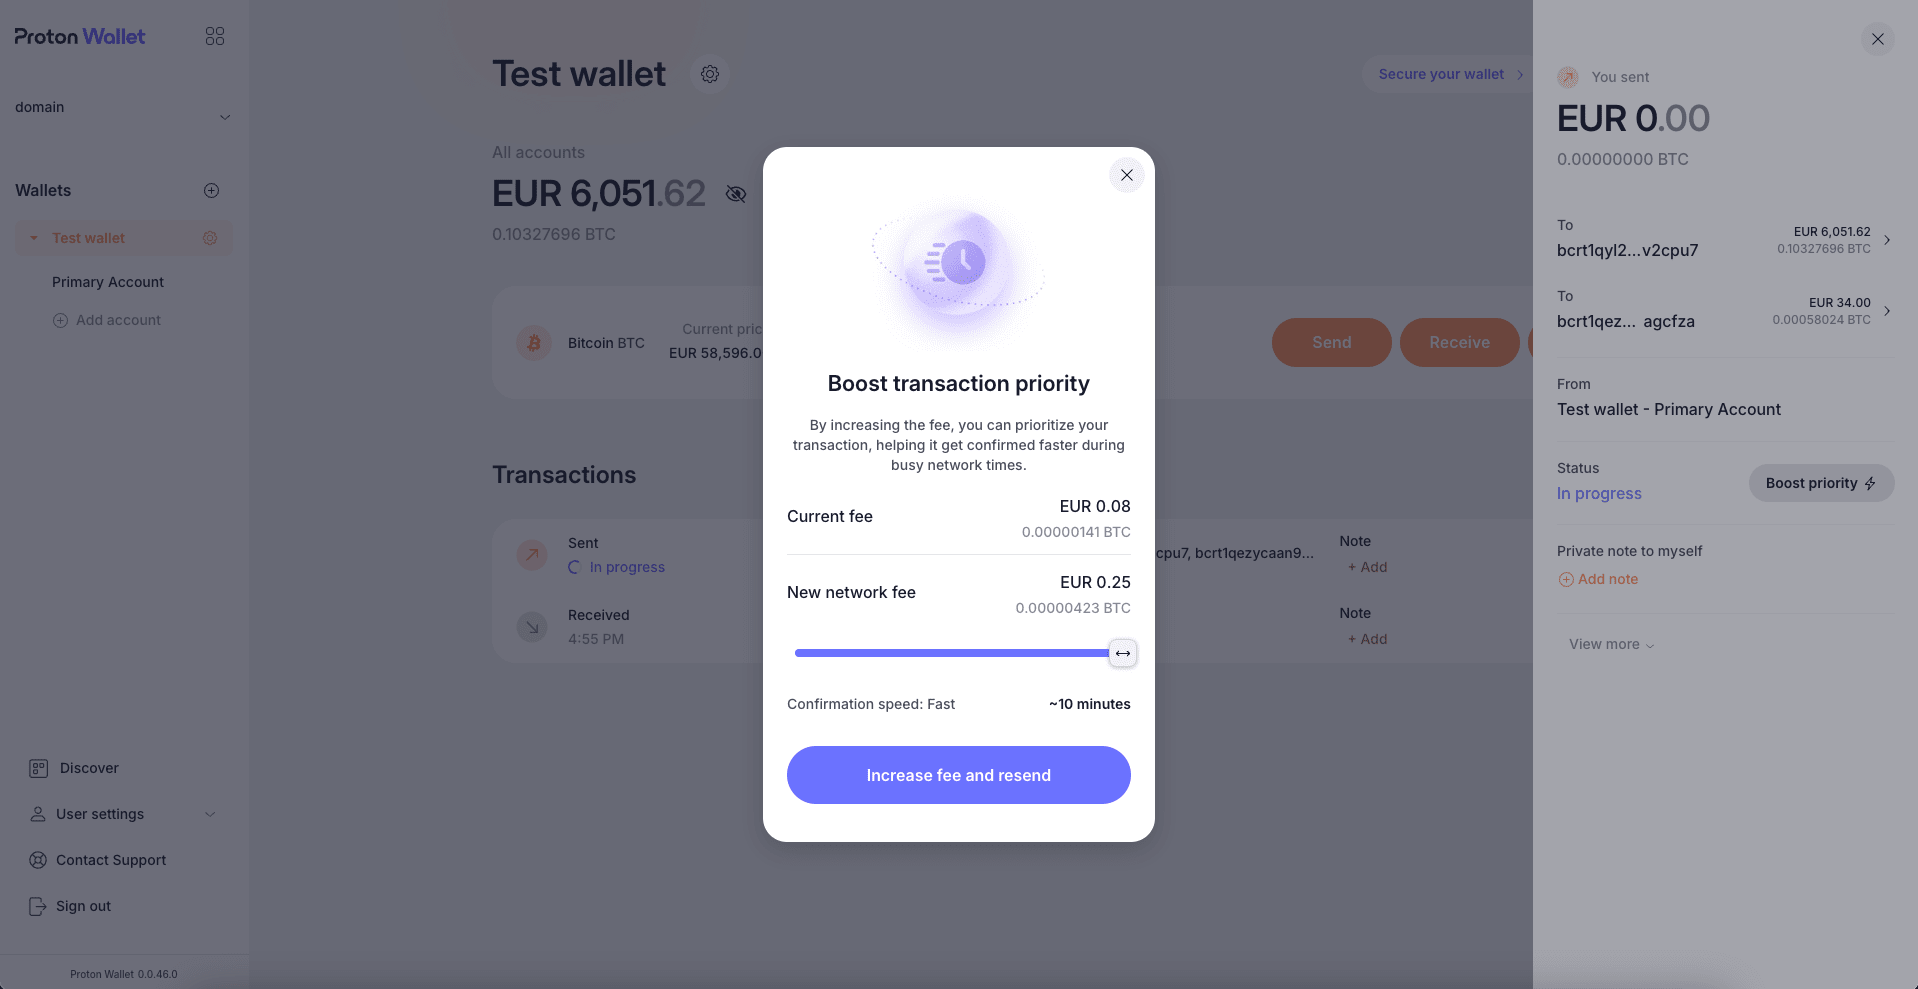
A Boost transaction priority window will appear. This window shows you the current network fee of your transaction and has a slider that you can use to set a new (higher) network fee. You can use this slider to quickly choose exactly how much to pay for your new network fee (as long as you can cover the new fee with the funds on your current account balance), and we’ll show you how long we estimate it will take for your transaction to be confirmed with this new fee. Once you’ve selected the new fee you want, click Increase fee and resend to proceed.

4. Check the transaction status
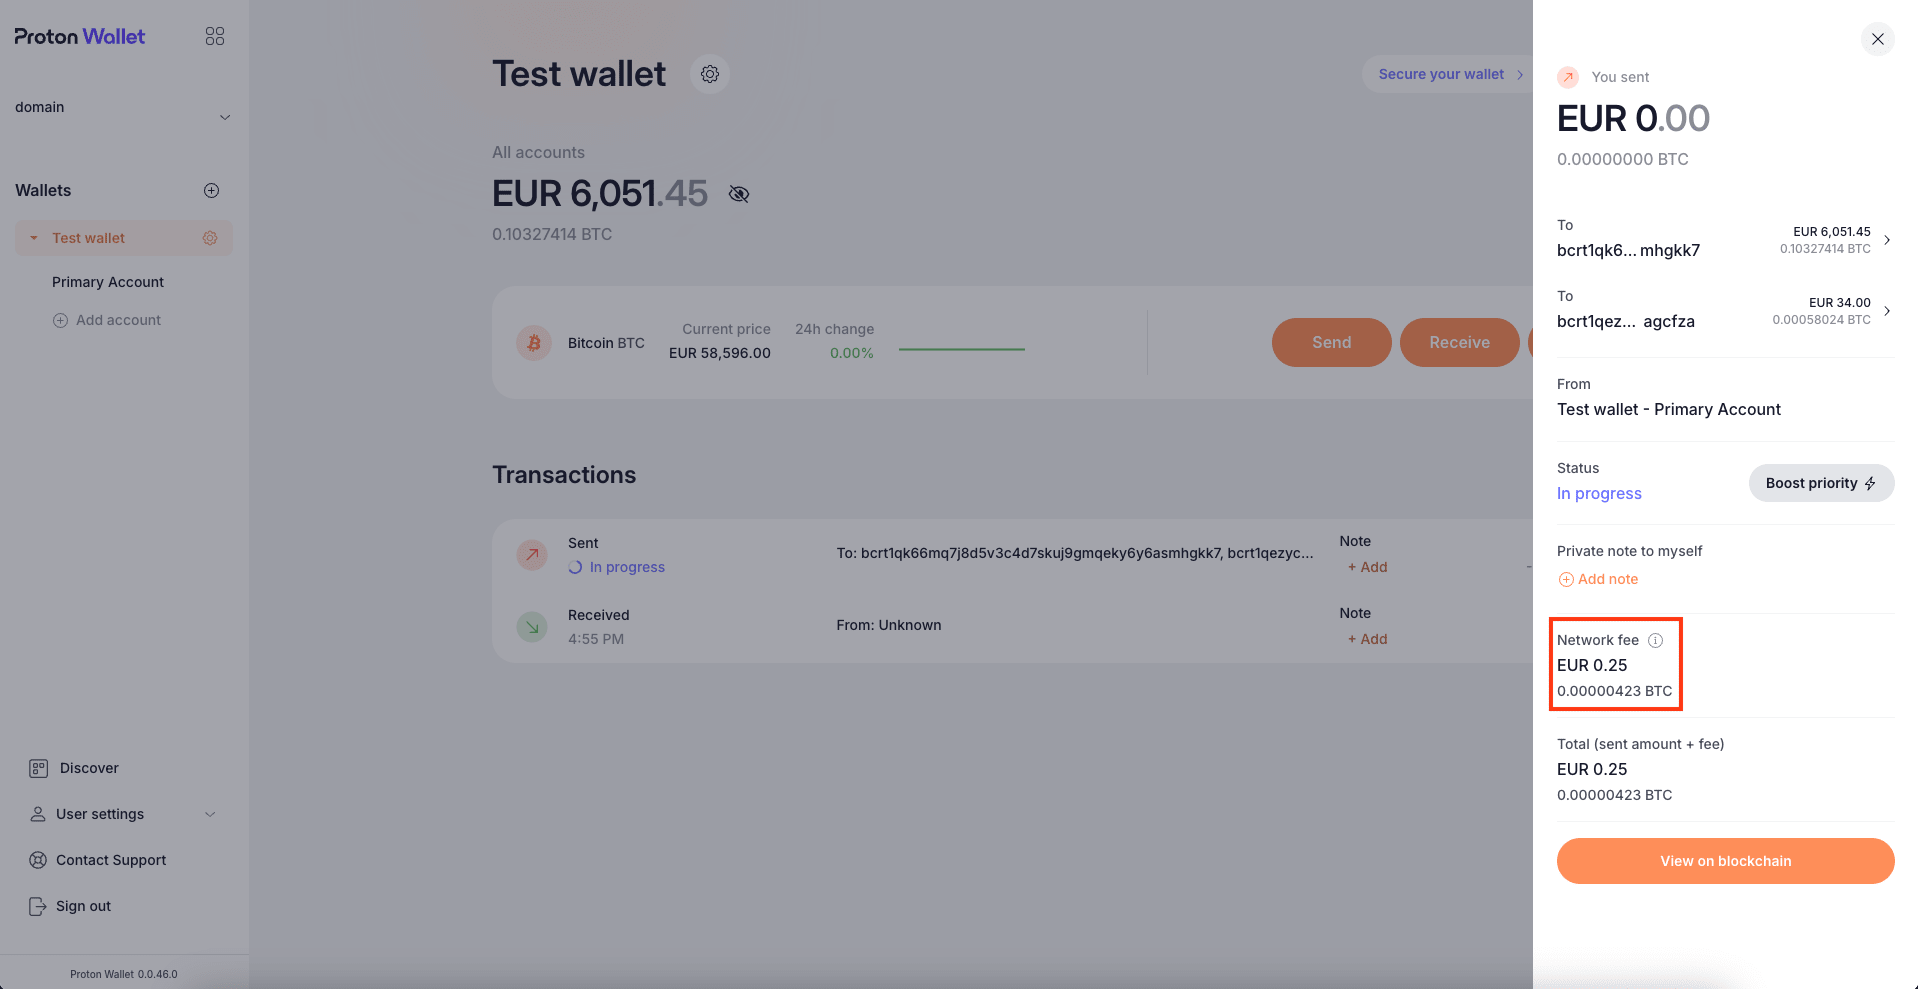
After confirming your new network fee, your wallet will sync and replace the previous transaction with a new one using the new fee. You can check its status by clicking on the transaction, as explained in step 1. When the right-side panel opens, you can check the Network fee category. It will be the one you set in step 3.

You can also boost the priority of this transaction again if it’s still taking a long time to be confirmed.