How to import from 1Password to Proton Pass
Proton Pass has built-in support for importing your passwords and other data from 1Password, including 1PUX files.
The process for this has two stages:
1. Export your passwords and other data from 1Password
2. Import your exported passwords into Proton Pass
How to export from 1Password
The instructions for exporting data from 1Password 8+ and 1Password 7 for macOS are different.
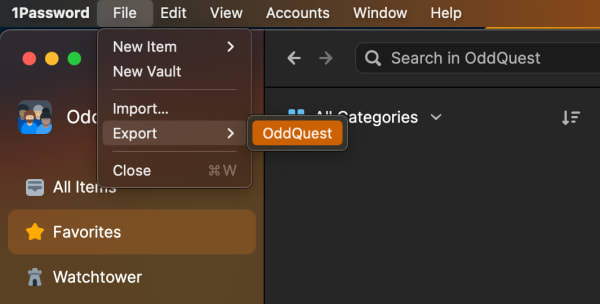
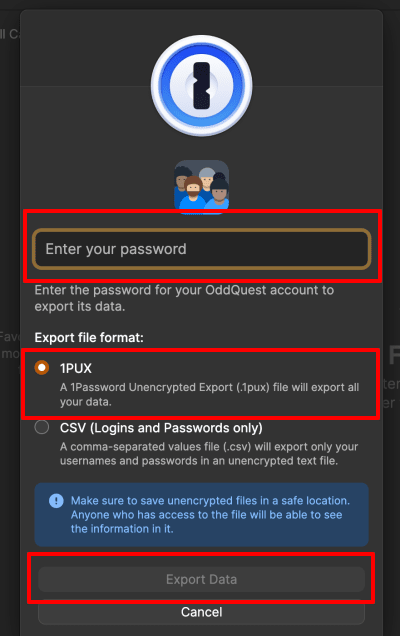
1Password 8+
1. On Windows and Linux, open the 1Password desktop app and go to All Items → Export → your 1Password username.

On macOS, open the 1Password desktop app and go to the menu bar → File → Export → your 1Password username.

2. Enter your 1Password master password, ensure Export file format: 1PUX is selected, and click Export Data.

Your system’s file manager will ask where you want to save the .1pux file.
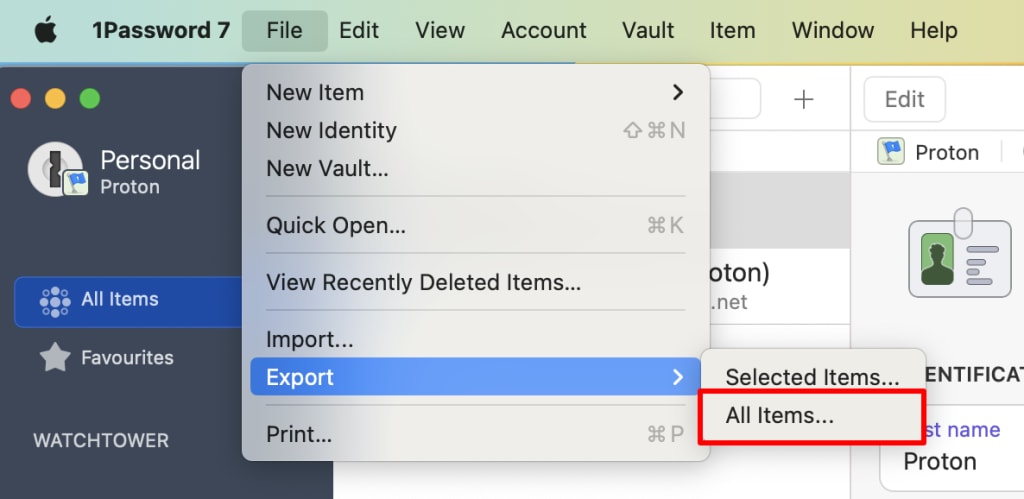
1Password 7
1. Open and unlock the app and select the vault you want to export. It’s not possible to export from All Vaults, so you’ll need to switch to a specific vault.
2. Go to the macOS menu bar → File → Export → All Items.

3. Enter your 1Password master password, ensure File format: .1pif is selected, and click Save.

Finder will ask where you want to save the 1PIF file.
2. How to import to Proton Pass
1. Open the Proton Pass browser extension and go to ☰ → Settings.

2. Go to the Import tab, select 1Password (1pux, 1pif) from the dropdown Provider list, and either drag the .1pux or .1pif file you exported to the File box or click the Choose a file or drag it here button to manually select it using your system’s file manager.
Click Import when you’re done.
