How to use the Proton Pass desktop app
Proton Pass is our end-to-end encrypted password manager that helps you protect your online identity. Our desktop app is available for Windows, macOS, and Linux. You can also use our web app or browser extensions for Chrome, Brave, Edge, Firefox, and Safari.
Learn how to set up the Proton Pass browser extension
With the desktop app, you can easily access your vaults from your desktop and manage your items, whether they are logins, credit cards, or secure notes. Paid users can even access the app offline.
This article goes over the basics of how to use the desktop app. If you need help setting it up on your device, please see our guides for:
In this article, we’ll look at:
- An overview of Proton Pass desktop app
- How to enable offline mode
- How to add new items
- How to edit items
- How to move or delete items
- How to share vaults
- How to get alerted to threats with Pass Monitor
- How to view an item’s history
An overview of Proton Pass desktop app
The Proton Pass desktop app is divided into three sections.

On the left, you can access your different vaults — the directories for your different items (items being the term for logins, credit cards, notes, etc.) — your Trash, and various other options.
Vaults can be used to organize items — in the example above, we have a vault for personal items and one for work items.
In the middle section, you can find a list of all the items in the selected vault.
The section on the right shows you details about a selected item.
How to enable offline mode
To enable offline mode, go to Settings (⚙ in the bottom left corner) → General.
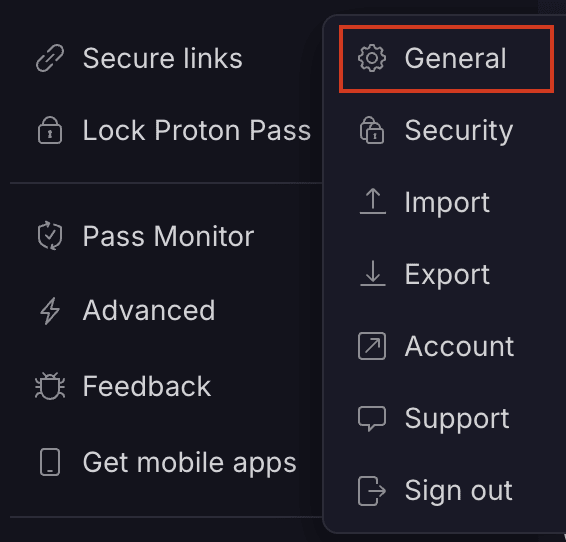
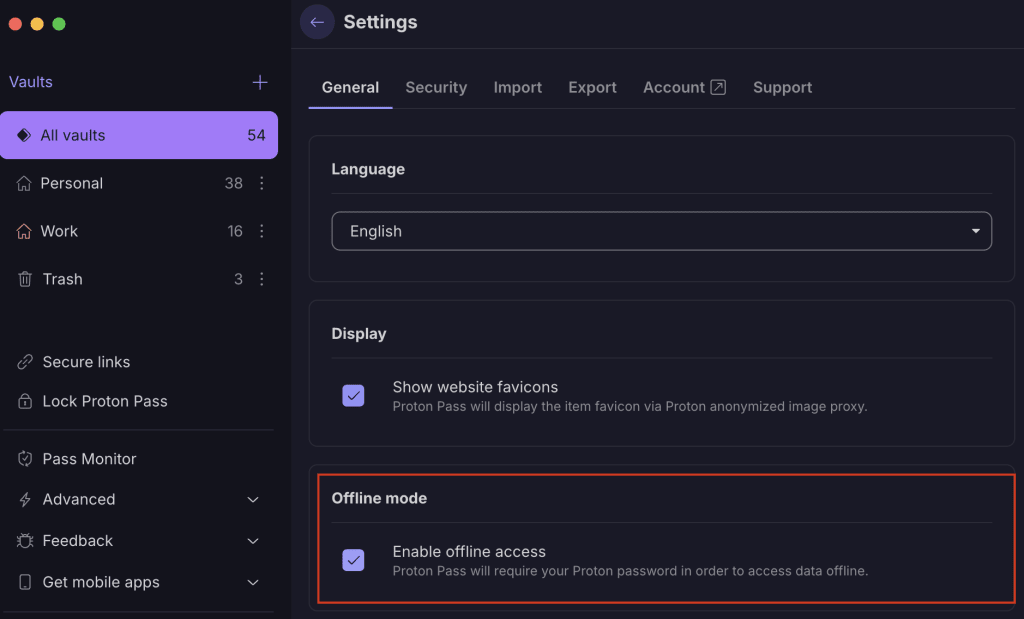
Go to the General tab → Offline mode and check the box next to Enable offline access. You’ll be asked to enter your Proton Account password. Once you’ve done that, offline access should be available.
How to add new items
To add new items, click + next to the search bar and select the type of item you want to create.

You create items by filling out the information in the appropriate blank fields. The blank fields the app prompts you to fill in will depend on the item you’re creating (for example, a login will ask you for a username and password, while a credit card will ask for your name, credit card number, expiration date, etc.).
When you’re done, click the Create [item] button (this also depends on the item you’re creating), and the app will add your new item to the vault.

To add two-factor authentication information to a login, please see our guide on how to use 2FA in Proton Pass.
If you need to add extra information to an entry, you can add hidden or custom fields to it.
You can also create hide-my-email aliases to help protect your actual email address from being disclosed or leaked.
Learn how to create and use a hide-my-email alias
How to edit items
To edit an existing item, select it in the center pane and click the Edit button on the right-hand side of the screen.
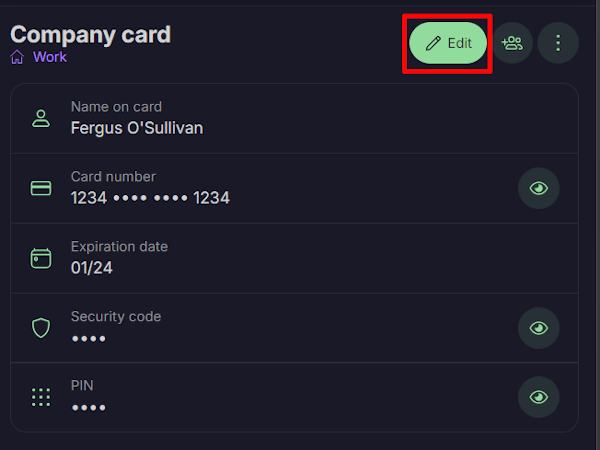
Overwrite whatever information you need to change, then click Edit again to finish.
Overwrite whatever information you wish to change and click Save when you’re done.
How to move or delete items
You can also move items to another vault or even delete them entirely. Select the item from the center pane → ⋮. A small menu will pop out.
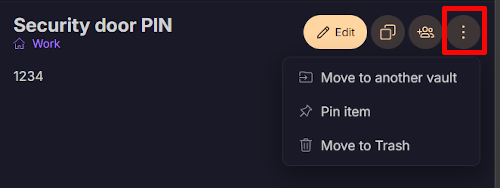
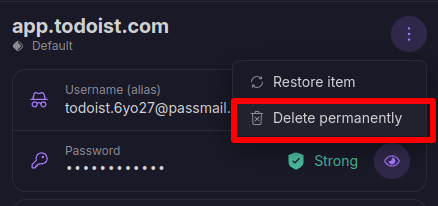
To delete an item, click Move to trash. Note that items deleted this way can still be accessed in your trash folder. To delete items permanently, locate the item in your Trash → ⋮ → Delete permanently.
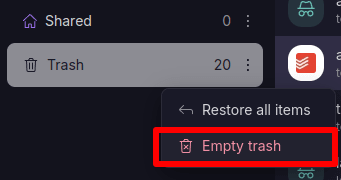
Alternatively, to permanently delete all items in your trash, go to Trash → ⋮ → Empty trash.
To move items, click Move to another vault and select the vault you’d like to move the item to from the available options.
How to share vaults
You can also share vaults. To do this, click on any item in a vault → Share.
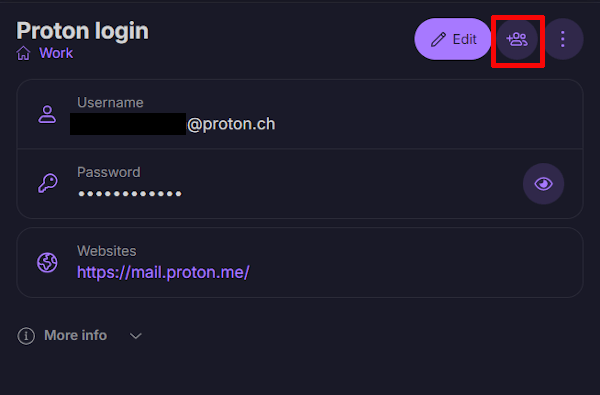
From there you’ll be prompted to confirm that you’re sharing. Once you’ve confirmed, enter the email address(es) of the people you’d like to share the vault with.
How to get alerted to threats with Pass Monitor
Pass Monitor(nieuw venster) scans the dark web for credential leaks, checks on the health of your passwords, and reminds you to switch on two-factor authentication (2FA) for accounts that offer it.
It works the same way on the Pass desktop app and the Pass web app.
How to view an item’s history
If you have a paid Proton Pass account, you can view each item’s history. To do this:
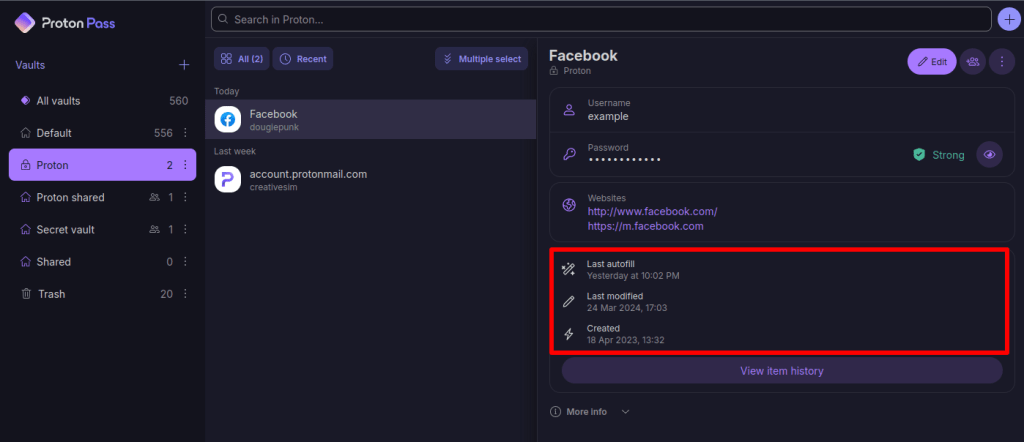
1. Click on the item. Here, you can see the item’s history, including the current version, when the last autofill was performed, when it was created, and each time it’s been modified.
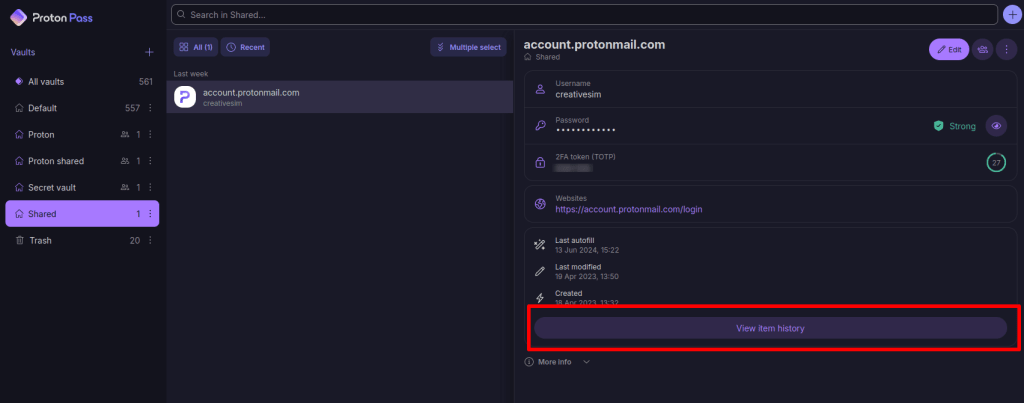
2. To find out more information about each change, click View item history.
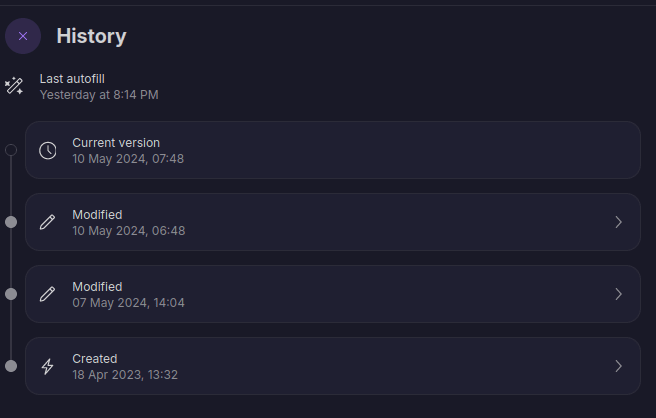
3. Click the relevant Created or Modified entry in the timeline.
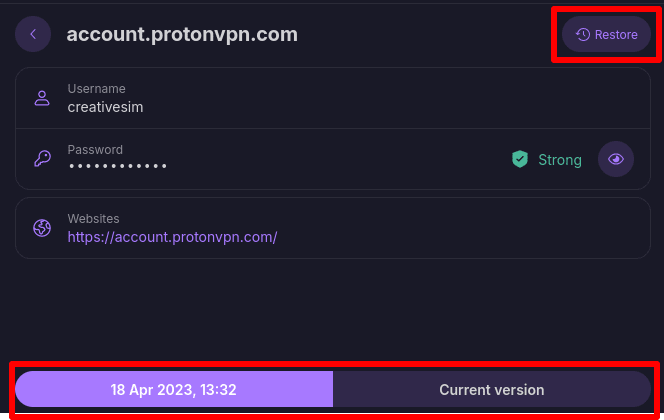
4. You can now view a snapshot of the change made on the selected date. Tab between the version of this item you’re looking at and the current version to compare them. To restore an older version of an item (that is, to make it the current version), click Restore.
