How to send and receive BTC using a Bitcoin address
Sending and receiving BTC with traditional Bitcoin addresses is easy. Proton Wallet supports this standard method in addition to our innovative Bitcoin via Email feature.
Note: This process will be the same on any device. For clarity, we only display the web app below.
How to send BTC using a Bitcoin address
1. Log in to your Proton Wallet account
Open the Proton Wallet app on your mobile device or open your browser and go to wallet.proton.me(nuova finestra).
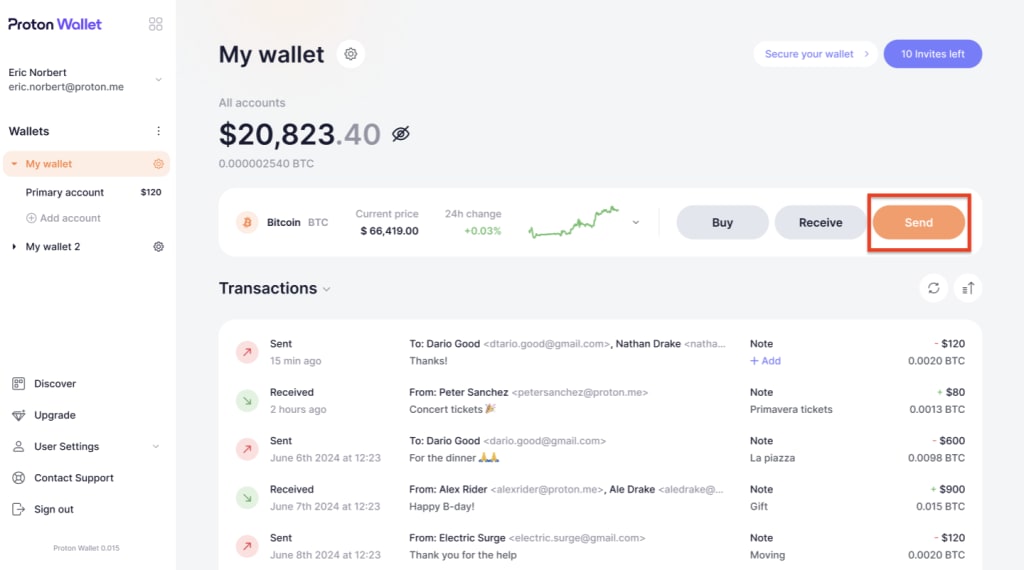
Click or tap the Send button. It is displayed on your main wallet or account screen.
2. Specify your recipient
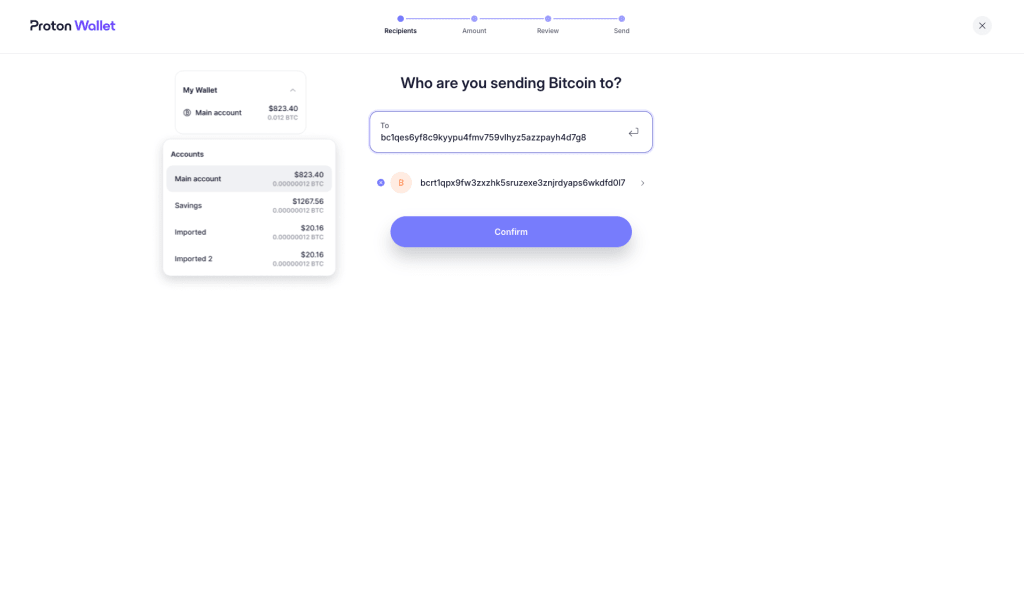
By default, Proton Wallet uses your primary account to send BTC to your recipient(s). You can select another account in the left menu.
Enter your recipient’s unique Bitcoin address by copying and pasting, or typing this directly. (We strongly recommend you copy and paste your recipient’s Bitcoin address and verify it before hitting send.)
3. Define the amount of BTC
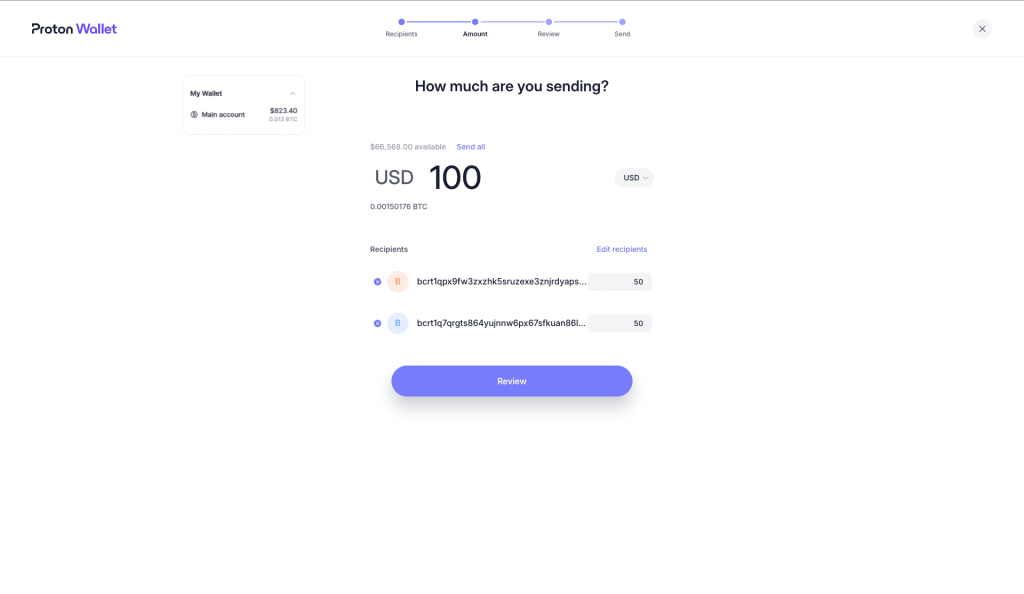
Once you’ve chosen your recipient(s), you can enter how much BTC you’d like to send. This is displayed in your preferred currency for easy visualization.
The amount selected will appear differently depending whether you send BTC to one or multiple recipients.
- For a single recipient: Simply enter the amount of BTC you want to send in the appropriate field.
- For multiple recipients: If you enter an amount at the top, it’ll be divided equally per recipient. You can also change the amount per recipient. Sending to multiple recipients in one transaction may reduce your network fee compared to separate transactions for each recipient. However, note that each recipient will be able to see all the Bitcoin addresses
4. Review the transaction
Double-check the recipient’s Bitcoin address and the BTC amount which will be broadcast to the Bitcoin network. Be careful, sending BTC to an incorrect address can result in permanent loss of funds. A moment spent here ensures your BTC reaches the intended destination.
Next, check the network fee, which is a payment to miners (not Proton) for adding your transaction to the blockchain. You can expand the network fee to adjust it; a higher fee tends to get your transaction confirmed on the blockchain faster.
Be cautious of scams and phishing attacks that try to trick you into sending them BTC.
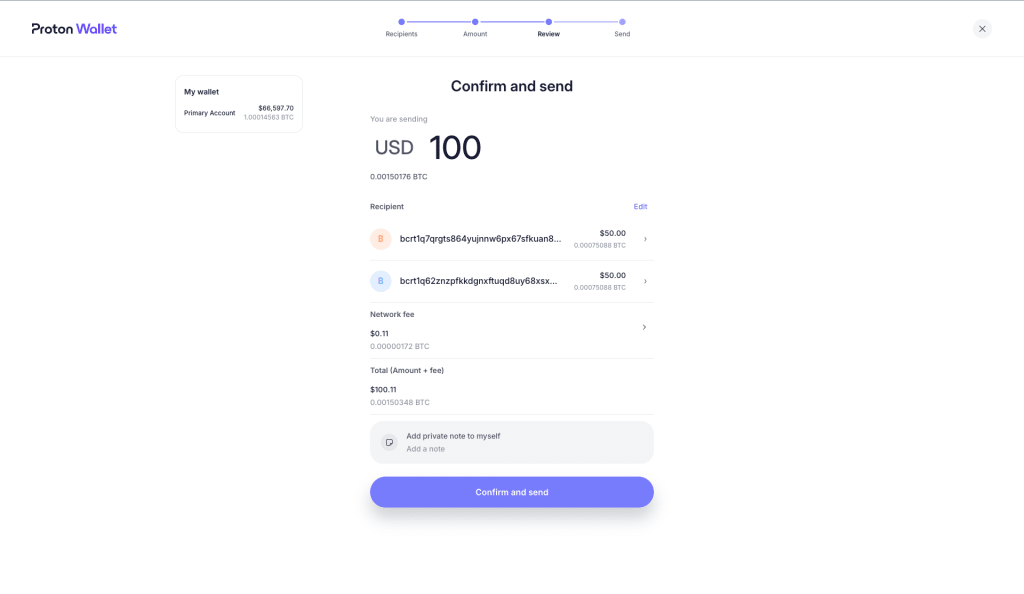
5. Add a note (optional)
While reviewing your transaction, you can add notes. You have two options in Proton Wallet:
- Message to recipient (Bitcoin via Email only): You can include an encrypted message to your recipient(s) which can be useful to explain the purpose of the transaction.This option is possible only if you and the recipients are using Proton Wallet, and if the recipient(s) have enabled Bitcoin via Email. Otherwise you’ll only be able to write a private note to yourself.
- Private note: You can write a note to yourself to organize your transactions or remind yourself of the transaction’s purpose. The recipient(s) will not receive it and cannot see it.
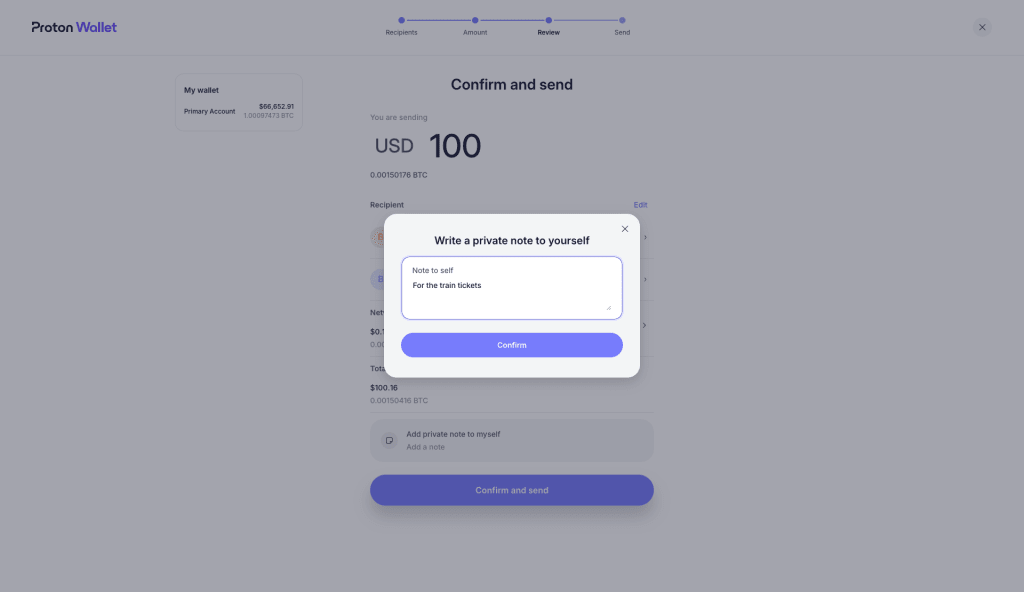
6. Confirm and send
Once you’ve reviewed the BTC address of your recipient(s) and added any notes, confirm the transaction by selecting Confirm and send to initiate the BTC transfer.
If you forgot to add a note to yourself, you can always add one later from your transaction view.
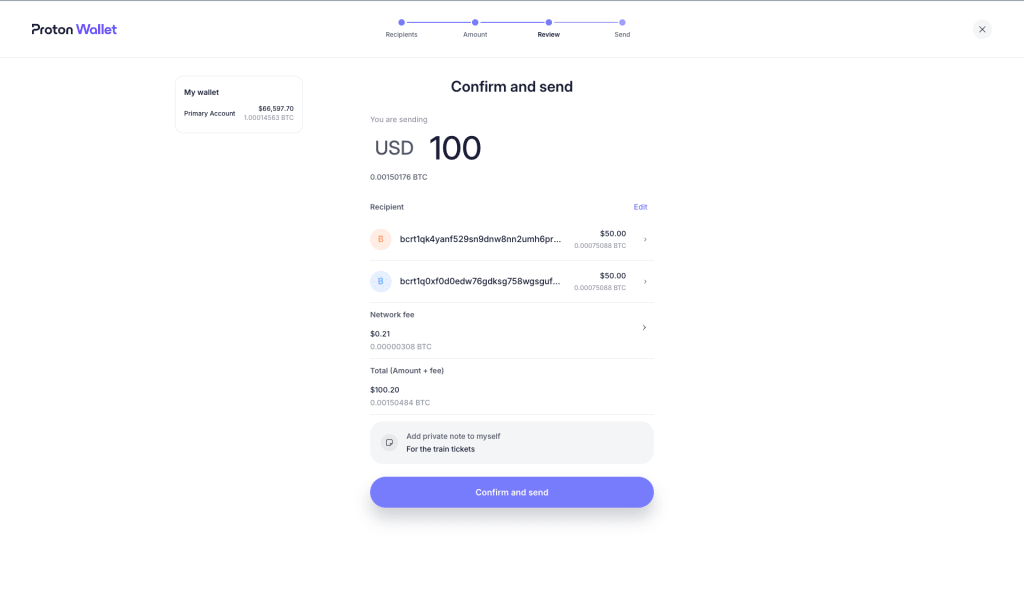
7. Check the transaction status
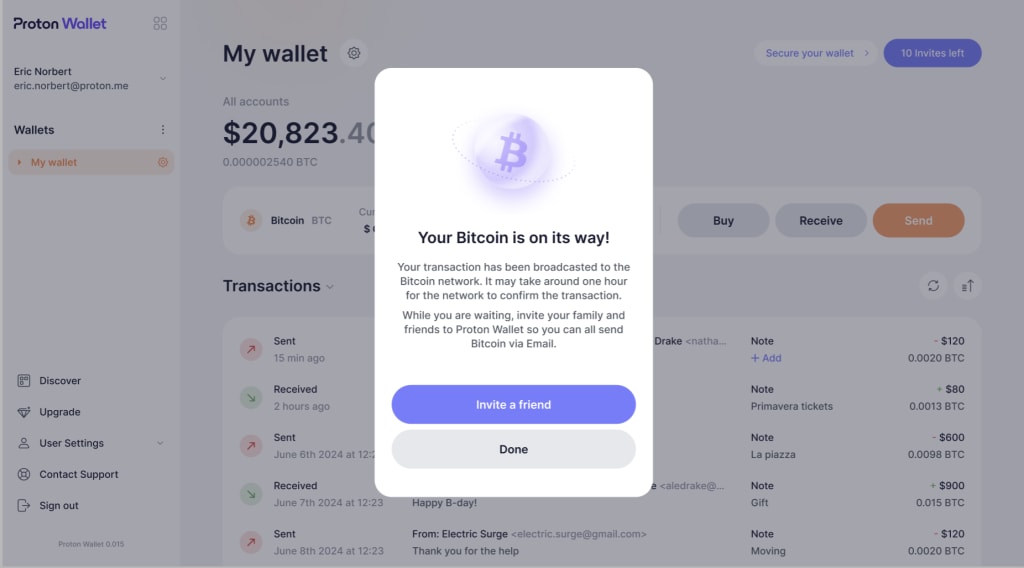
Your BTC is now on its way!
Bitcoin transactions typically require confirmation by the network, which can take anywhere from a few minutes to several hours, depending on network traffic. You can view the status of your transaction in your account.
How to receive BTC using a Bitcoin address
With Proton Wallet, anyone can send you BTC using your unique Bitcoin address, just like with traditional Bitcoin wallets. We support this standard method alongside our innovative Bitcoin via Email feature for a simpler experience.
To share your Bitcoin address:
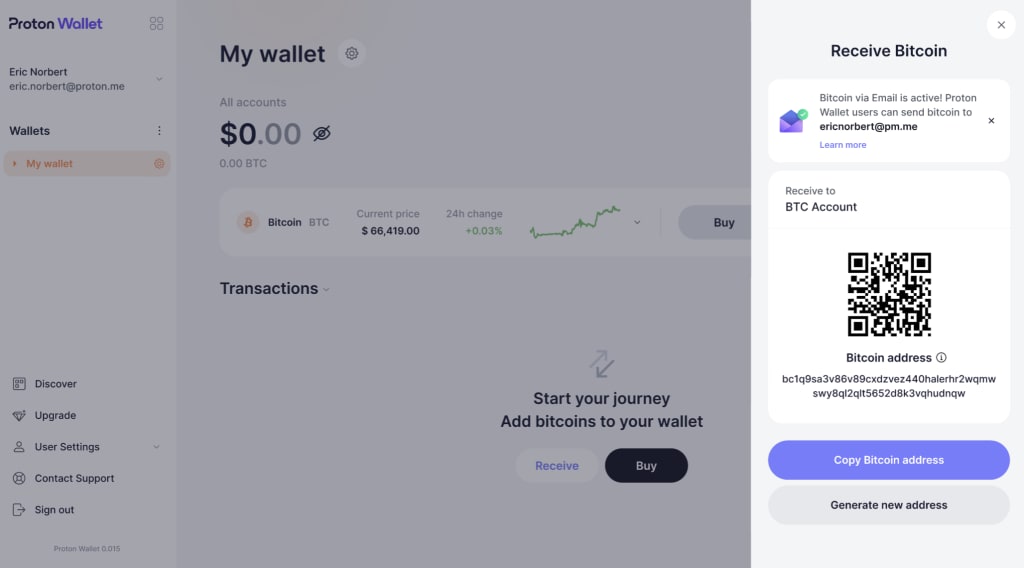
1. Open the Proton Wallet app on your mobile device or open your browser and go to wallet.proton.me(nuova finestra). Go to the wallet you’d like to use to receive BTC. Then go to the Bitcoin account you’d like to use to receive BTC.
2. There, click or tap the Receive button. If you don’t specify a Bitcoin account, the BTC you receive will go directly to the chosen wallet’s primary account by default.
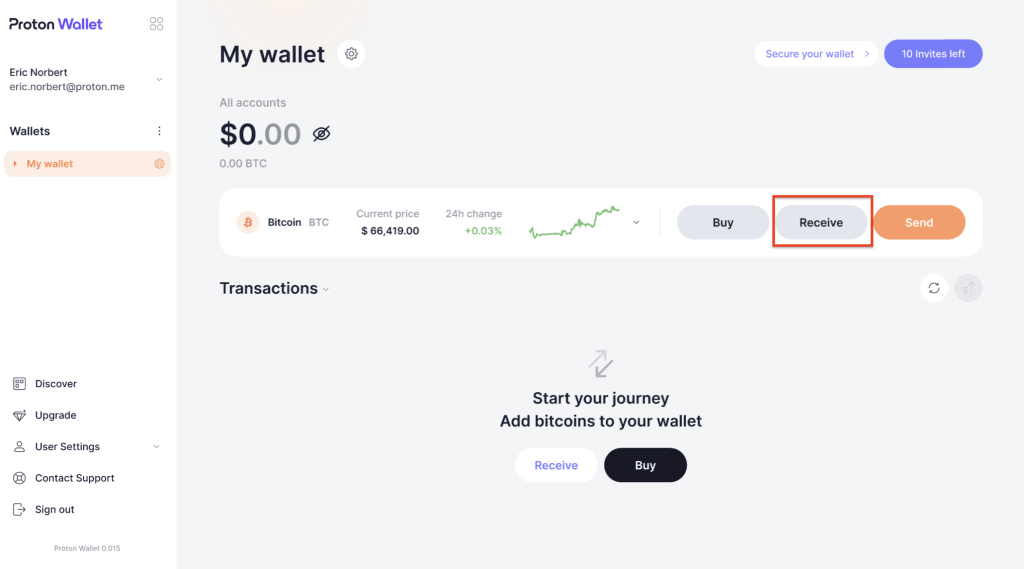
3. A right menu bar will appear displaying your current Bitcoin address and its corresponding QR code.
In this menu, you can:
- Select another account you’d prefer to receive bitcoin on (from wallet view only)
- Share your QR code
- Share your Bitcoin address by copying it
- Generate a new Bitcoin address
