How to use an email alias in Proton Pass for Android
In this article, we discuss how to create and use email aliases with our Android app. If you are using a different device, please see our guides to using aliases on our desktop and on iPhone/iPad apps.
Proton Pass allows you to create unique email aliases that you can use instead of your regular email address. Emails sent to alias addresses are instantly forwarded to your inbox.
- Why use an email alias?
- How to create an email alias
- How to edit an email alias
- How to use an email alias
- How to disable or delete an alias
Why use an email alias?
There are many reasons you may not wish to give your real email address to websites that you visit:
- You may wish to visit a website just once and have no desire to receive emails from it.
- You might want to prevent online trackers from being able to see which accounts you’ve signed up for.
- You may want to try out a free trial without receiving endless emails encouraging you to join the service once the free trial has expired.
- You may simply want to reduce the amount of spam email you receive by reducing the overall exposure of your real email address.
This also has security benefits, as using multiple different email addresses for the many services you use makes credential stuffing attacks(новое окно) (using passwords from one website to crack accounts on other websites) much harder.
Proton Pass allows you to create a unique alias for every web service you use that you can disable whenever you no longer wish to receive emails from that service.
How to create an email alias
Note: This guide was created on a Samsung One UI device. Details may differ slightly, depending on your device and which version of Android you’re running.
Visit any website or open any app that asks you to create an account. Instead of providing your real email address, you can create an alias email address for this website. To do this:
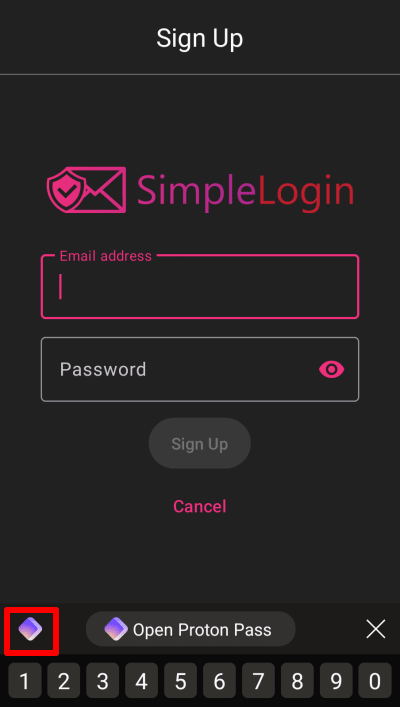
1. Tap the email address field and then tap the Proton Pass autofill logo.
2. Tap the + button at the bottom right of the screen.

3. Tap the Username field → Hide my email.

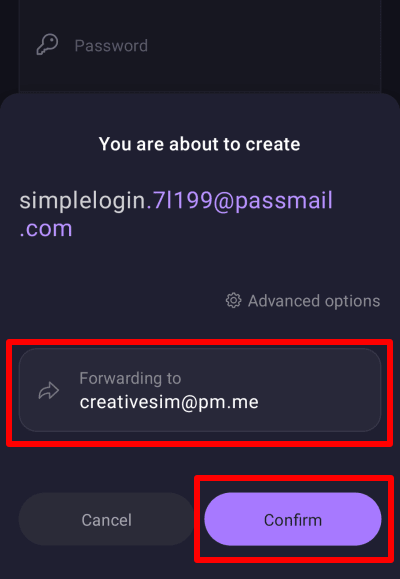
4. An email alias will be generated for you. Any emails sent to this alias will be forwarded to your default Proton Mail mailbox. To have emails forward to a different mailbox, select it from the Forward to dropdown menu. Tap Confirm when you’re ready.
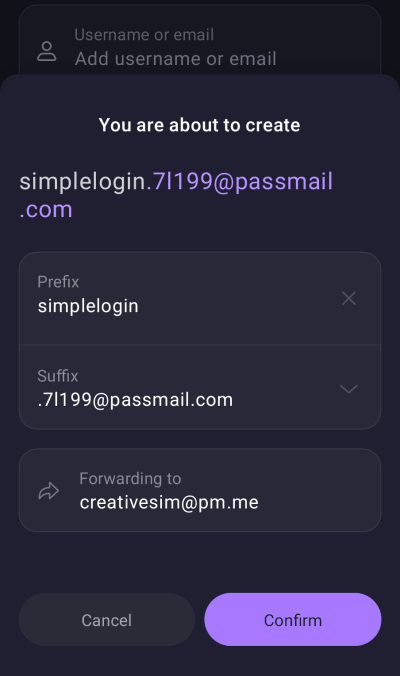
You can also tap Advanced options to edit the Prefix, Suffix, and Forwarded to settings. Tap Confirm when you’re done.
5. Tap the Password field → Generate a new password (or manually enter your own, but we don’t recommend this).

To edit the Title and Notes, tap their text fields and enter whatever text you like. You can also configure two-factor authentication (2FA) from this screen.
Tap Create login when you’re done. This will return you to the app or webpage of the service you created an alias for with your login details autofilled.
How to edit an alias
When an alias is created using the steps mentioned previously, two Pass items are created: a login and an alias. To edit the alias,
1. Open the app and select the alias (aliases are marked with a green “spy” icon).

2. Tap Edit.
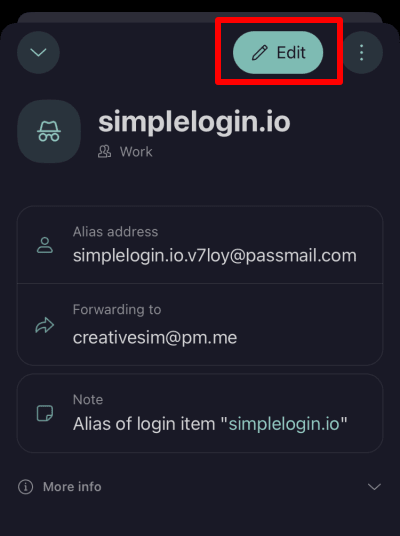
Tap the text fields to edit the Name, Forwarding to, and Notes entries. Tap Save when you’re done.
How to use an email alias
Once an email alias is created, you can use it to register for and sign in to an account as if it was your real email address.
How to disable or delete an alias
One of the best things about an alias is that you can disable it at any time. To do this, open the Proton Pass app and ensure All logins are shown. Then simply select the alias you want to disable → ፧ → Move to trash.
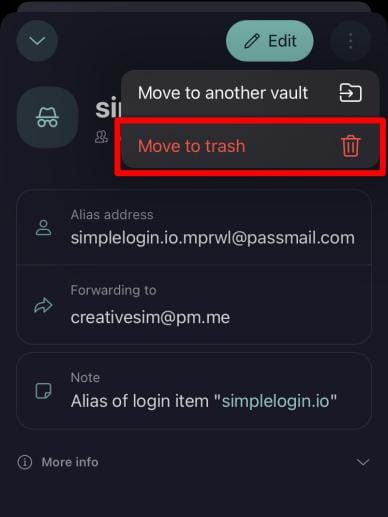
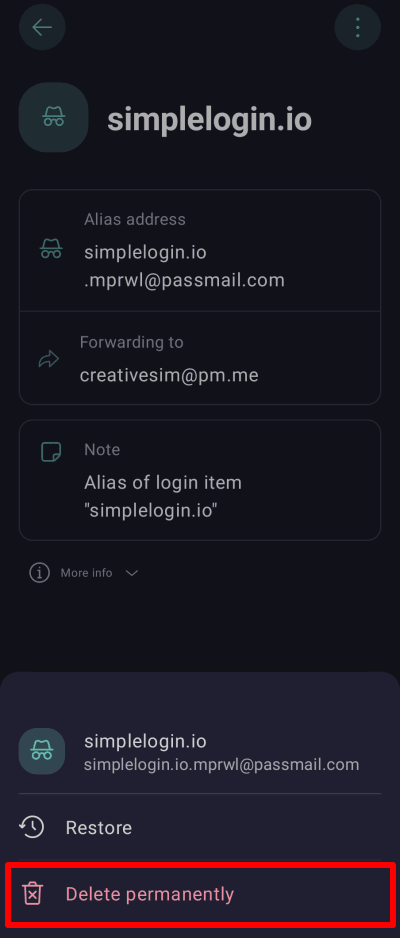
To completely delete an alias, you must delete it from your trash folder. This permanently deletes the alias, meaning it can no longer be restored.
To empty all items in your trash, open the Pass browser extension:
1. Go to the Proton Pass logo (top left of screen) → Trash.

2. Tap Empty trash.
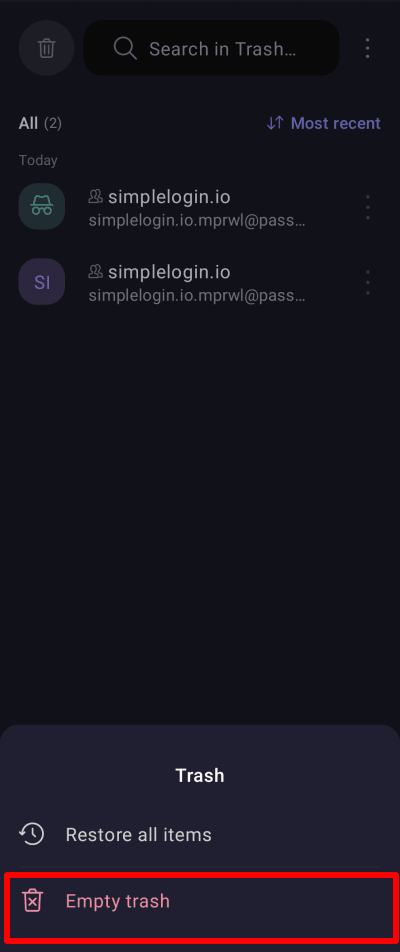
To delete a specific alias from your trash, go to the Proton Pass logo (top left of screen) → Trash. → select the alias you wish to delete → ⋮ → Delete permanently.
