KeePass with Proton Mail
KeePass 2 (nuova finestra)is an open source password manager for Windows. KeePass password containers (.kbdx files) can be stored locally or synced across devices by storing the .kbdx file on a cloud storage server or service (for example, Proton Drive(nuova finestra), Dropbox, or Google Drive).
Even if the cloud server is unsafe, the file is end-to-end encrypted using a password and optional key file that only you possess, so your passwords are secure (do not store the Key File in the cloud with the .kbdx file).
Although KeePass 2 itself is a Windows app, its .kbdx files are interoperable with most password manager apps built on KeePass’s open source code. These include KeePass XC (Windows, macOS, Linux), KeePass for Android, and KeePassium (iOS).
Note that the instructions below detail KeePass’s built-in Perform Auto-Type feature, but browser plugins such KeePassHttp(nuova finestra) provide a more seamless user experience.
How to setup KeePass
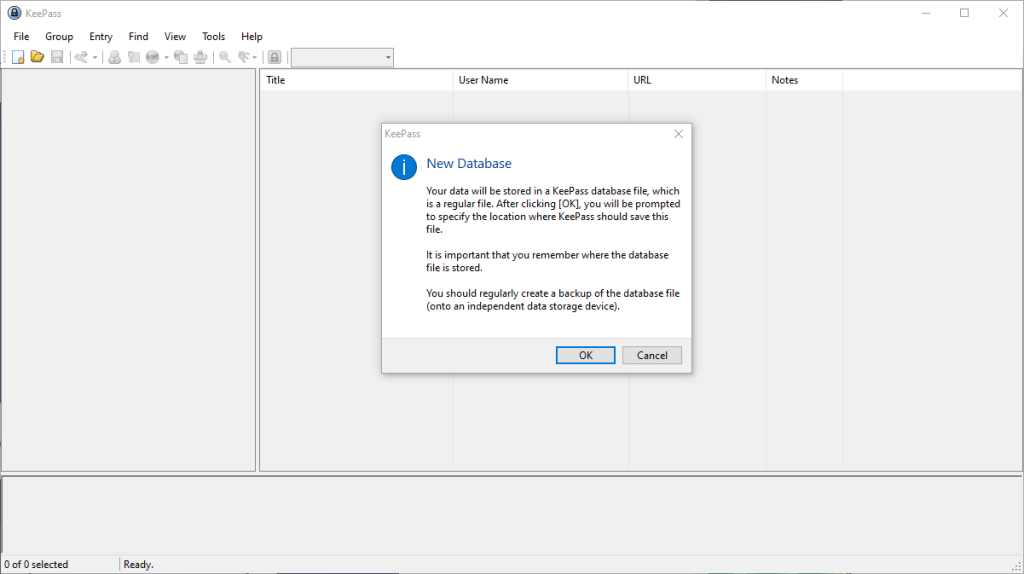
1. Download, install, and open KeePass 2.x. Then go to File → New. Click OK to create a new database. You will be asked where you want to save it.

2. Create a Master password and click OK. For additional options, such as creating a Key File that must be present to open the password database (providing 2FA), select the Show expert options checkbox.

3. Select a name for your new database. Additional options, including changing the encryption cipher used to protect your passwords, are available by clicking on different tab buttons.

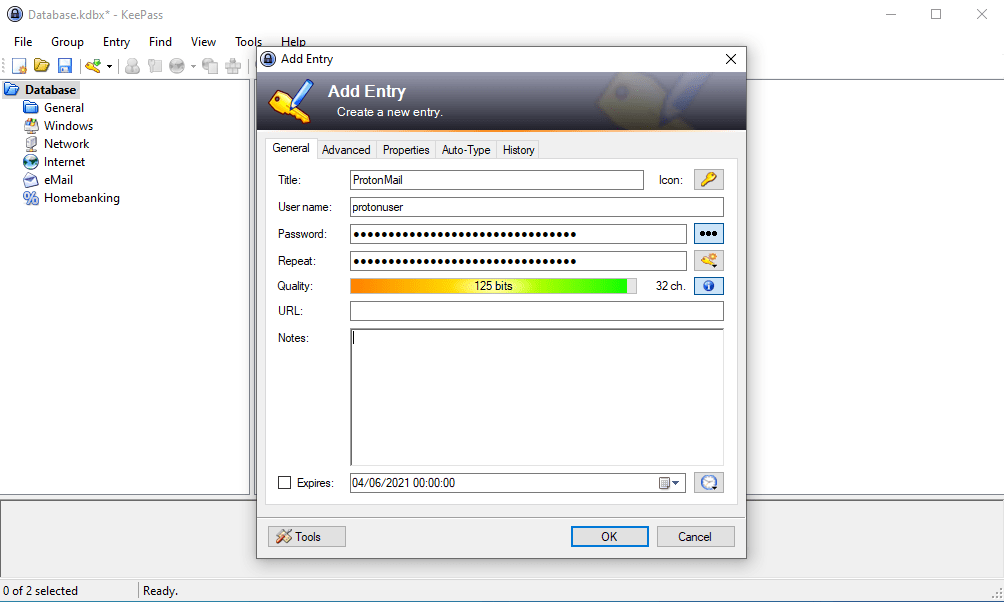
4. To create a new entry for Proton Mail, go to Entry → Add Entry… or just click the key icon in the taskbar.
Give the entry a name (such as Proton Mail) and fill in your Proton Mail Username and Password. For the URL, use https://account.proton.me(nuova finestra). Click OK when you are ready.

How to autofill your password using KeePass
As already noted, a number of plugins and browser add-ons exist that make it easier to autofill your password in your browser. In this guide, we’ll look at KeePass’s built-in autofill feature.
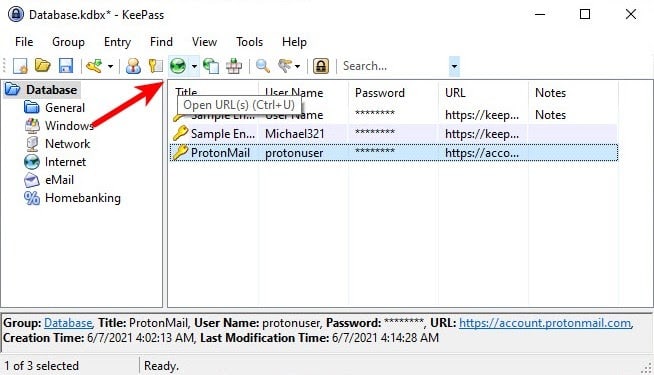
1. Select the Proton Mail entry you have just created and click the Open URL icon in the taskbar. This will open our login page at https://account.proton.me(nuova finestra) in your default browser.

2. Position your mouse cursor in the Email or username field and return to KeePass. Click the Perform Auto-Type icon and KeePass with autofill the username and password fields in your browser.
