Proton 主页

How to manage Gateway users and groups

阅读
2 分钟
类别
Proton VPN for Business

Once you’ve created a Gateway(新窗口) for your organization, add users(新窗口) and groups(新窗口) to give them access to your Gateway’s dedicated servers.

How to add users and groups to a Gateway

1. Sign in to account.protonvpn.com.

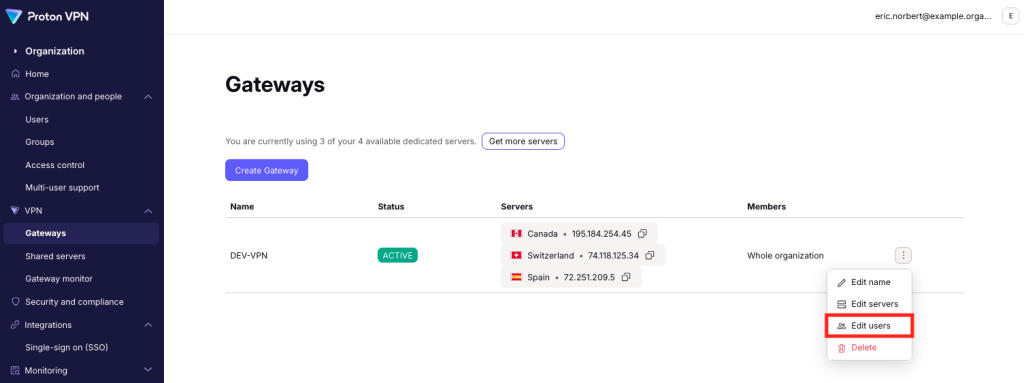
2. Go to VPNGateways. Next to the Gateway you want to edit, you want. Click the vertical three dots (⋮) → Edit users.

Edit users

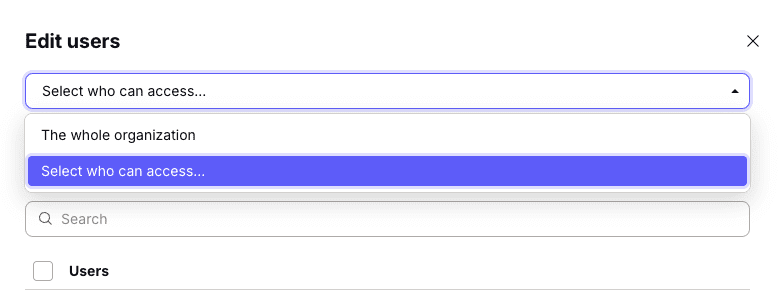
To give everyone access to your Gateway, select The whole organization from the dropdown menu, then click Save to confirm.

Edit users 2

To limit access to specific people, select Select who can access from the dropdown menu.

Edit users 3

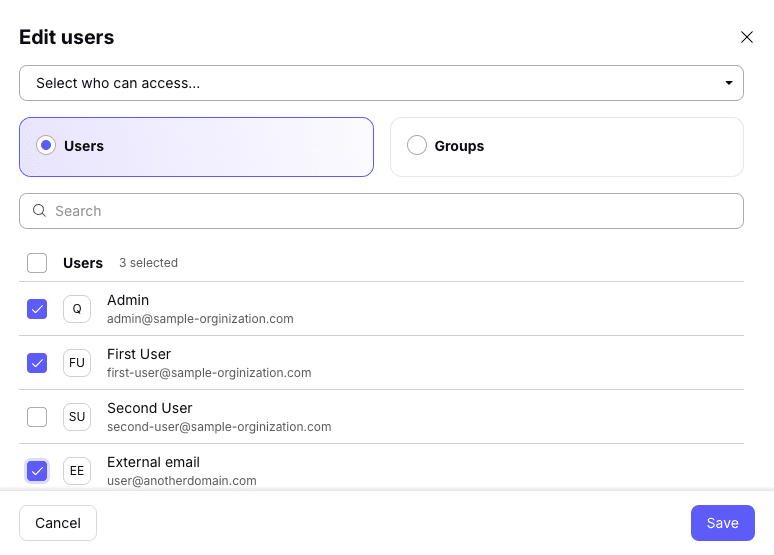
Now you can add users, groups(新窗口), or both

To add users: Select the Users tab. Select users from the list, or Search for their username or email address.

Edit users 4

To add groups: Select the Groups tab. Select groups from the list, or Search for the group’s name.

Edit users 5

Click Save when you’re done.

How to remove users or groups from a Gateway

To remove users or groups, simply uncheck them. Note that your organization’s main administrator must always have access to your organization’s Gateways and cannot be unchecked.

Provisioning groups through SCIM

If your organization uses an IdP (identity provider) such as Okta or Microsoft Entra, you can create and manage groups there instead of in Proton. Group and membership changes made in your IdP are mirrored automatically in Proton, so there’s no need for manual updates.

This is especially useful for onboarding and offboarding: when someone joins or leaves a team, their access updates automatically without someone having to grant or revoke permissions each time.

To set up SCIM for your organization, see: