How to use Proton Pass on Android
- Lesetid
- 6 min
- Kategori
- Using Proton Pass
Proton Pass is an end-to-end encrypted open-source(nytt vindu) password manager that lets you protect your online identity. It’s part of the Proton privacy suite that includes Proton Mail, Proton VPN, Proton Drive, and Proton Calendar. In this guide, we explain how to use Proton Pass on your Android device.
- How to set up Proton Pass for Android
- How to log in manually
- How to log in using autofill
- Proton Pass items
- How to add new items manually
- How to add new items using autosave
- How to view an item’s history
This guide was created using a Samsung One UI device. Details for using Proton Pass on Android may vary, depending on which version of Android you are running.
How to set up Proton Pass for Android
Before using Proton Pass on Android, you’ll need to set it up:
1. Sign up for Proton Pass. You can sign up for a standalone Proton Pass Free or Pass Plus plan or get all the premium features of Pass — and every other Proton service — with our Proton Unlimited plan.
2. Download(nytt vindu) and install the Android app.
3 (optional). Import your data from your previous password manager. If you’ve used a password manager before, you’ll probably want to import your saved passwords to Proton Pass. To do this, you’ll need to use our browser extension.
Learn how to import to Proton Pass
You’re now ready to start using Proton Pass.
How to log in using Proton Pass
Once you save login details to Proton Pass, you can log in to websites manually or using autofill.
How to log in manually
1. Visit the login page for the website or app you wish to log in to.
2. Open the Proton Pass app, select the correct login item, and tap the Username or email address field. The username will be copied to your clipboard.

3. On the login page of the website or app, paste the username from your clipboard into the correct field. To do this on most versions of Android, long-press on the input field → Paste.

4. Repeat this process for the password.
Note that for security reasons, your device’s clipboard will be cleared after 60 seconds. To adjust this setting, open the Proton Pass app and go to Profile → Settings → Clipboard.
How to log in using autofill
This guide assumes Proton Pass is set as your default autofill password manager. This can be configured when you first install the Proton Pass app, or you can enable it at any time by opening the app and going to Profile → Autofill.
1. Visit the login page for the website or app you wish to log in to.
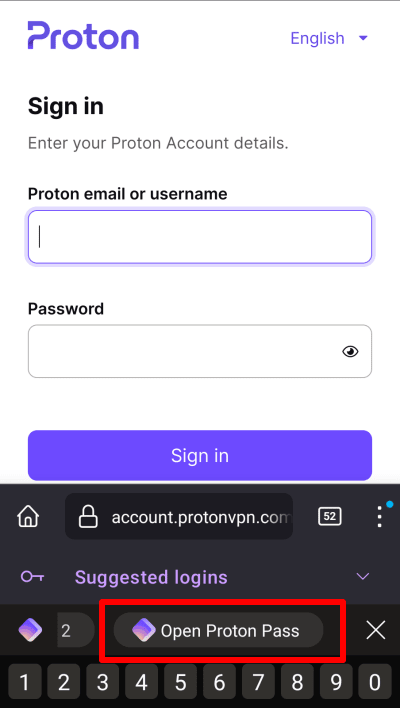
2. Tap either the username or password field. Android’s autofill service will suggest relevant logins that are saved to Proton Pass. Swipe through the options and tap the correct login to autofill the username and password.

Alternatively, swipe until you see Open Proton Pass and tap it.
Select the login you wish to use and choose whether to Use always or Use once for this website or app.
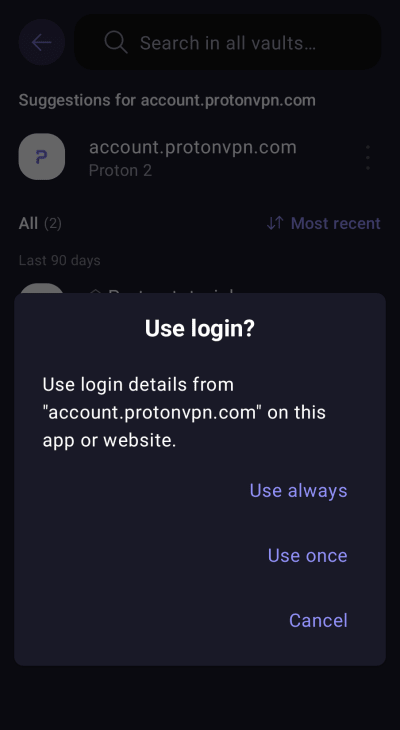
Proton Pass will automatically return you to the login page and autofill the username and password fields.
Proton Pass items
A Proton Pass item can be a login, hide-my-email alias, credit card, secure note, or password. Items are stored in vaults.
Learn more about vaults in Proton Pass
Login
A login contains your username, password, the URL of the website (or websites) the login is for, 2FA codes, and any notes you saved for that login. When you’ve finished creating an item, tap Create login.
Title: Tap the field and start typing to edit it.
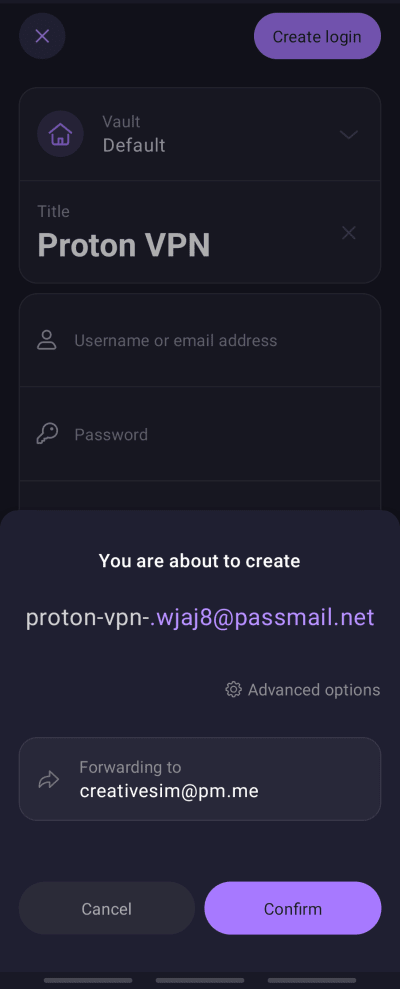
Username or email address: Tap the field. To manually enter an email address or other username, simply start typing. Alternatively, Proton Pass will offer to autofill the field using your default Proton Mail email address or generate a Hide my email alias. Tap your preferred option.

Learn how to use an email alias in Proton Pass
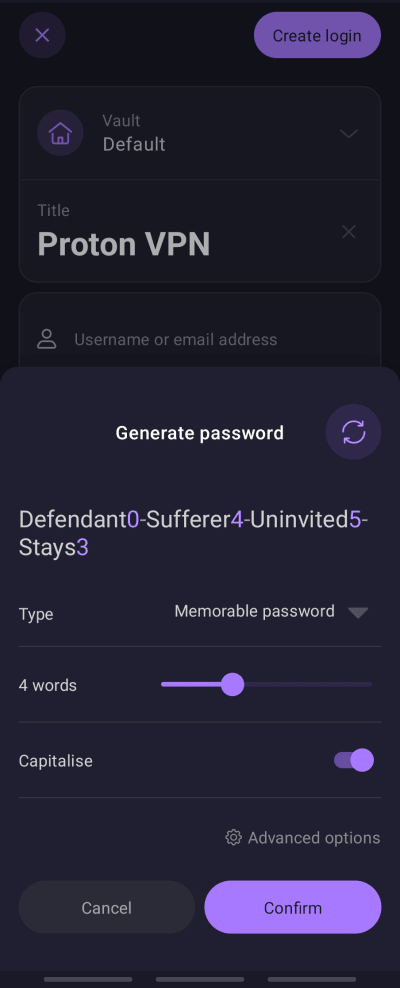
Password: Tap the field and start typing to manually enter a password, or tap the field → Generate a new password to let Proton Pass create a customizable strong password for you.
2FA secret (2FA): Proton Pass can securely generate TOTP codes for websites you have saved login details for.
Learn how to use 2FA codes in Proton Pass
Website: Tap the field to add or edit a URL associated with this login item.
Note: Tap the field to add a text note to the login item.
+ Add field: To create an additional Text, 2FA secret (TOTP), Date, or Hidden field, tap the + Add field and select the type of custom field you’d want to create.
Learn more about creating custom fields in Proton Pass

Credit cards
You can add your credit card details to Proton Pass for easy access whenever you purchase something online.
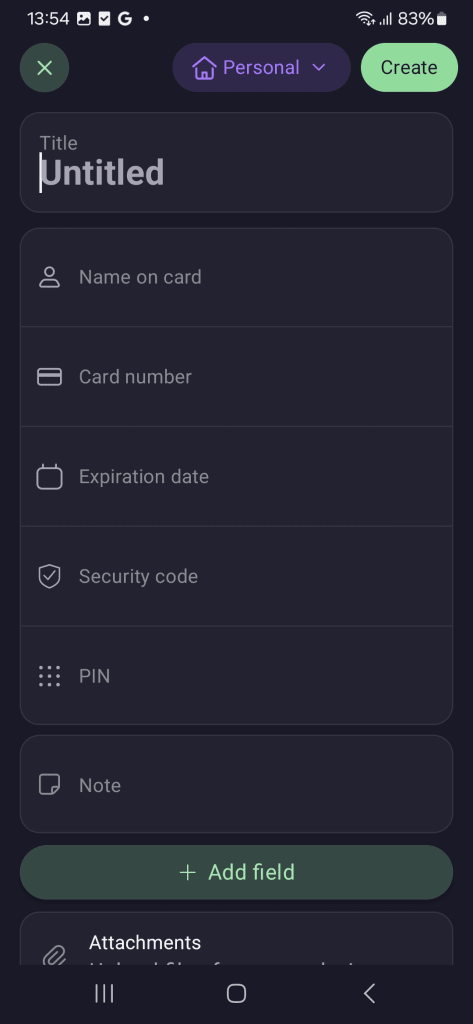
These details include:
- Cardholder name
- Card number
- Expiration date
- Security code (CVV)
- PIN code
Autofill is not available for credit card details yet. To use saved card details, you’ll need to copy your details from Proton Pass and then paste them into your checkout.
To edit the details of a credit card that you’ve already added, simply select the card you want → Edit.
Other items
You can also create standalone items for aliases, passwords, and notes that aren’t associated with a login item.
To edit already existing items, simply open the Proton Pass browser extension, select the item → Edit.

How to add new items
You can add new items manually, or add login and alias items using autosave.
How to add items manually
1. Open the Proton Pass app and tap +.
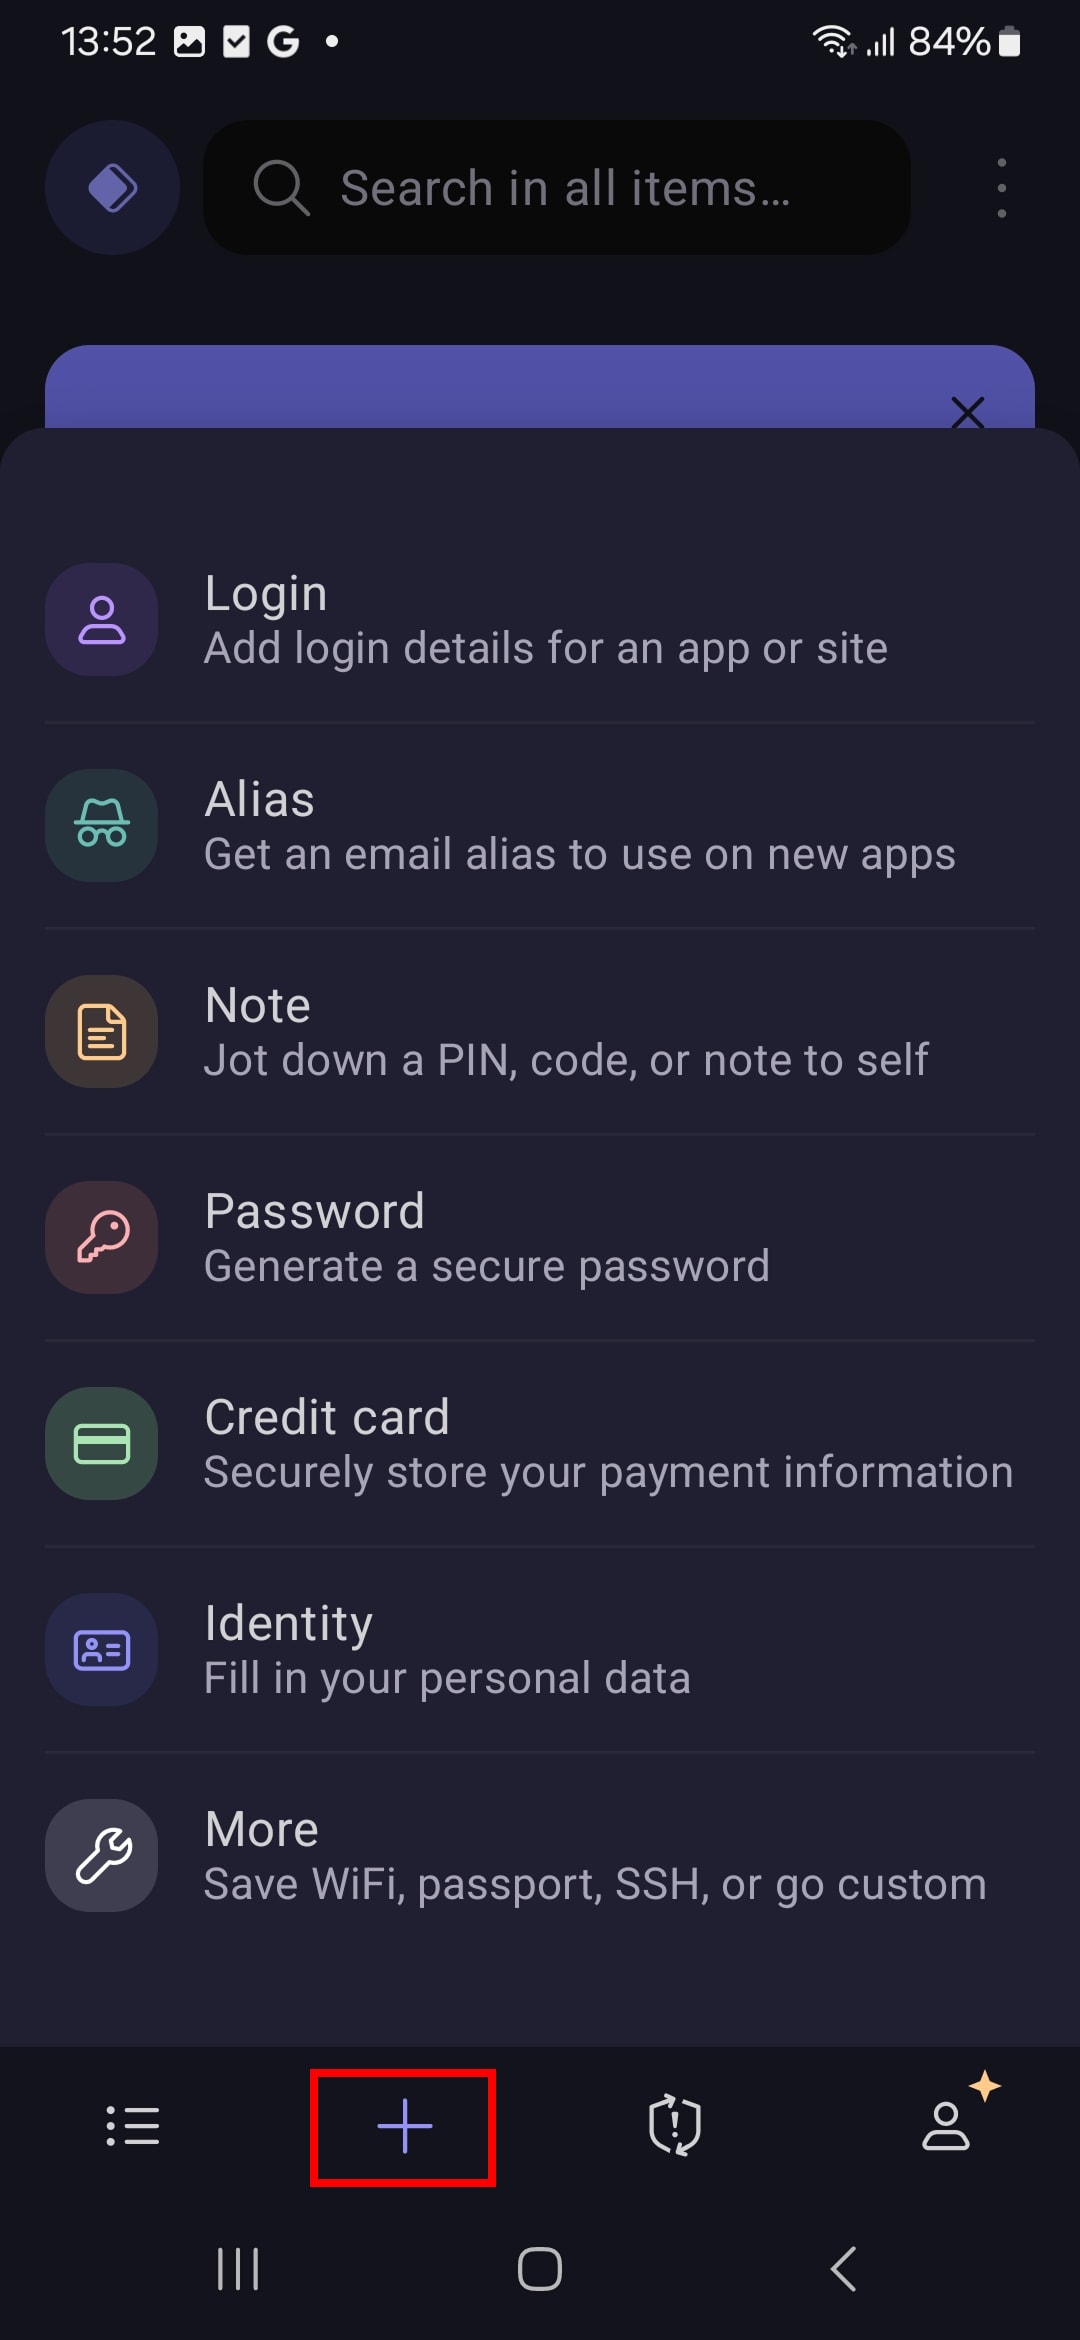
2. Depending on the item you selected, fill out the fields with the appropriate information.
How to add items using autosave
When you sign in to a website or app that you don’t have a Proton Pass login for, Proton Pass will offer to autosave your login details for future use. Tap Save to accept.

When creating a new account, Proton Pass can also create and save a login or alias for it:
1. Tap Open Proton Pass.
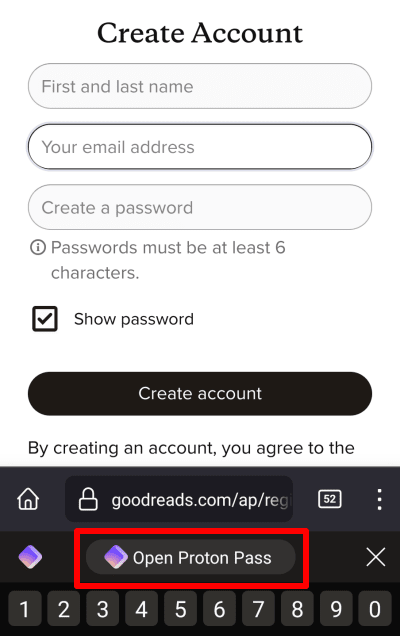
2. Tap +.

3. Choose whether you’d like to create a login or alias item (see above).

4. Tap Create login/alias when you’re done. Proton Pass will return you to the login page and autofill your details using the login or alias you just created. When you create the new account, Proton Pass will offer to autosave your login details.
How to view an item’s history
If you have a paid Proton Pass account, you can view each item’s history. To do this:
1. Select an item to see its history, including the current version, when the last autofill was performed, when it was created, and each time it’s been modified.

2. To find out more information about each change, tap View item history.

3. Tap the relevant Created or Modified entry in the timeline.
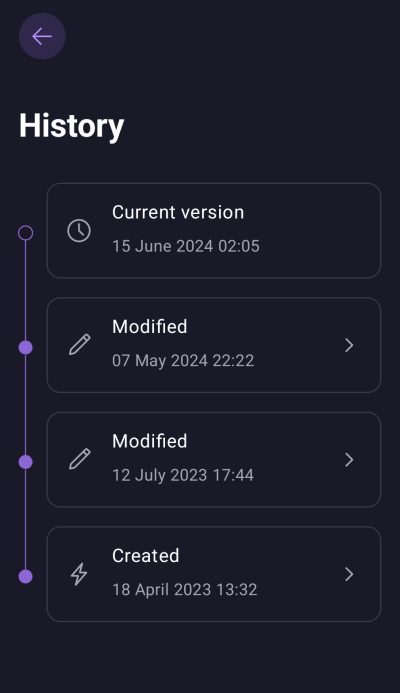
4. You can now view a snapshot of the change made on the selected date. To restore the selected older version of an item (that is, to make it the current version), tap Restore.
