How to use the Proton Pass web app
- Reading
- 5 mins
- Category
- Using Proton Pass
Proton Pass is an end-to-end encrypted password manager that helps you protect your online identity. To access it, you can use either the browser extensions, which let you add logins on the fly and autofill them on websites, or the web app.
The web app is a browser window that works on all major browser (Chrome, Firefox, Microsoft Edge). It gives you a better overview of your logins, passwords, credit cards, etc., and lets you manage them more easily. In this article, we’ll go over how it works.
- How to access the Proton Pass web app
- Making sense of the Proton Pass web app
- How to add new items
- How to edit items
- How to share vaults
- How to move or delete items
- How to get alerted to threats with Pass Monitor
- How to view an item’s history
How to access the Proton Pass web app
There’s no setup required to use the web app. To open the web app you can:
- Go to pass.proton.me(new window).
- Click the app switcher button (the four squares in the top left) on the homepage of all other Proton web apps (for example, the Proton Mail inbox). Then click Proton Pass, and you’ll be taken directly to its web app.

Making sense of the Proton Pass web app
The web app has three panes that let you control different aspects.

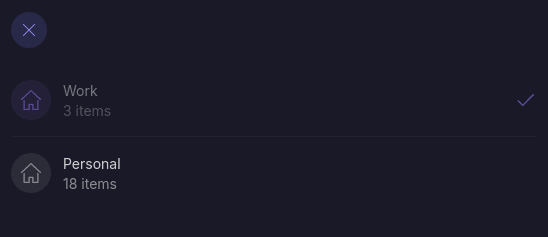
On the left side, you can access your different vaults — directories for different types of items — as well as your trash and the options at the bottom.
In the middle section, you can find a list of all the items in the selected vault.
The pane on the right shows you the details of a selected item.
Vaults
You can arrange items in vaults, making it easier to find them when you need to make changes. In the example above, we created a vault for personal items and one for work.
How to add new items
To add new items to Proton Pass, you can either use the autosave function included with the browser extension or do so manually. In the web app, you need to click the Create item button next to the search bar and then select the type of item you want to create.

You create items by filling out the information in the appropriate blank fields. The blank fields the app prompts you to fill in will depend on the item you’re creating (for example, a login will ask you for a username and password, a credit card will ask for your name, credit card number, expiration date, etc.).
When you’re done, click the Create login button (this also depends on the type of item you’re creating), and the app will add your new item to the vault.
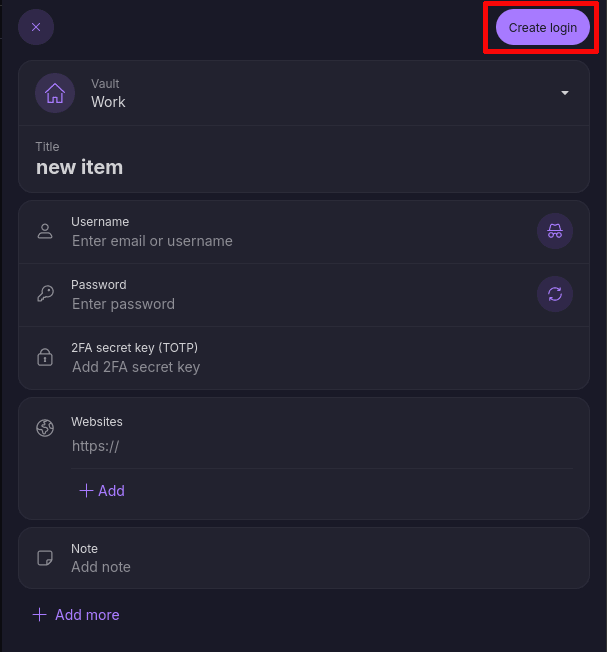
If you’d like to add two-factor authentication information to a login, check out our guide on how to use 2FA in Proton Pass.
You can also add hidden or custom fields to every entry.
How to edit items
To edit an existing item, select it in the center pane and then click on the Edit button on the right-hand side of the screen.
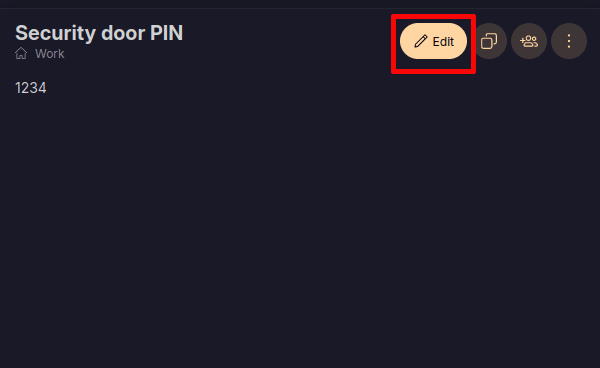
Simply update whatever information needs to be changed, then click Edit again to finish.
How to share vaults
You can also share a vault with others. To do so, click on any item in a vault and then click the Share button next to the Edit button.
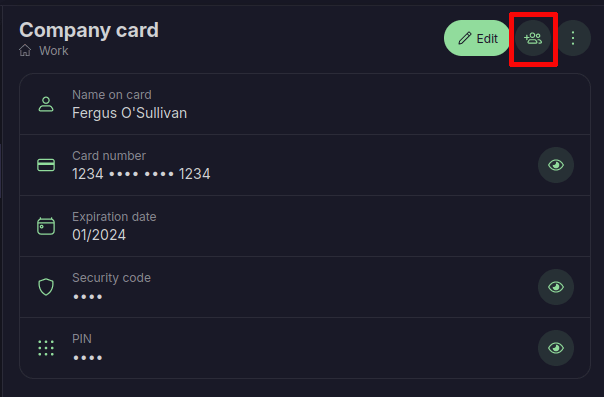
From there you’ll be prompted to confirm the sharing. Once you’ve confirmed, enter the email address of the people you’d like to share the vault with, or, generate a secure link and share the vault with the people you want.
How to move or delete items
You can also move items to another vault or delete them. Simply select the desired item from the center pane, then click the three vertical dots next to the Share button. A small menu will pop out.
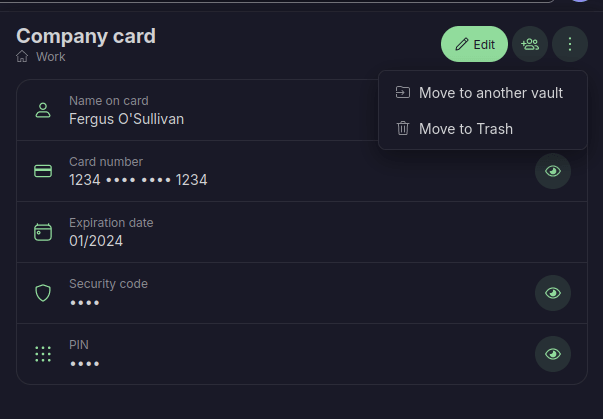
To delete an item, click Move to trash. You’ll be asked to confirm. If you do, the app will remove the item permanently.
To move an item to another vault, select Move to another vault, then select which vault you want to move the item to from the available options.
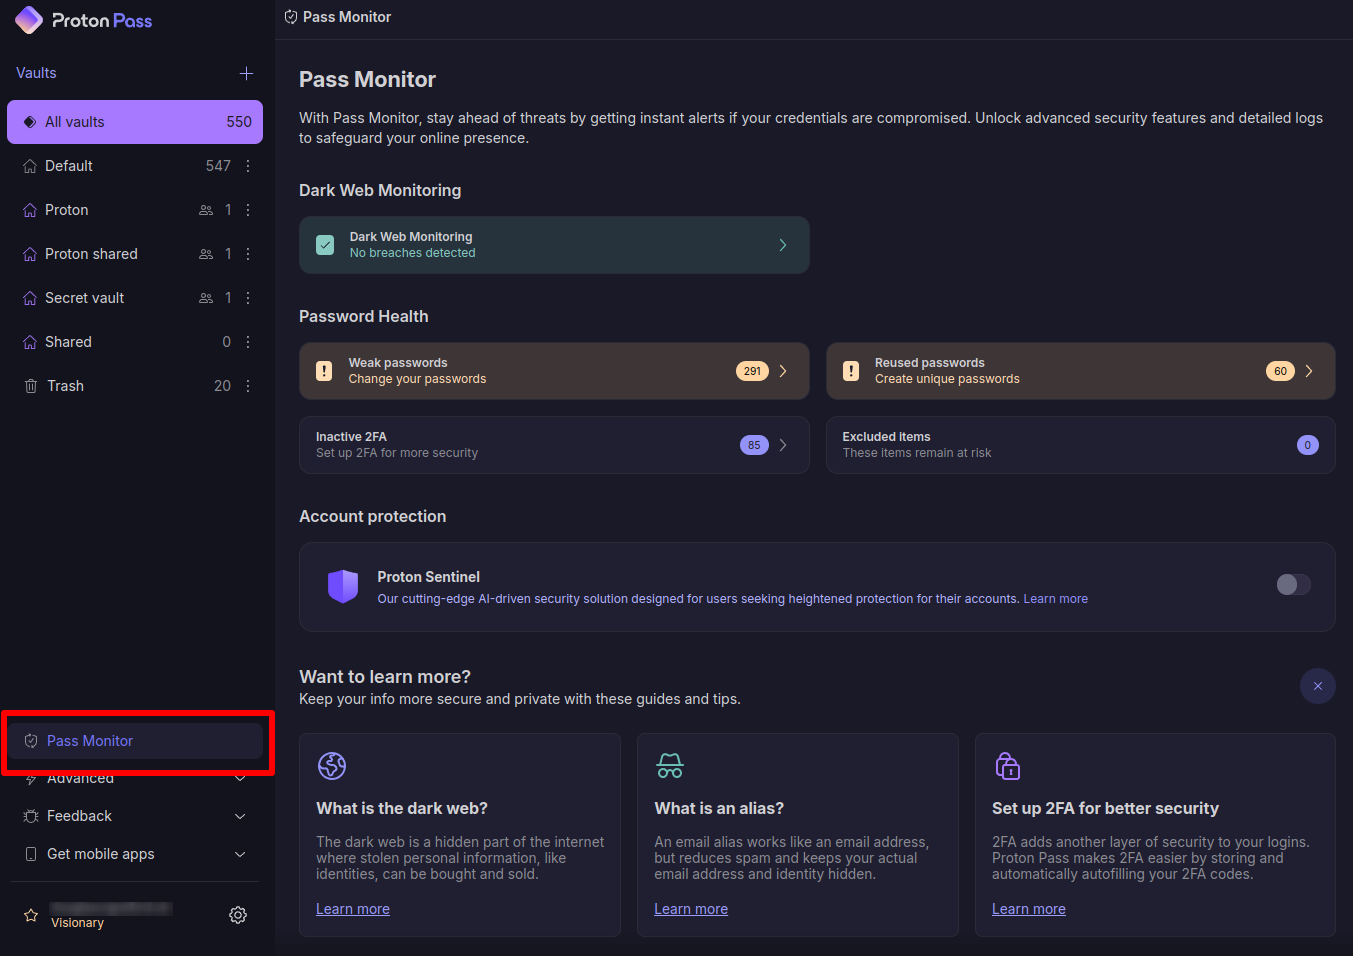
How to get alerted to threats with Pass Monitor
Pass Monitor(new window) scans the dark web for credential leaks, checks on the health of your passwords, and reminds you to switch on two-factor authentication (2FA) for accounts that offer it.
It works the same way on the Pass desktop app and the Pass web app.
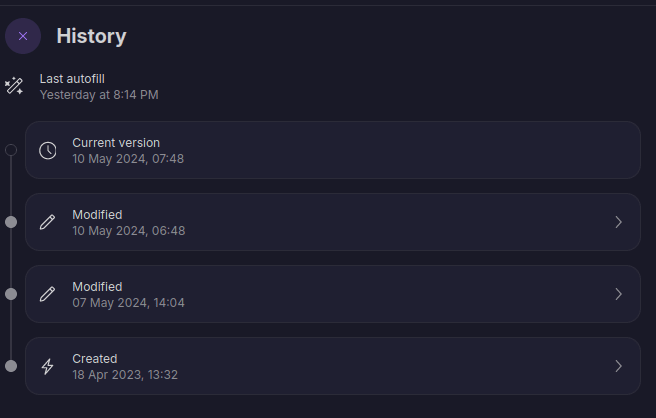
How to view an item’s history
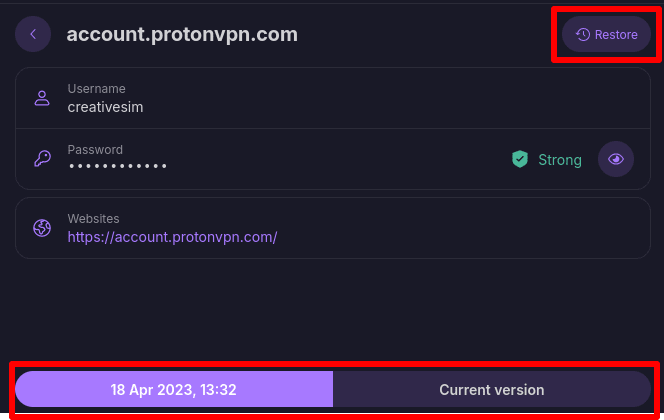
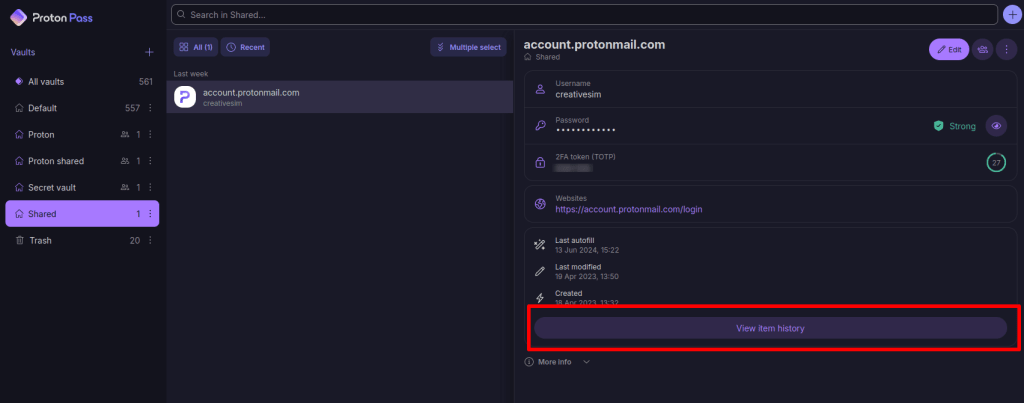
If you have a paid Proton Pass account, you can view each item’s history. To do this:
1. Click on the item. Here, you can see the item’s history, including the current version, when the last autofill was performed, when it was created, and each time it’s been modified.

2. To find out more information about each change, click View item history.
3. Click the relevant Created or Modified entry in the timeline.
4. You can now view a snapshot of the change made on the selected date. Tab between the version of this item you’re looking at and the current version to compare them. To restore an older version of an item (that is, to make it the current version), click Restore.