Proton Mail Bridge Thunderbird setup guide for Windows, macOS, and Linux
- Reading
- 7 mins
- Category
- Email app configuration
Proton Mail Bridge is an open-source application that allows you to fully integrate your Proton Mail account with any program that supports IMAP and SMTP. This includes Microsoft Outlook, Mozilla Thunderbird, and Apple Mail.
It runs in the background on your computer and seamlessly encrypts and decrypts your mail as it enters and leaves your computer.
Before you configure Thunderbird to use Proton Mail, you must first sign up for a Proton Mail plan and download and install Proton Mail Bridge on your computer.
Once you’ve installed and added your account(s) to Proton Mail Bridge, you will need to configure your email client. Proton Mail Bridge works with most email clients and applications that support IMAP/SMTP connections.
In this guide, we provide step-by-step instructions to configure Mozilla Thunderbird to use with Proton Mail Bridge in Windows, macOS, and Linux.
How to set up Mozilla Thunderbird with Proton Mail Bridge
Set up Mozilla Thunderbird to send from Proton Mail aliases
How to set up Mozilla Thunderbird with Proton Mail Bridge
Recent versions of Thunderbird include an experimental feature called Account Hub, which changes how new accounts are added. To follow the steps in this guide, we recommend disabling this feature:
Go to Thunderbird → Menu → Settings → General, scroll down to Account Hub, and uncheck Create accounts in the new Account Hub.
Here’s how to add Proton Mail to Thunderbird using Bridge:
1. Open Thunderbird, and click the hamburger Menu at the top right → New Account → Email

2. Enter your name, email address, and Proton Mail Bridge password.
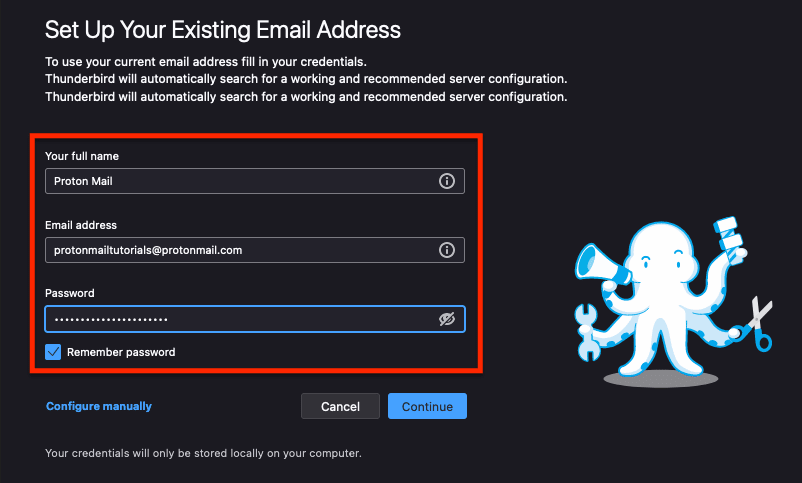
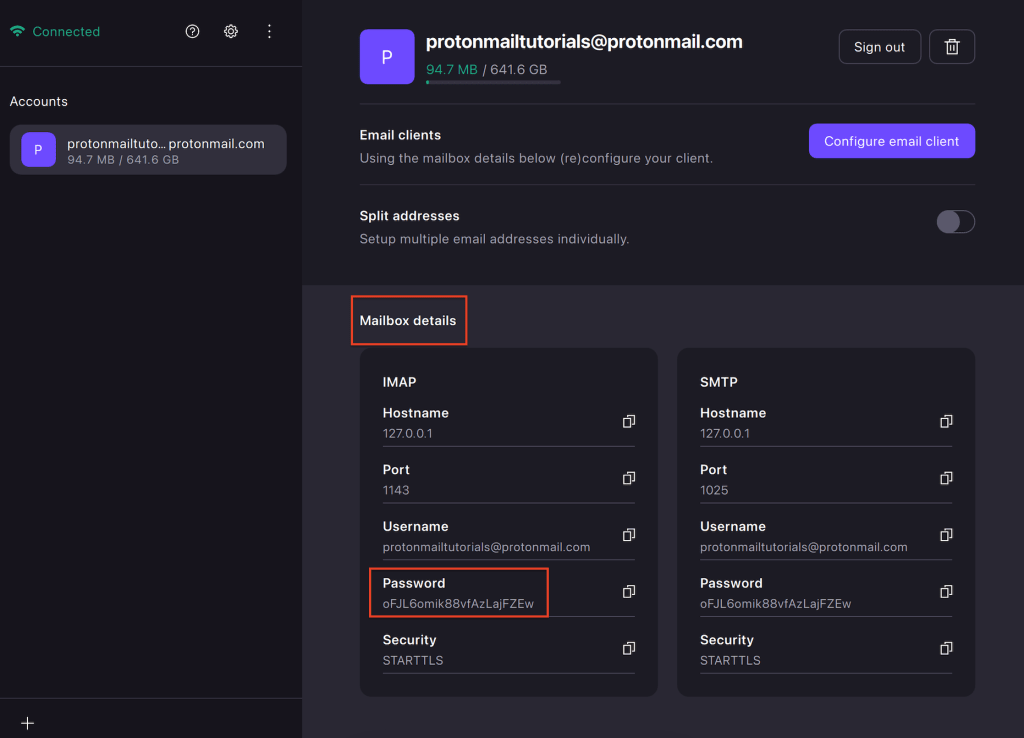
The name you enter in Your full name will be used as your display name. Make sure you enter the password displayed in the Bridge Mailbox details rather than your regular account password.
3. Click Continue, and the server settings should be detected automatically. You’ll see the message Configuration found at email provider.

If you’re using a custom domain, you’ll need to click on Configure manually.
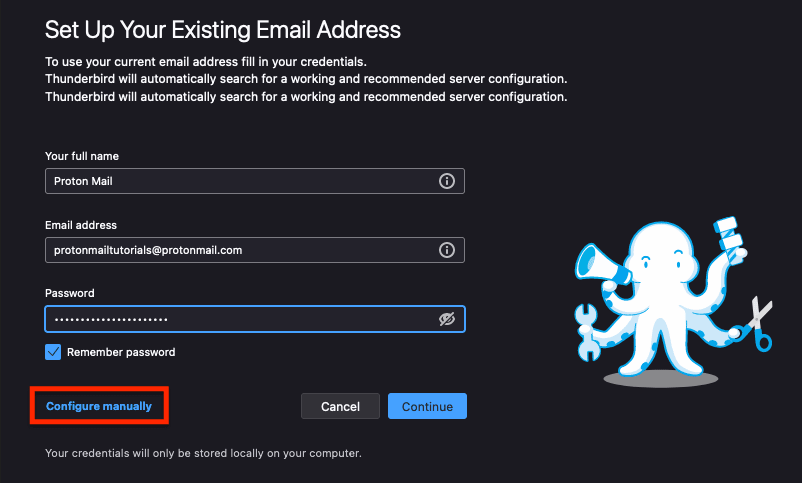
Then enter the details from the Bridge Mailbox Details section manually.

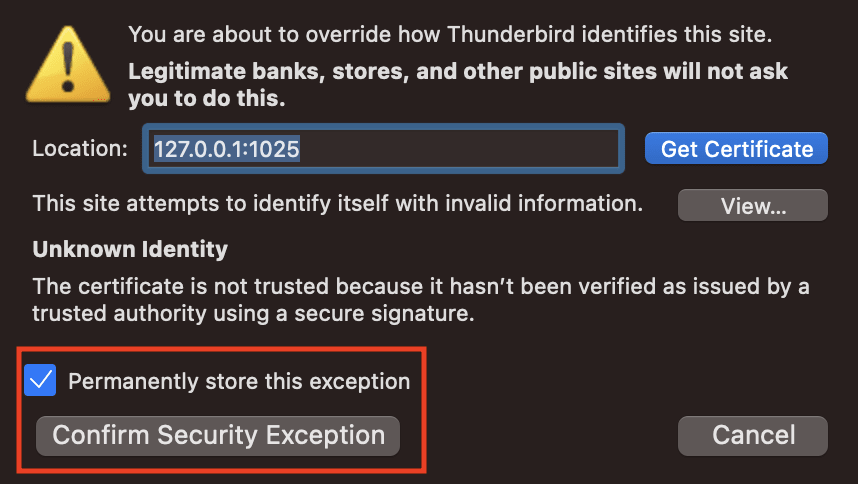
4. Click Done, and you’ll be asked to confirm the exception for the security certificate. Since Proton Mail Bridge uses a certificate locally on your device, this can’t be signed by a certificate authority and requires you to confirm it manually.
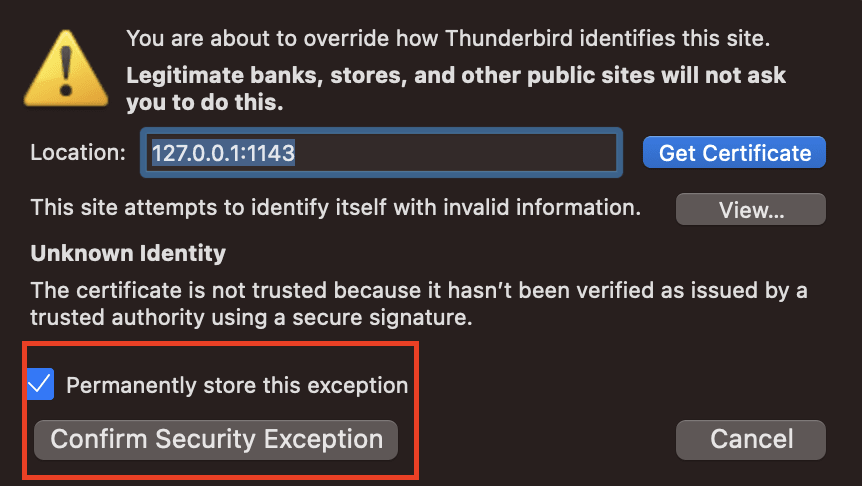
5. Thunderbird will now be able to fetch your emails. To send emails, you’ll need to confirm the certificate for SMTP. To trigger this, send a test message. When you press Send, you’ll receive the same popup as above but for the SMTP port.
Once you confirm the exception, you might get an error message. You can dismiss it, then try to send the message again. It should work this time.
Set up Mozilla Thunderbird to send from Proton Mail aliases
If you want to send from your alias addresses, you can add them to Thunderbird as follows:
1. Open Thunderbird and go to Menu → Account Settings.
2. Select the account, and click Manage Identities at the bottom.
3. Click Add to add your email alias.
4. Enter the necessary details, such as Name and Email Address, and click OK.
If you want to add each address as a separate account to Thunderbird, you can use split address mode.
And you’re done! You can now use your Proton Mail account with Thunderbird to send and receive messages.