Proton Mail Bridge new Outlook for macOS setup guide
- Reading
- 3 mins
- Category
- Installation on macOS
May 17 2024: Read our Important notice regarding the New Outlook for Mac.
Proton Mail Bridge is an open-source application that allows you to fully integrate your Proton Mail account with any program that supports IMAP and SMTP. This includes Microsoft Outlook, Mozilla Thunderbird, and Apple Mail.
It runs in the background on your computer and seamlessly encrypts and decrypts your mail as it enters and leaves your computer.
Before you configure Outlook to use Proton Mail, you must first sign up for a paid Proton Mail plan and download and install Proton Mail Bridge on your computer.
Once you’ve installed and added your account(s) to Proton Mail Bridge, you’ll need to configure your email client. Proton Mail Bridge works with most email clients and applications that support IMAP/SMTP connections.
In this guide, we provide step-by-step instructions to configure the new Outlook app to use Proton Mail Bridge on your Mac. If you have an older version of Outlook installed, take a look at our instructions for Outlook 2019, Outlook 2016, or Outlook 2011
Important notice regarding the New Outlook for Mac
Microsoft has introduced the New Outlook for Mac as a replacement for Legacy Outlook. The New Outlook includes fundamental changes in the way it synchronizes data, leading to issues with Proton Mail Bridge that can only be solved by Microsoft itself.
If the stability of email is critical for your organization, we recommend using the Proton Mail Desktop app, or one of our recommended email clients — like Legacy Outlook, Apple Mail, or Thunderbird — with Proton Mail Bridge to prevent issues and to protect the privacy of your data. New Outlook is not recommended by Proton.
How to know which Outlook version you are running
If you see a “Legacy Outlook” toggle turned on in the top right of your Outlook window, that means you are running Legacy Outlook.

How to switch back to Legacy Outlook
You can switch back at any time by launching Outlook, clicking the Help menu, and selecting Revert to Legacy Outlook. Note that Accounts added in the new Outlook for Mac may not automatically be added to Legacy Outlook.
Alternative options
If for any reason you are unable to use Legacy Outlook, we recommend using Apple Mail, Thunderbird or the new Proton Mail Desktop app instead.
How to set up the new Outlook for macOS with Proton Mail Bridge
The new Outlook is not officially supported by Proton and has known synchronisation issues that only Microsoft can address. Use Legacy Outlookor an alternative email client instead.
Use the new Outlook at your own risk.
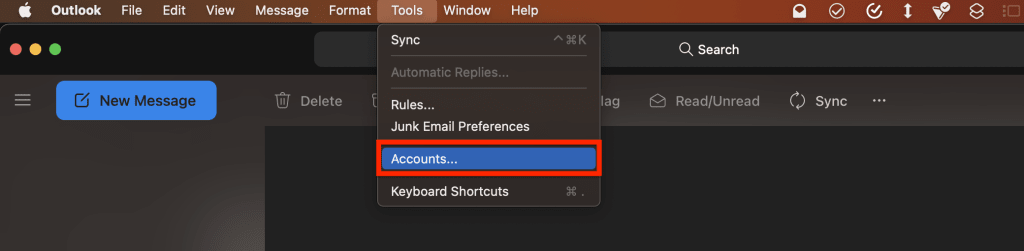
1. Open Outlook, and in the menu bar go to Tools → Accounts.
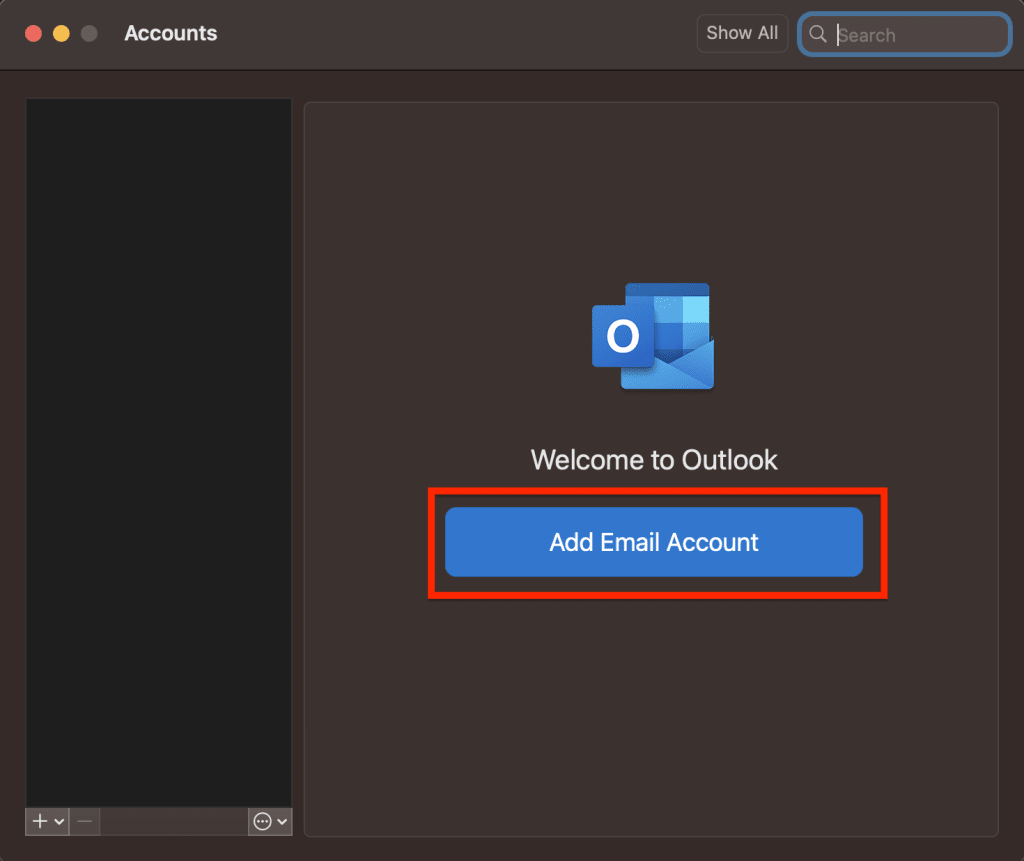
2. Click Add Email Account.
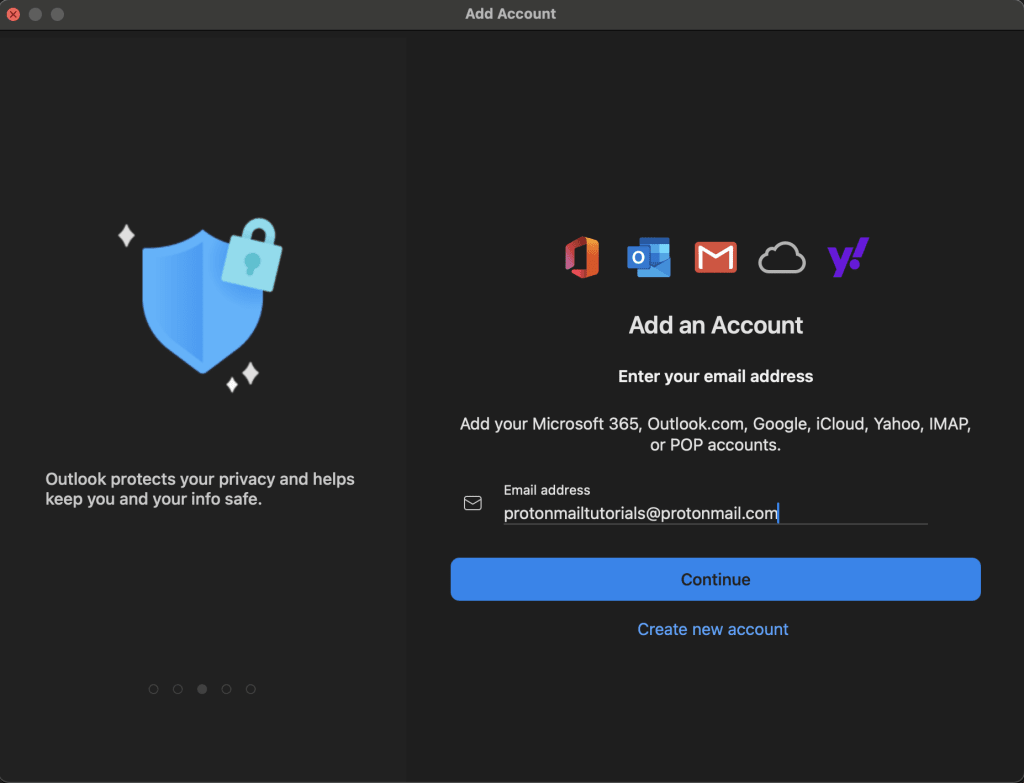
3. Enter your Proton Mail email address (displayed in the Bridge app under Username) and click Continue.
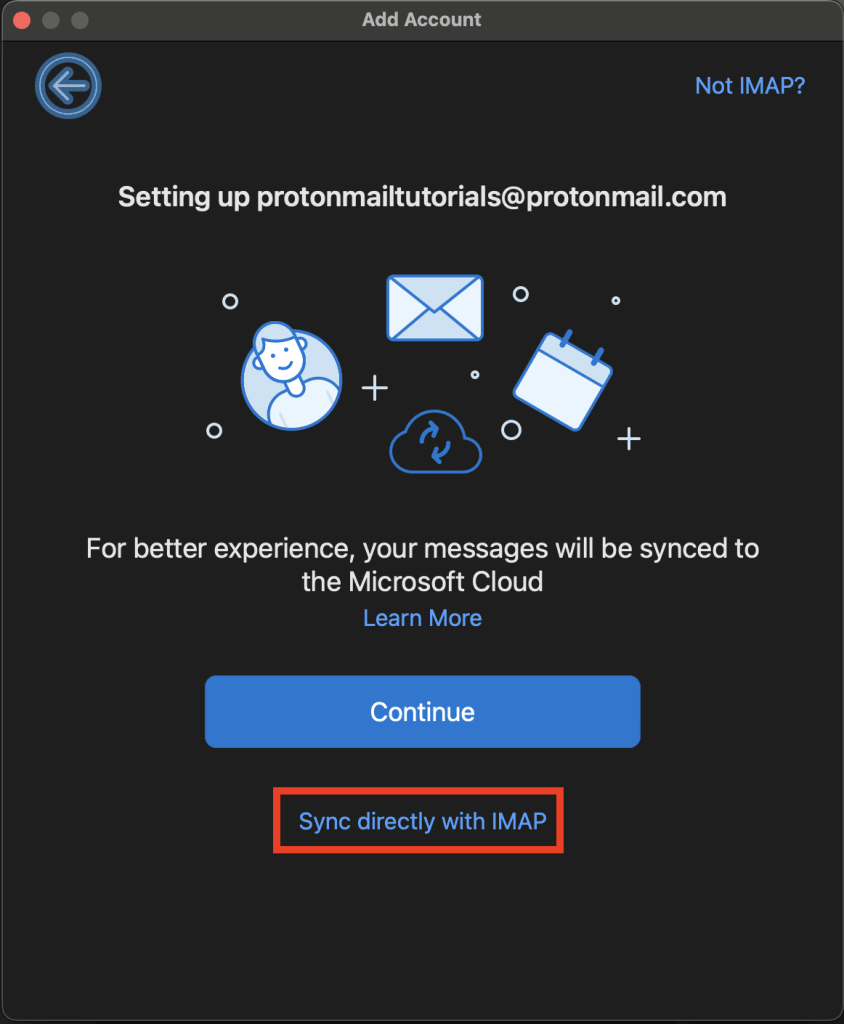
4. Click Sync directly with IMAP.
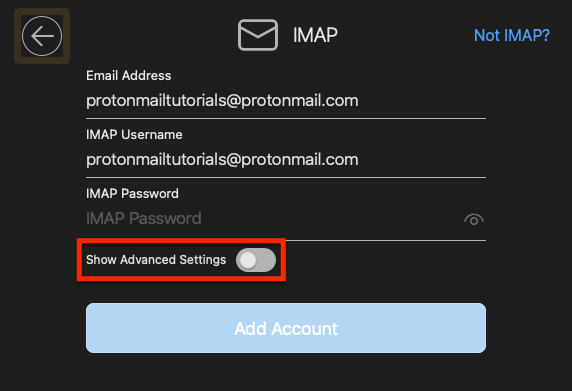
5. Click Show Advanced Settings.
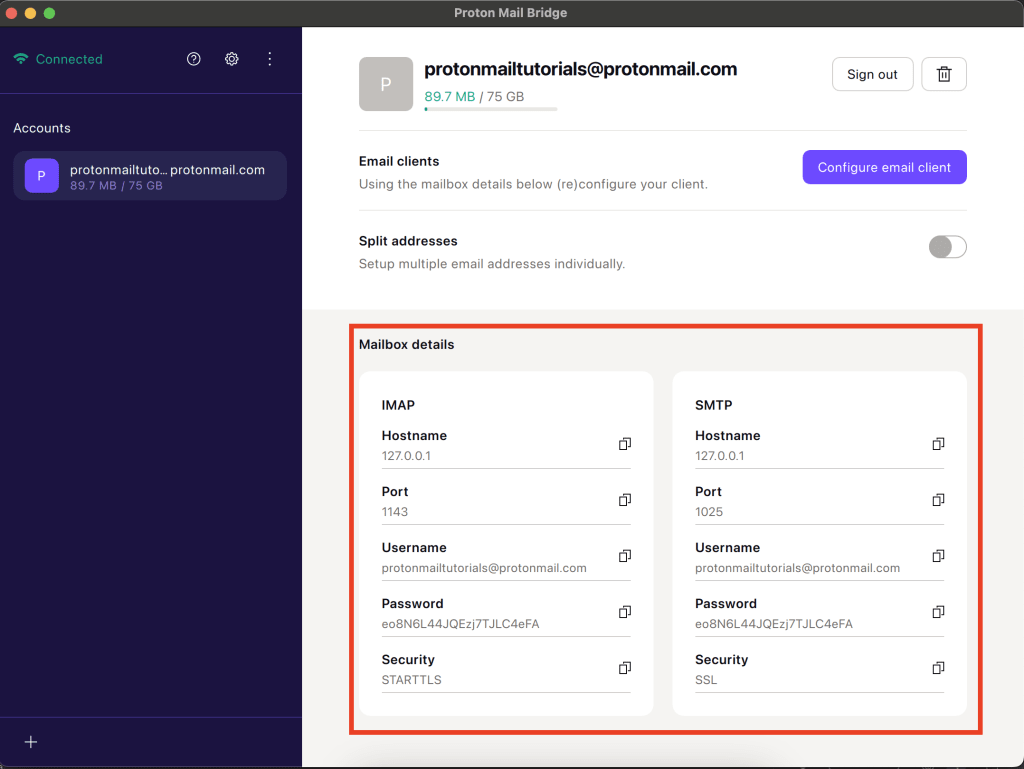
6. Enter the details from the Bridge Mailbox details section.
SMTP Outgoing Server and IMAP Incoming Server should be 127.0.0.1.
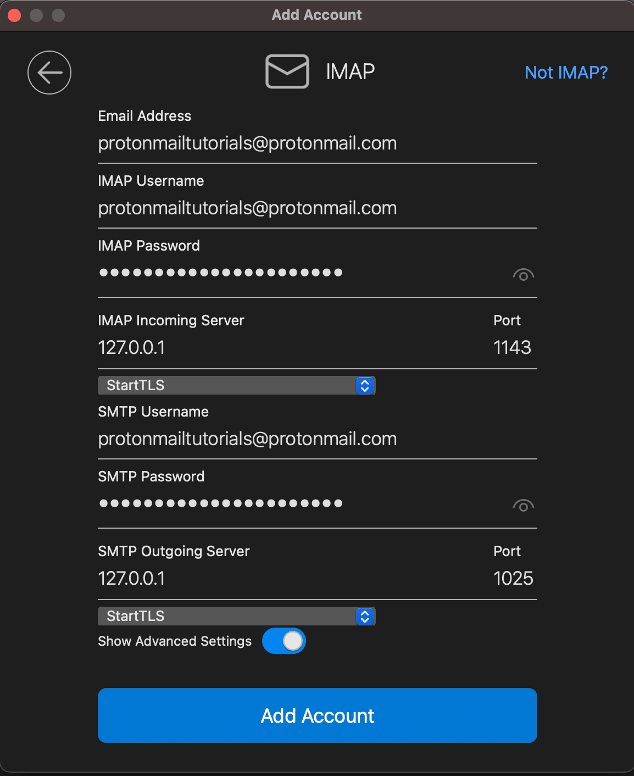
Note: Don’t use your regular Proton Mail account details. You must use the account details provided in Proton Mail Bridge under Mailbox details.
8. Click Add account, and the account will be added to Outlook.
Now you can use your Proton Mail account with Outlook on your Mac.
With Outlook for macOS, there is no option to add additional addresses (aliases) to the same account so you can send from them. As an alternative, you can switch to split address mode and add each address as a separate account.