
Proton Pass के लिए SSO कैसे सेटअप करें
- पढ़ने का समय
- 1 मिनट
- श्रेणियां
- Proton Pass for Business
- Proton Pass
Proton Pass Professional plan एकल साइन-ऑन (SSO) को सहायता देता है, जो आपको एक पासवर्ड से अपने Proton Pass खाते और कई अन्य खातों में सुरक्षित रूप से लॉगइन करने की अनुमति देता है। इस आर्टिकल में हम आपको दिखाएंगे कि एडमिन के तौर पे SSO कैसे सेटअप करें, इसे अपने बिज़नेस या संगठन के लिए कैसे संभालें, और स्टाफ मेंबर इसका इस्तेमाल कैसे कर सकते हैं।
शुरूआत करने से पहले, आपको निम्न चीज़ों की ज़रूरत होगी:
- Admin विशेषाधिकारों वाला एक Proton Pass Professional खाता
- Okta, Microsoft Entra ID, OneLogin आदि जैसे किसी पहचान प्रदाता के साथ एडमिन एक्सेस वाला एक खाता
Proton Pass Professional प्राप्त करें(नई विंडो)
Google का इस्तेमाल करके Proton Pass के लिए SSO कैसे सेटअप करें
Microsoft का इस्तेमाल करके Proton Pass के लिए SSO कैसे सेटअप करें
Okta का इस्तेमाल करके Proton Pass के लिए SSO कैसे सेटअप करें
Proton Pass के लिए SSO कैसे सेटअप करें
1. अपने Proton Pass एडमिन पैनल में लॉगइन करें और एकल साइन-ऑन → SAML सत्यापन → SAML विन्यस्त करें पे क्लिक करें।
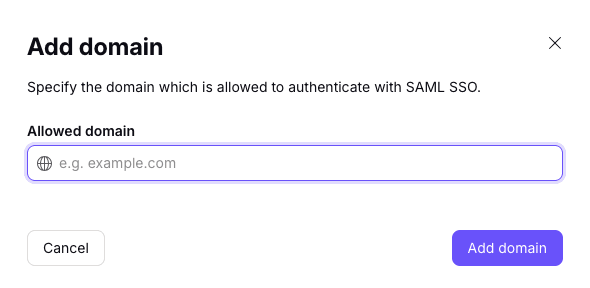
2. अपनी कंपनी का डोमेन नाम जोड़ें और डोमेन जोड़ें पे क्लिक करें।
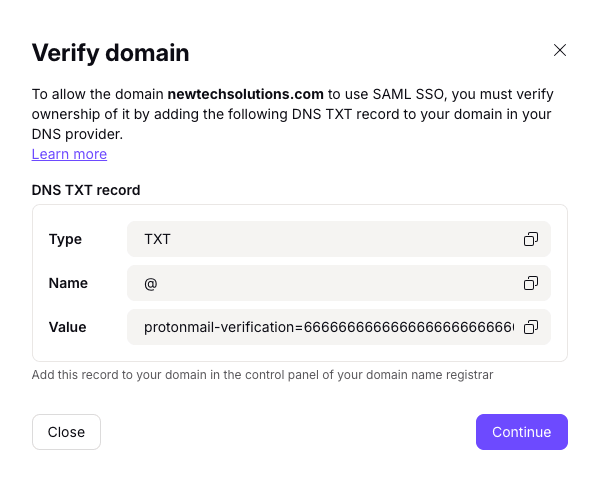
3. डोमेन को सत्यापित करें। इसके लिए, अपने डोमेन प्रोवाइडर के वेब पोर्टल में लॉगइन करें और इस स्क्रीन पे दिखाए गए DNS TXT रिकॉर्ड दर्ज करें।
ये करने के बाद, जारी रखें पे क्लिक करें।
4. अपनी पहचान प्रदाता से Proton Pass के लिए SAML मेटाडाटा आयात करें। आप ये डाटा URL या XML फ़ाइल के ज़रिए या मैन्युअल रूप से टेक्स्ट फील्ड भरकर आयात कर सकते हैं। अपना पसंदीदा तरीका चुनें (जो आपके IdP द्वारा तय हो सकता है) और मांगा गया डाटा डालें या अपलोड करें।
पूरा होने के बाद जारी रखें पे क्लिक करें।

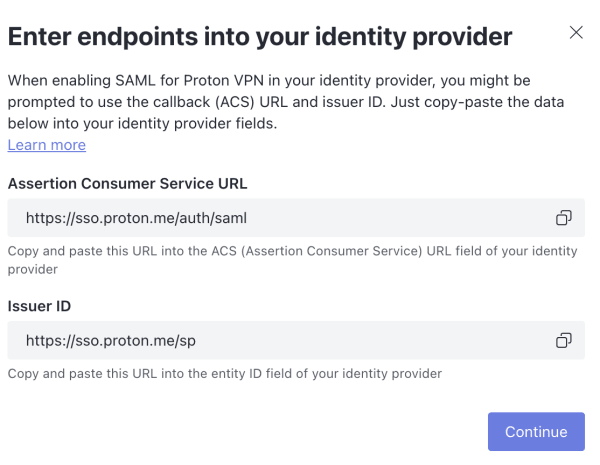
5. दिखाए गए एंडपॉइंट अपनी पहचान प्रदाता को दें। अगर आपका IdP Assertion Consumer Service (ACS) URL और जारीकर्ता आईडी मांगता है, तो बस इस स्क्रीन से जानकारी कॉपी करें और अपनी पहचान प्रदाता के फील्ड में पेस्ट करें।
ये करने के बाद, पूरा हुआ पे क्लिक करें।
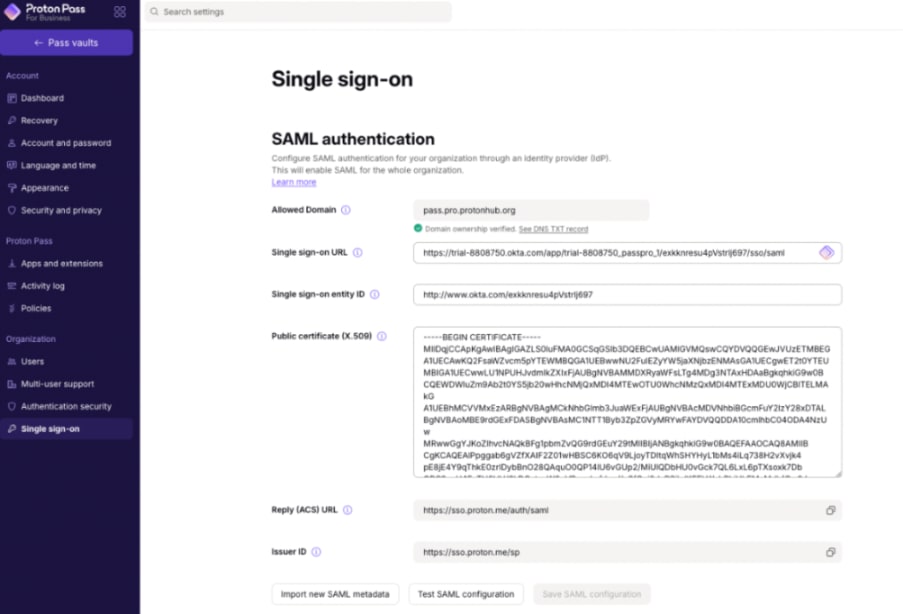
अब SSO आपके Proton Pass खाते पे कॉन्फ़िगर हो चुका होना चाहिए। अपनी SSO सेटिंग का ओवरव्यू देखने के लिए जानकारी देखें पे क्लिक करें।
SSO कैसे संभालें
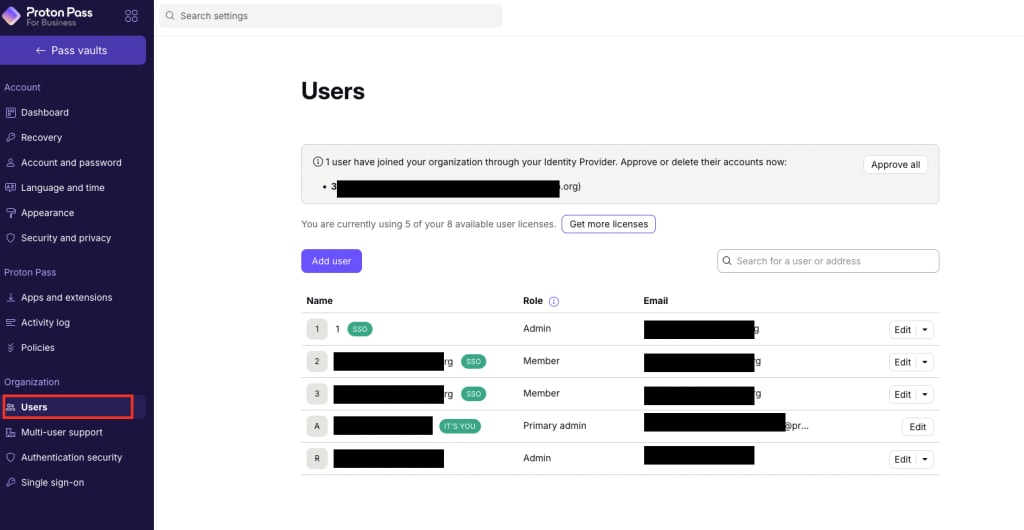
आपके संगठन के यूज़र अब आपकी पहचान प्रदाता द्वारा दिए गए यूज़रनेम और पासवर्ड का इस्तेमाल करके Proton Pass ऐप्स में लॉगइन कर सकते हैं। अपने संगठन में शामिल हुए यूज़र देखने के लिए, अपने Proton Pass खाते में लॉगइन करें और संगठन → यूज़र में जाएं। Proton Pass में यूज़र जोड़ने के लिए, अपनी पहचान प्रदाता में लॉगइन करें। नोट: SSO यूज़र यहां तभी दिखेंगे जब वे कम से कम एक बार साइनइन कर चुके होंगे।
आप किसी एक उपयोगकर्ता का SSO एक्सेस उनके ईमेल पते के बगल में बदलें कॉलम में ड्रॉपडाउन मेन्यू के ज़रिए संभाल सकते हैं।
SSO का इस्तेमाल करके Proton Pass में कैसे साइनइन करें
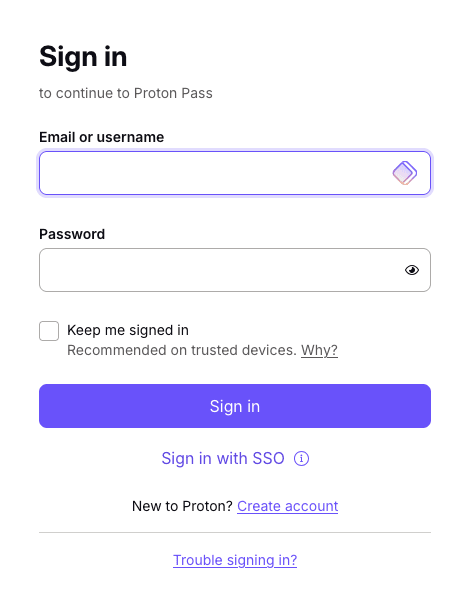
अगर आपके संगठन के किसी एडमिन ने Proton Pass के लिए SSO कॉन्फ़िगर किया है और आपके उपयोगकर्ता खाते के लिए Proton Pass सक्षम किया है, तो आप अपने IdP लॉगइन का इस्तेमाल करके Proton Pass ऐप्स में साइन इन कर सकते हैं। इसके लिए, किसी Proton Pass ऐप में साइन इन करते समय SSO से साइन इन पे क्लिक या टैप करें।
मल्टी-डोमेन SSO सेटअप
संगठन एक ही संगठन के भीतर अधिकतम 5 डोमेन के लिए SSO कॉन्फ़िगर कर सकते हैं।
मल्टी-डोमेन सेटअप तक एक्सेस करने के लिए, अपने Proton Pass खाते में लॉगइन करें और संगठन → एकल साइन-ऑन में जाएं

नोट: हर डोमेन को अपनी SSO संरचना की ज़रूरत होती है, जिसे आपकी संगठन सेटिंग में अलग से जोड़ा जाता है। सभी डोमेन की SAML सेटिंग एक जैसी होनी चाहिए – आपके द्वारा जोड़े गए किसी भी अतिरिक्त डोमेन की संरचना पहले वाले से मेल खानी चाहिए।
SSO से आगे: SCIM के साथ उपयोगकर्ता प्रबंधन को ऑटोमेट करें
SSO लॉगइन के समय उपयोगकर्ता की पहचान सत्यापित करता है, लेकिन नए अपडेट को Proton के साथ सिंक नहीं करता। जब कोई आपके संगठन को छोड़ देता है, टीम बदलता है, या एडमिन अधिकार खो देता है, तो ये अपडेट मैन्युअल रूप से करने पड़ते हैं और चूक होने पर एक्सेस खुला रह सकता है।
SCIM (System for Cross-domain Identity Management) इस कमी को पूरा करता है, जिससे Proton आपके IdP के साथ लगातार सिंक रहता है। उपयोगकर्ता में हुए बदलाव Proton में अपने आप लागू हो जाते हैं, और SCIM ग्रुप बनाने से आप पूरी टीमों के लिए एक साथ एक्सेस संभाल सकते हैं। इसका मतलब ये है कि अगर आप अपने IdP में किसी ग्रुप में किसी को जोड़ते हैं, तो उसे उस ग्रुप का Proton एक्सेस (जैसे साझा तिजोरी, पासवर्ड, या VPN गेटवे) अपने आप मिल जाएगा; और अगर आप उसे हटाते हैं, तो वो एक्सेस अपने आप वापस ले लिया जाएगा।
अपने संगठन के लिए SCIM सेटअप करने के लिए, देखें: