How to use a custom domain with Proton Mail
- Reading
- 8 mins
- Category
- Domain setup
You can create email addresses with your own domain name in Proton Mail, such as yourname@yourdomain.com, to send and receive messages.
To use a custom domain with Proton Mail, you must have both:
- A custom domain, such as
yourdomain.com:You can purchase one from a domain name registrar. - A paid Proton plan. All paid plans support adding custom domains.
The next steps are to connect your custom domain to your Proton Mail account, and then add users and email addresses. Here’s how:
- Step 1: Create your organization
- Step 2: Connect and verify your domain
- Step 3: Create new users and addresses
Note to organizations migrating multiple users to Proton Mail: Please create corresponding email addresses on Proton Mail before changing the MX records. This can prevent losing emails during the migration. - Step 4: Update MX records
- Step 5: Configure MX, SPF, DKIM, and DMARC records
Step 1: Create your organization
When you purchase a Business plan, you’re prompted to set up your organization. If you skipped it, you can do this now by following the steps below.
If you’ve already created an organization, or if you’re not on a Business plan, skip this section.
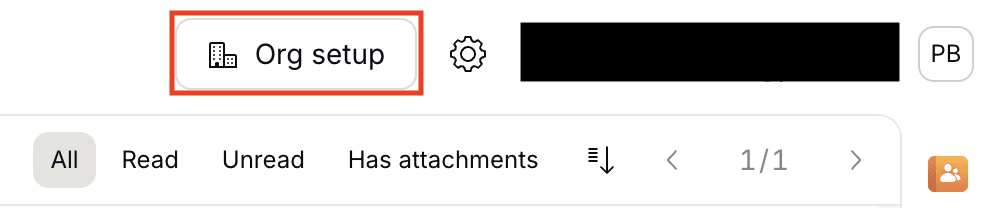
- Click Org setup in the top-right corner.
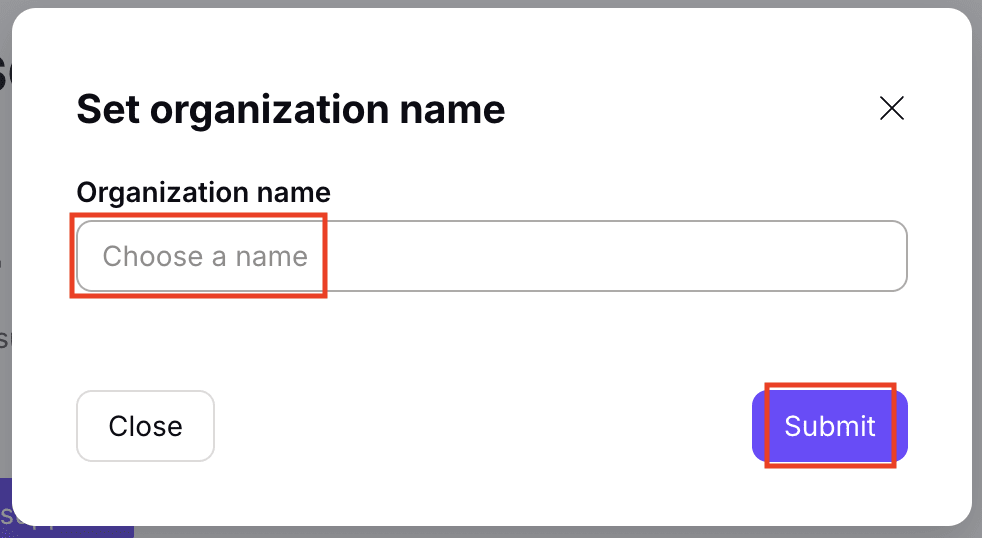
- Set an Organization name and click Submit. You can change it later.
- Allocate storage space to your administrator account and click Submit.
Learn more about setting up your organization.
Step 2: Connect and verify your domain
Note: If your domain’s nameservers are set to a service other than your domain registrar’s, you’ll need to update the DNS records through that service’s console (not through your registrar’s console).
- Log in to your DNS console (located on the platform where you purchased the custom domain). If you don’t know how to access your DNS console or update DNS records, contact your domain name registrar to request help.
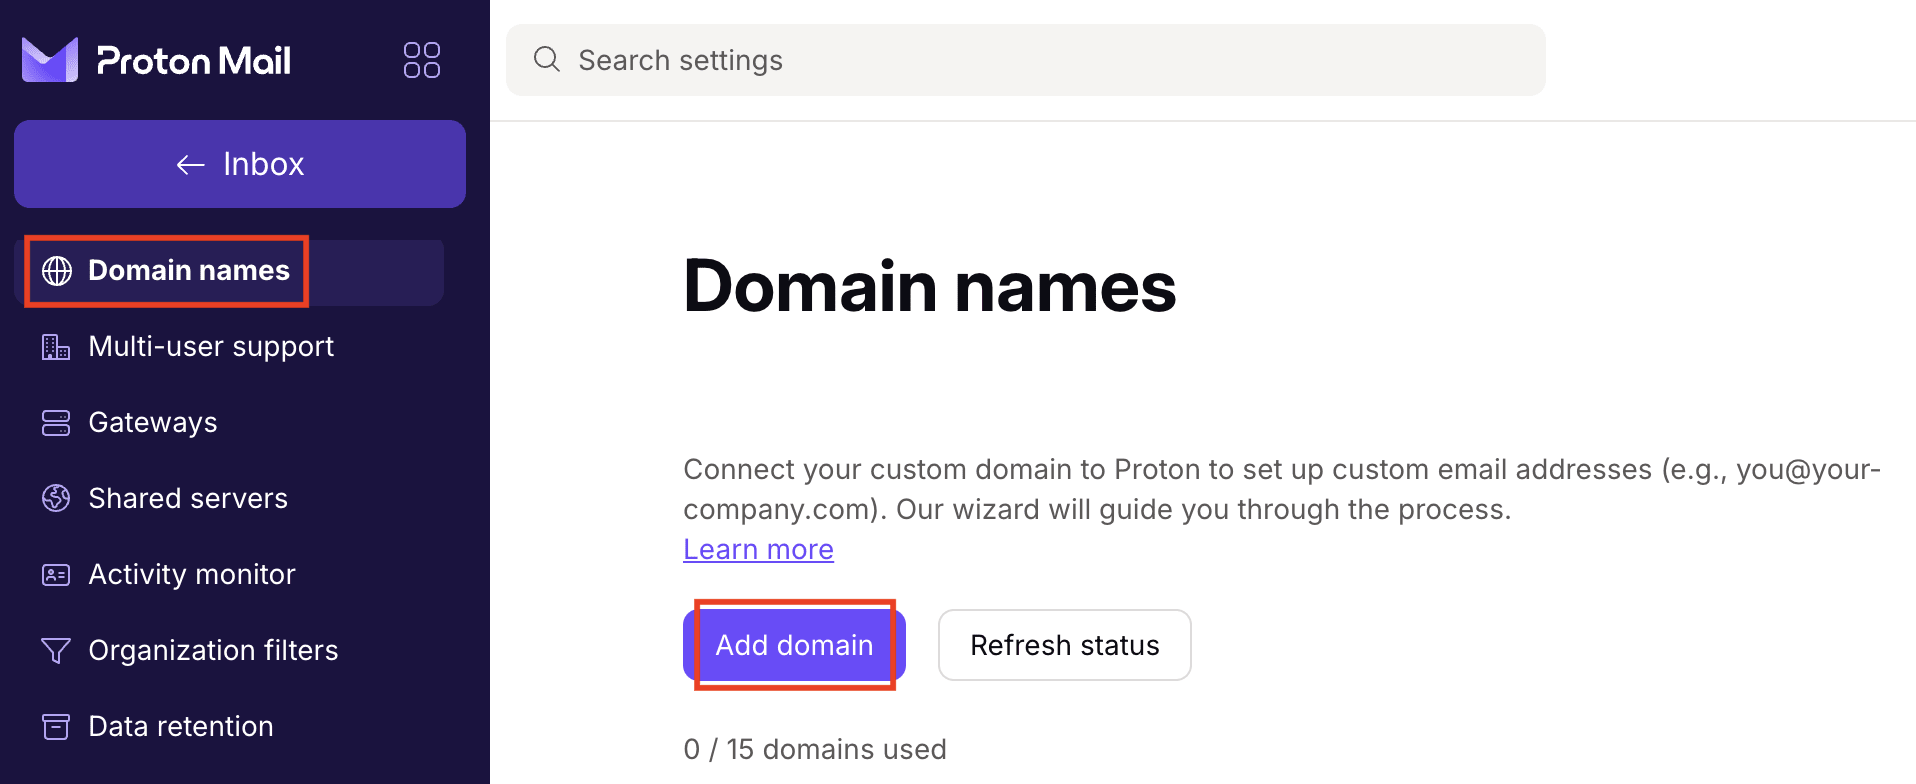
- Open another browser tab. Go to Settings → Domain names, sign in, and click Add domain.
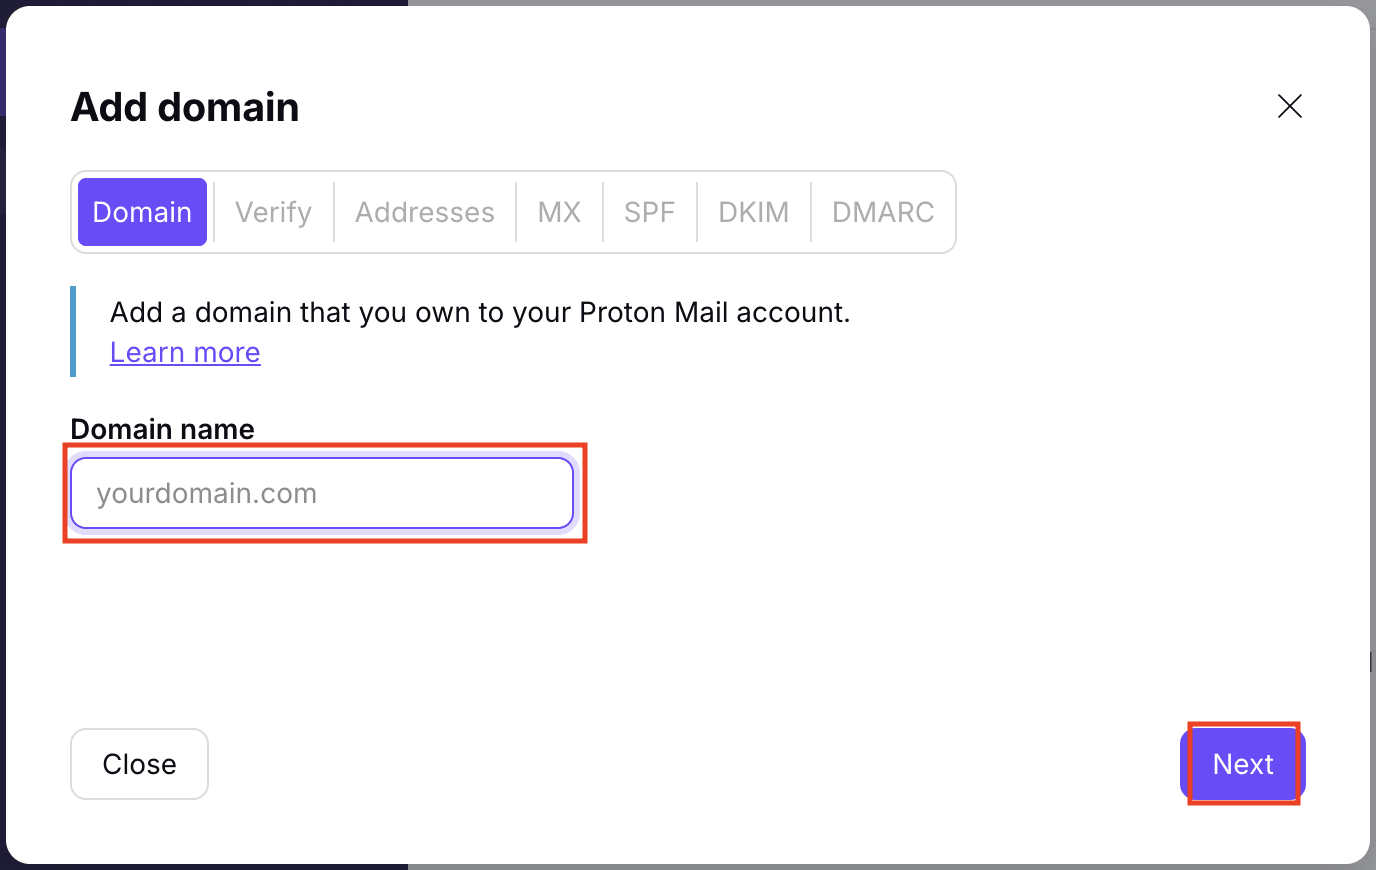
- Enter a domain name and click Next.
- Verify your domain. Copy the DNS values (Type, Host name, Value/Data/Points to) and paste them into the correct fields in your DNS console as in the example below. Note: You may need to follow the instructions from your domain name provider to create and update DNS records.
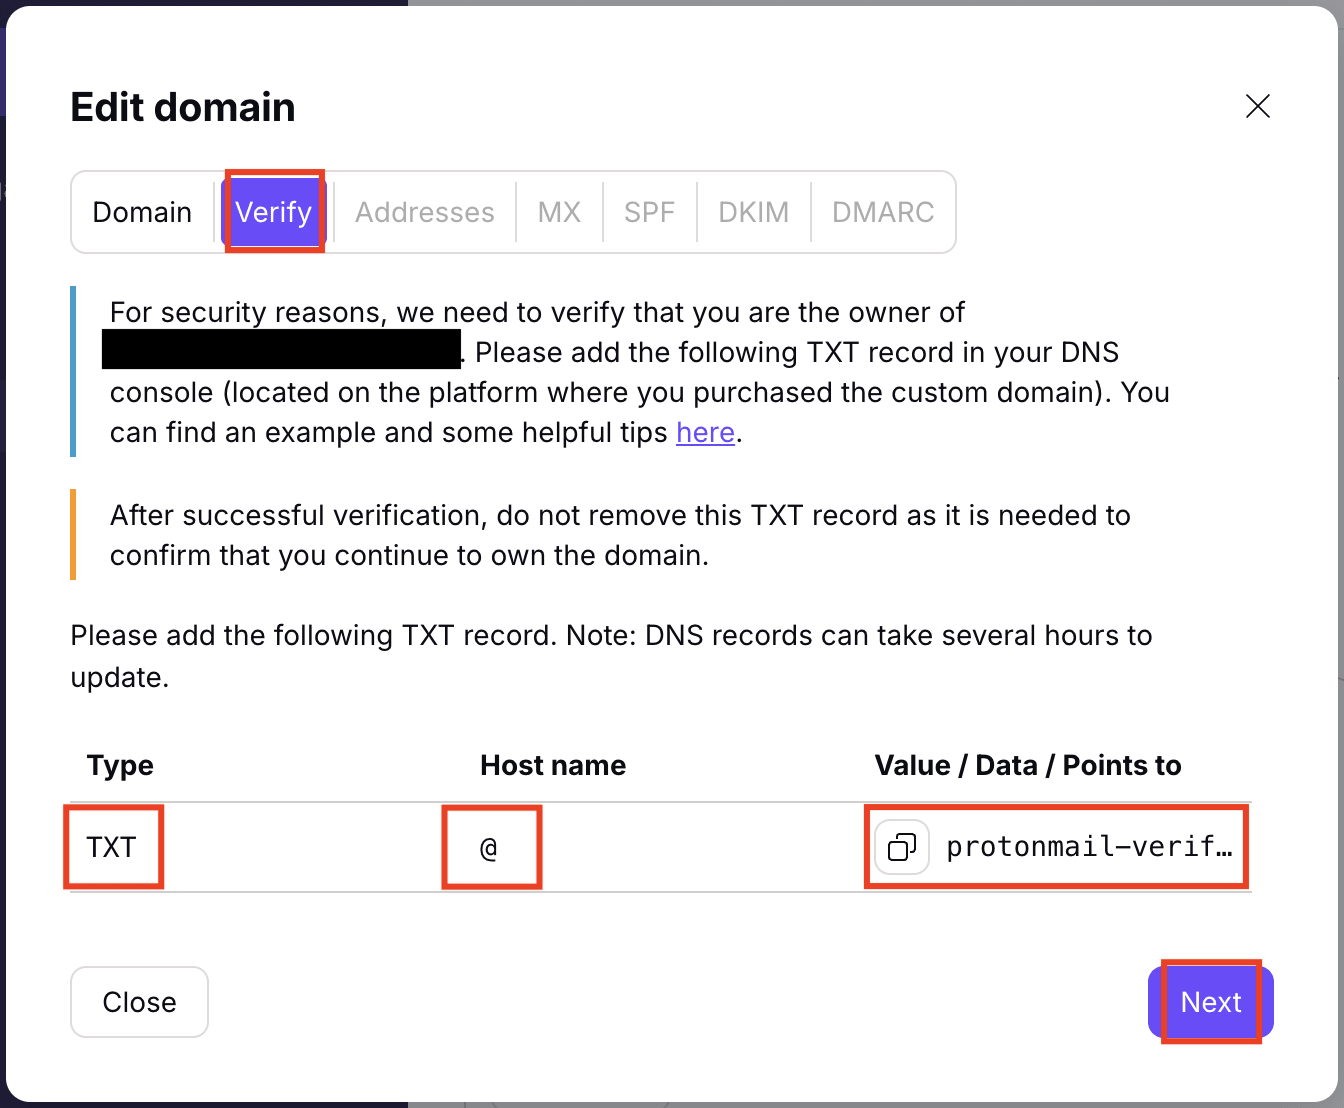
This means you must create a new DNS record in your DNS console. Select the record type TXT. Enter the character @ in the host name field and paste the value protonmail-verification=xxx into the value field.
If your DNS console doesn’t accept @ as the host name, try to leave the host name field empty. Some providers require entering the full domain name instead of @, or leaving the field empty.

Please note that domain providers sometimes have different or additional options. Here are some helpful tips:
- If the TTL field is available in your DNS console, set the value to 300 It means the old DNS settings will be updated every five minutes.
- If your DNS console doesn’t accept the host name @, leave the host name field empty.
- If your DNS console doesn’t allow CNAME values to end with a dot (.), you can remove the last dot (.) in the CNAME values.
- After adding the DNS records, click Next in the Proton Mail domain verification tab.
Step 3: Create new users and addresses for your custom domain
Before continuing, make sure you’ve purchased enough seats for the users you plan to create.
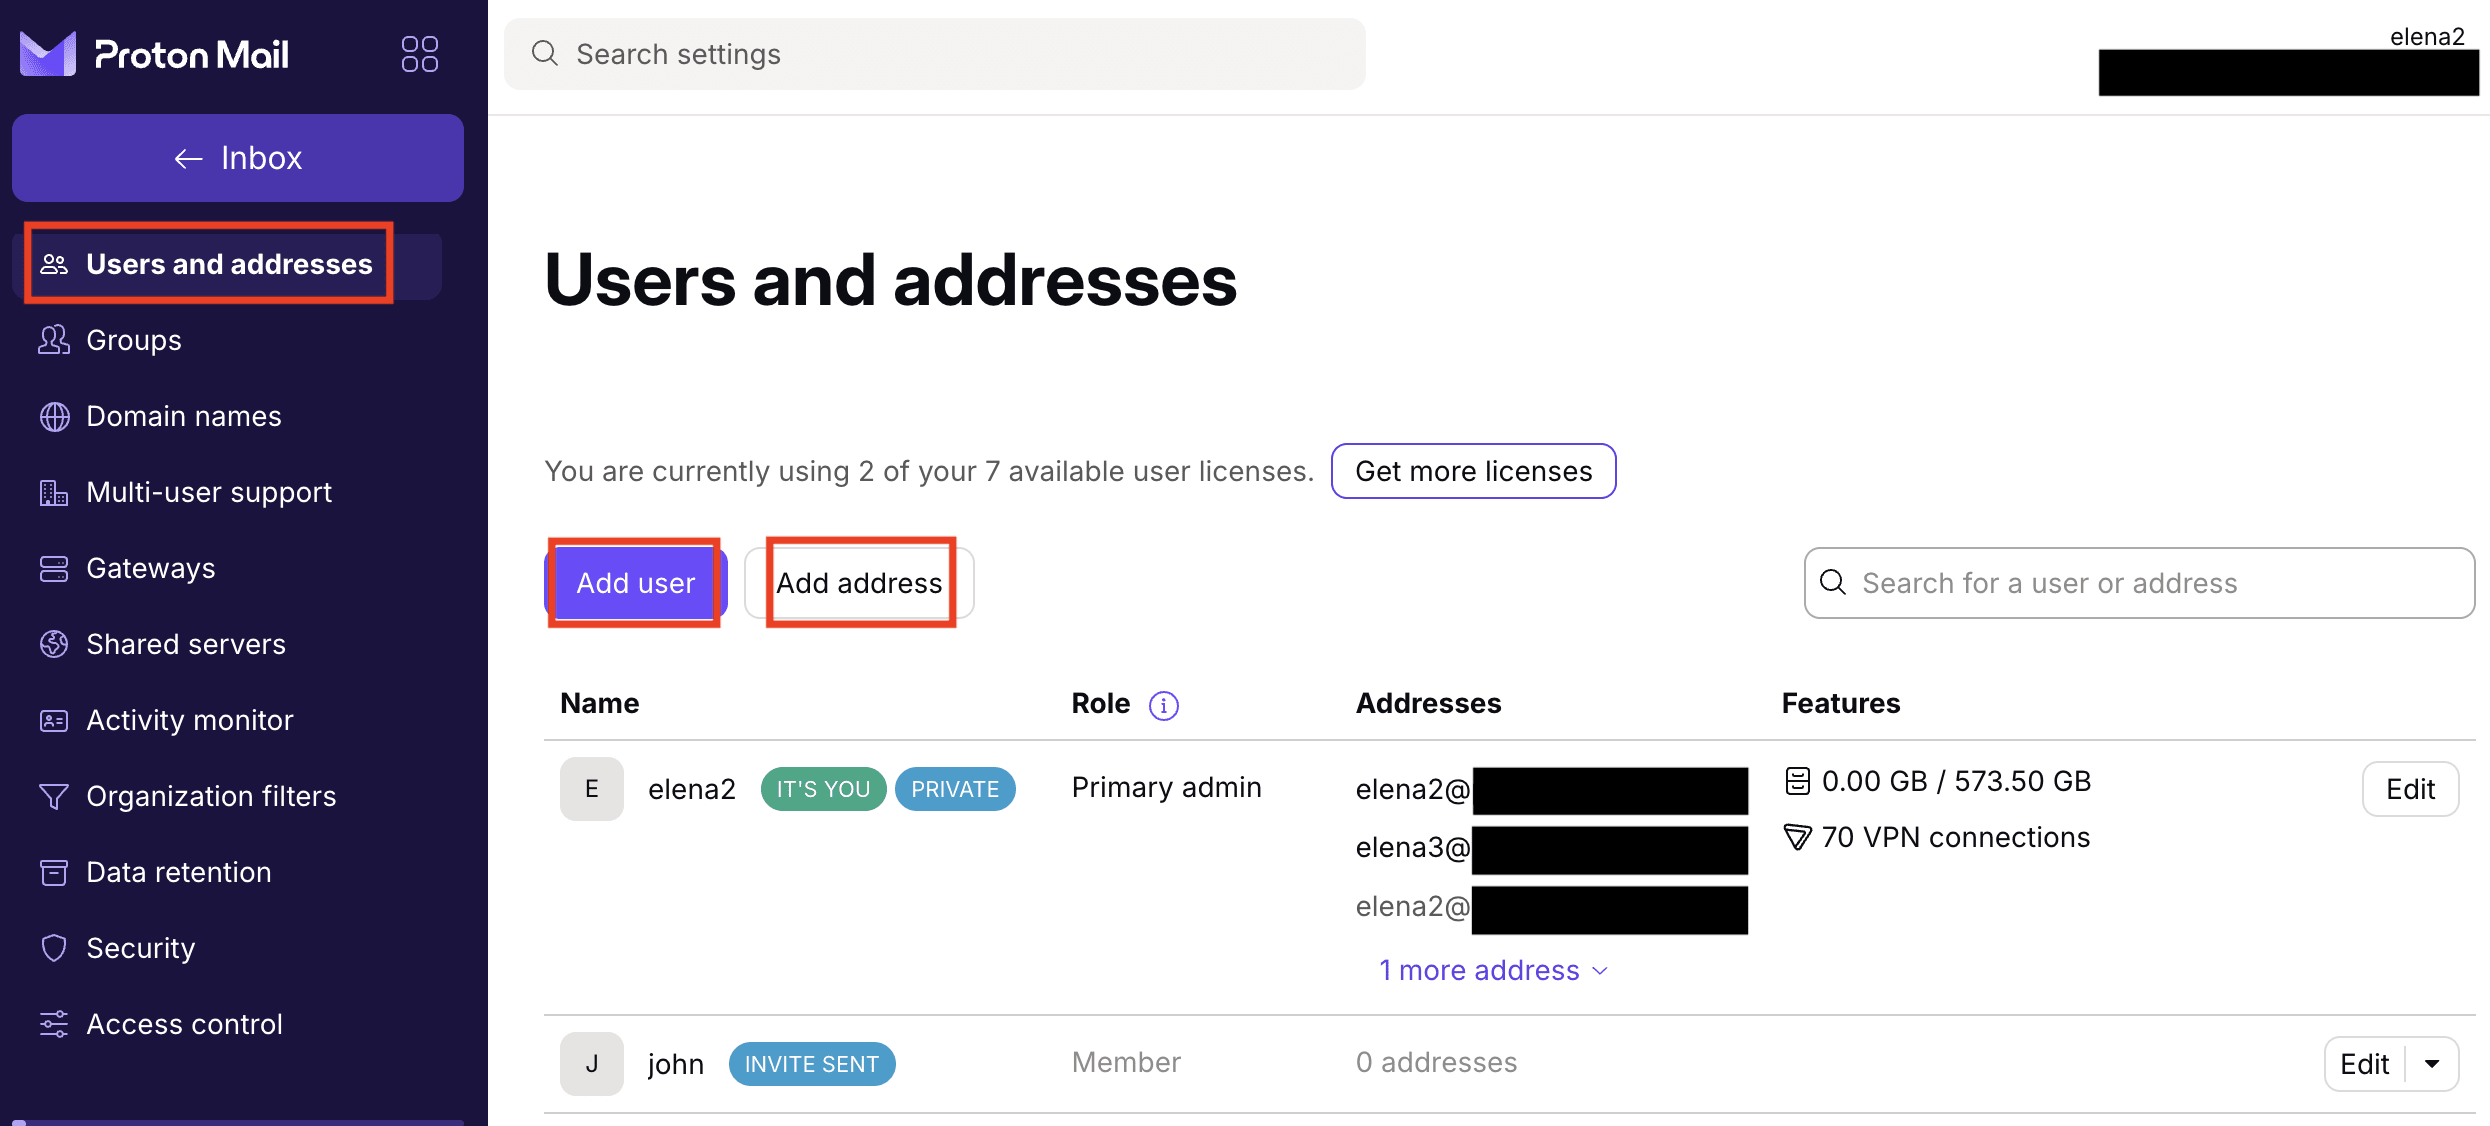
Navigate to Addresses and click Add user or Add address. This will open Users and addresses settings.
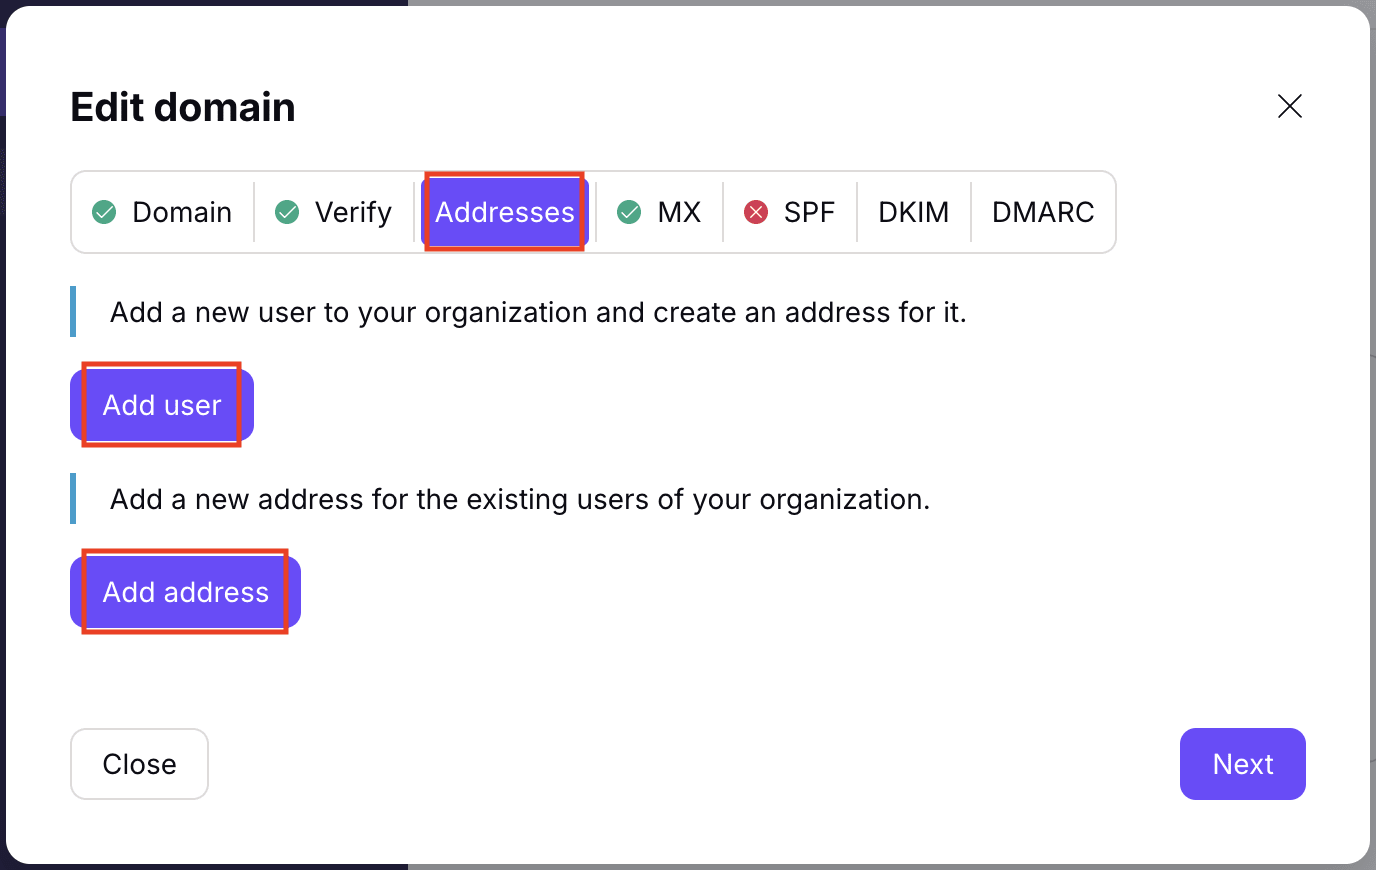
You have two options: Click Add user to create a new user account for your custom domain, or Add address to create new email addresses for an existing user.
If you select “Add user”
You’ll be guided through setting up a new user account.
You can:
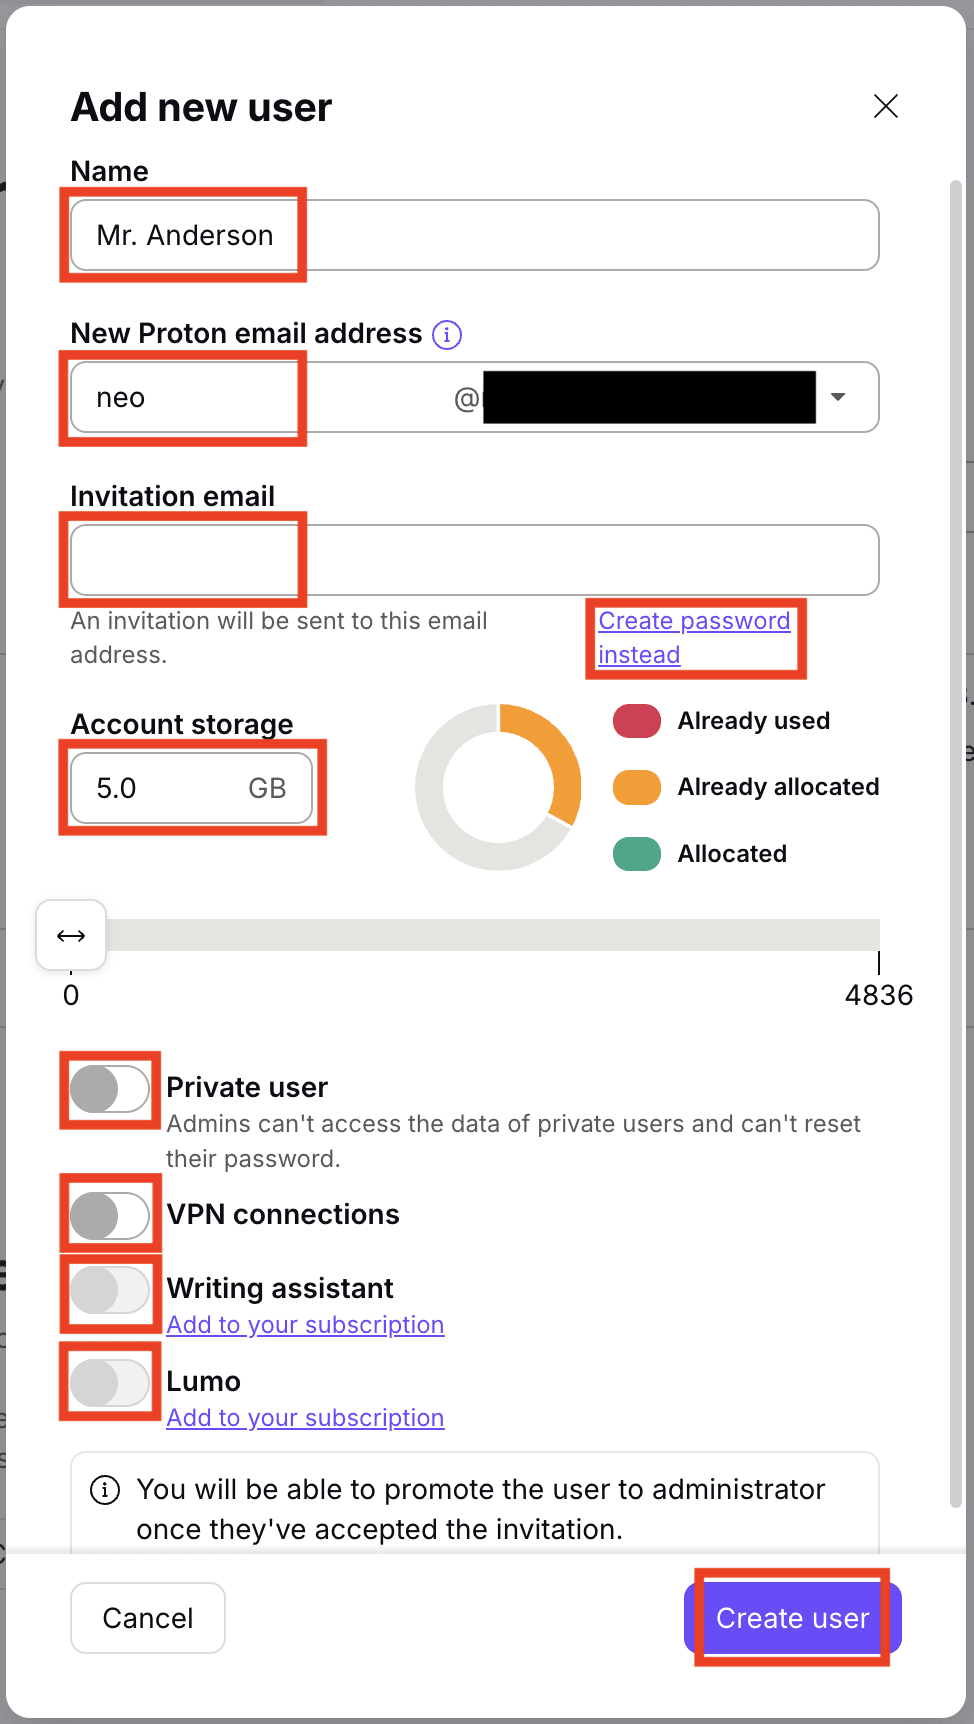
- Set the user’s name and new Proton email address
- Choose how the user gets access:
- Enter an invitation email, allowing the user to set their own password, or
- Click Create a password instead to set up a password manually, which you’ll need to securely share with the user
- Assign account storage
- Choose whether to make the user a private user. Making a user private prevents organization admins from managing the user or accessing their data. Depending on your organization’s policies, this may not be recommended. Learn more about user roles.
- Depending on your Proton subscription, you can optionally enable:
- VPN connections, allowing the user to connect remotely
- Writing assistant, providing access to Proton Scribe for proofreading or refining emails
- Lumo, granting access to our private AI assistant for business(new window)
Once finished, click Create user.
If you select “Add address”
You’ll be able to add email addresses to an existing user.
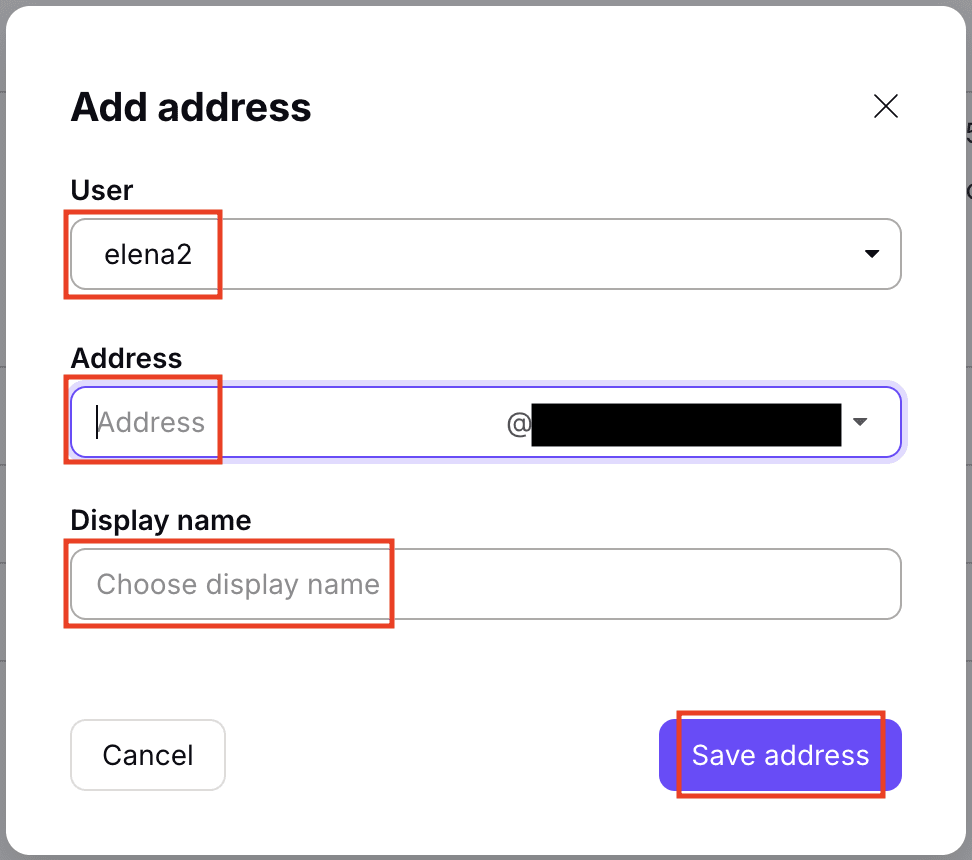
For each address, you can:
- Select a domain
- Set the new email address
- Set a display name
When you’re done, click Save address.
Learn more about adding users to your organization.
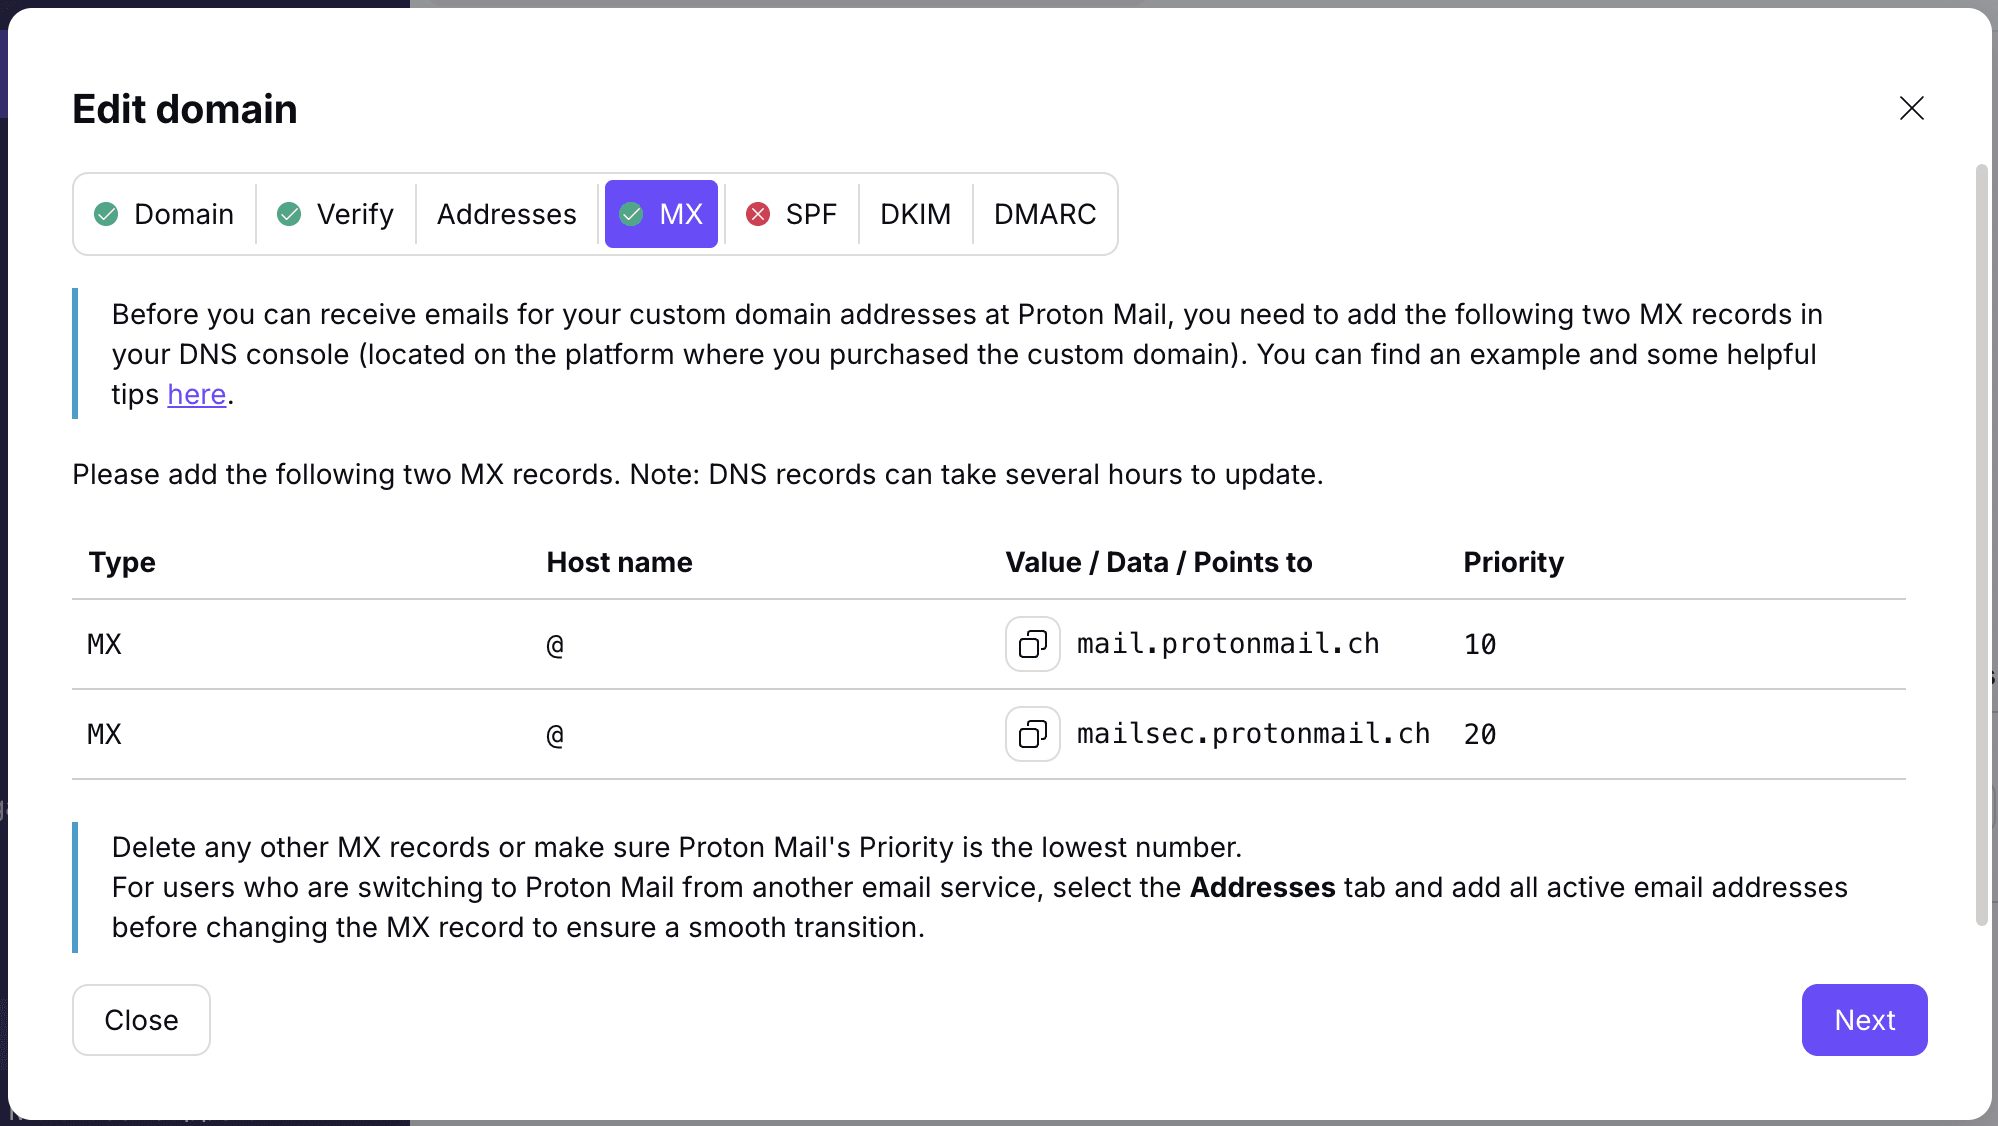
Step 4: Update MX records
Before continuing, make sure to create all user email addresses for your custom domain in Proton Mail, so no emails are lost during migration.
When you update your MX records, you’re telling the internet to deliver all incoming emails for your domain to Proton Mail’s servers instead of your previous email provider. After this change, emails sent to addresses that don’t exist in Proton Mail won’t be delivered, because your domain will no longer route mail to your old server.
To ensure emails sent from your custom domain are delivered reliably and protected against spoofing, configure MX records with your domain provider by following these steps:
Go to Settings → Domain names and click Review next to your domain.

Navigate to MX and add both MX records to your domain provider’s DNS console. Be sure to delete any existing MX records, or that Proton Mail’s MX records have the lowest priority number.
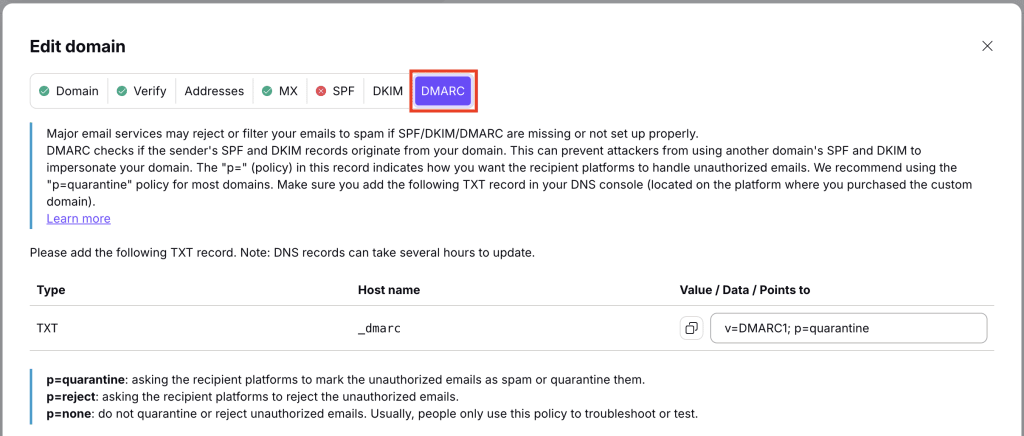
Step 5: Configure SPF, DKIM, and DMARC records
SPF, DKIM, and DMARC records help protect your domain from spoofing and improve email deliverability. Without them, your messages may be rejected or sent to spam by major email providers like Gmail.
When editing your custom domain in Proton Mail settings (in Domain names), go to SPF, DKIM, and DMARC to add the records to your domain provider’s DNS console.
Here’s what you should know:
- SPF allows Proton’s IPs to send emails for your domain. Make sure you have only one SPF record.

- DKIM allows Proton to cryptographically sign your emails. Make sure you add all three DKIM records.

- DMARC combines SPF and DKIM authentication results to prevent spoofing of your domain. We recommend using “p=quarantine” policy for most domains.
Learn more about how to set up SPF, DKIM, and DMARC for anti-spoofing in custom domains.
Proton Mail will automatically check to see if you have added the required records. This can take a few minutes or a few hours, depending on your previous TTL settings. A green check mark will appear on the Proton Mail Domain name settings page once each record has been verified.
Note: Even if all steps have a green check mark, a few platforms might still keep a record of your old settings for 1-3 days. If emails are still being delivered to your old mail server, check again later.
Congratulations! You’ve set up your custom domain in Proton Mail. It’s a good idea to double check your settings in Settings → Domain names → Review to make sure all your DNS records have been verified.
Groups and custom domains
You no longer need a custom domain to set up groups. You can add any user to a group and give them access to your Gateways.
If your organization sets up a custom domain, any new groups you create will use your custom domain (@groups.your-custom-domain.com), but existing groups will continue to use the default @groups.proton.me domain.
To use a group with your new domain, you’ll need to delete and then recreate it.
Similarly, if your organization removes a custom domain, you must first delete all groups that have been configured with that domain and then recreate them.
How to set up an organization in Proton Mail
- Set up your custom domain (you are here)
- Add new users to your organization