How to configure Google Workspace’s MDM to use Proton Pass on Android
- Reading
- 4 mins
- Category
- Manage users
Businesses can use mobile device management (MDM) platforms to install and manage Proton Pass on their team members’ Android devices.
This guide explains how to configure the MDM functionality of Google Workspace’s endpoint management to set up Proton Pass on your team’s Android devices. This will allow you to automatically install Proton Pass on your organization users’ Android devices
To get started, you’ll need:
- A Google Workspace admin account for your organization
- To enable advanced mobile management for Android(new window) in your admin console
In this guide, we’ll cover:
- How to add a new user
- How to configure Google Workspace to install and manage Proton Pass on users’ devices
- How to set up a work profile on an Android device
- Additional configuration options
Step one: Add new users
1. Sign in to admin.google.com(new window) using your administrator username and password (plus 2FA, if enabled) and go to Directory → Users → Add new user.
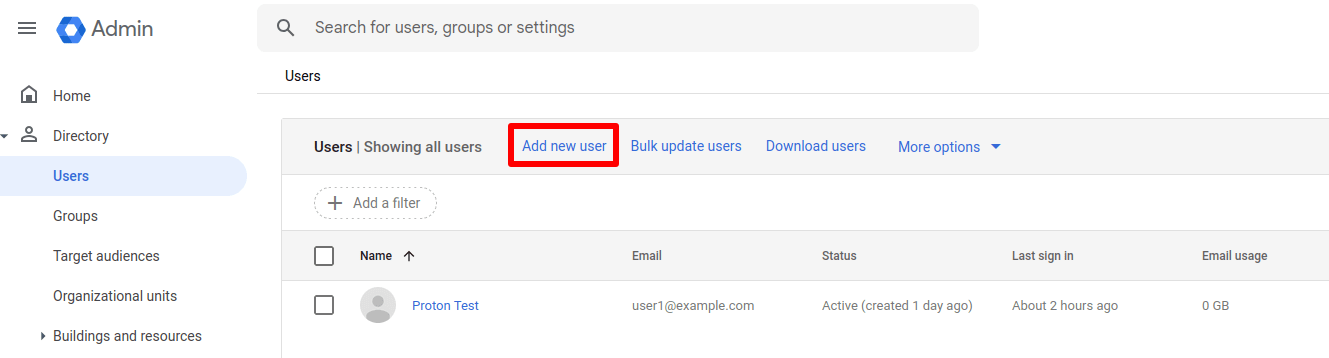
2. Enter the new user’s details and click Add new user when you’re done.
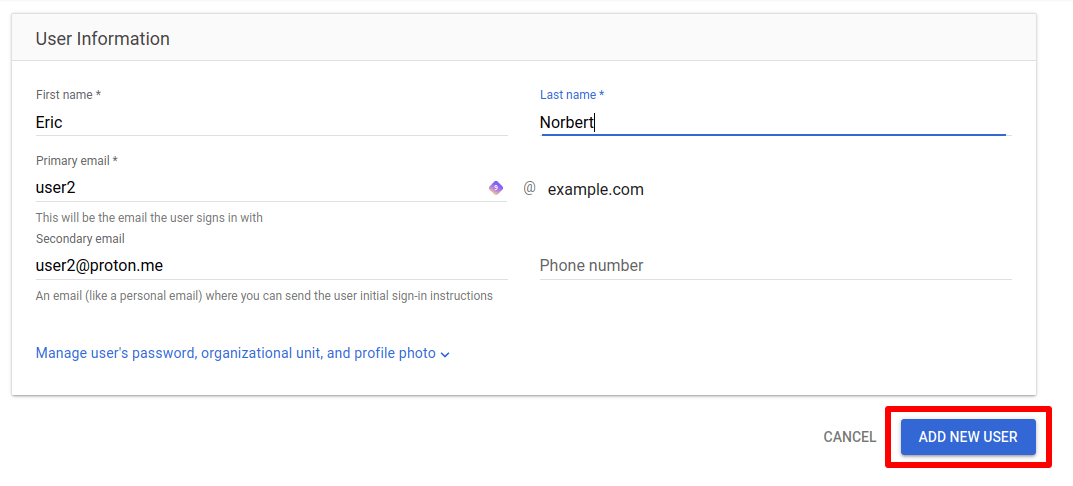
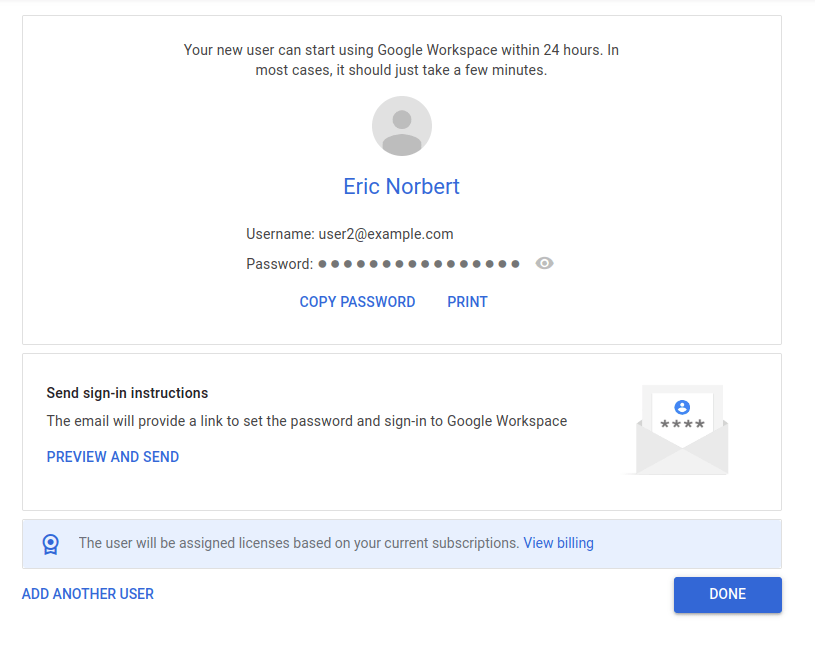
3. The new user account has now been created with a temporary one-use password. Be sure to make a note of this, as you’ll need it to set up their business profile on the Android device (see step three).
Step two: Configure Proton Pass MDM for your organization
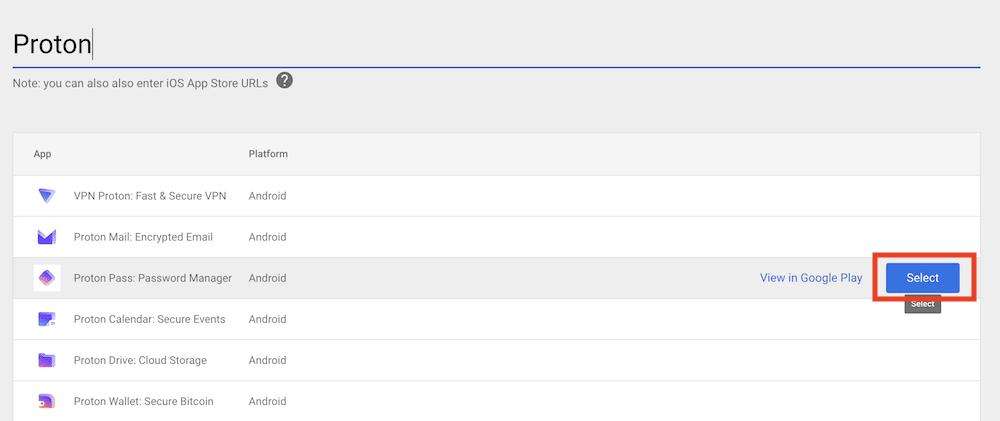
1. Go to Apps → Web and mobile apps → Add app → Search for apps.
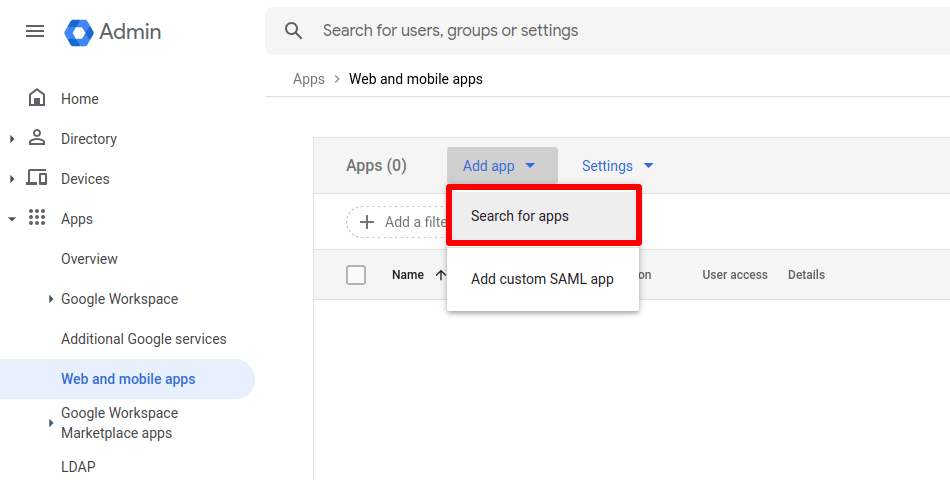
2. Search for Proton and go to Proton Pass → Select.
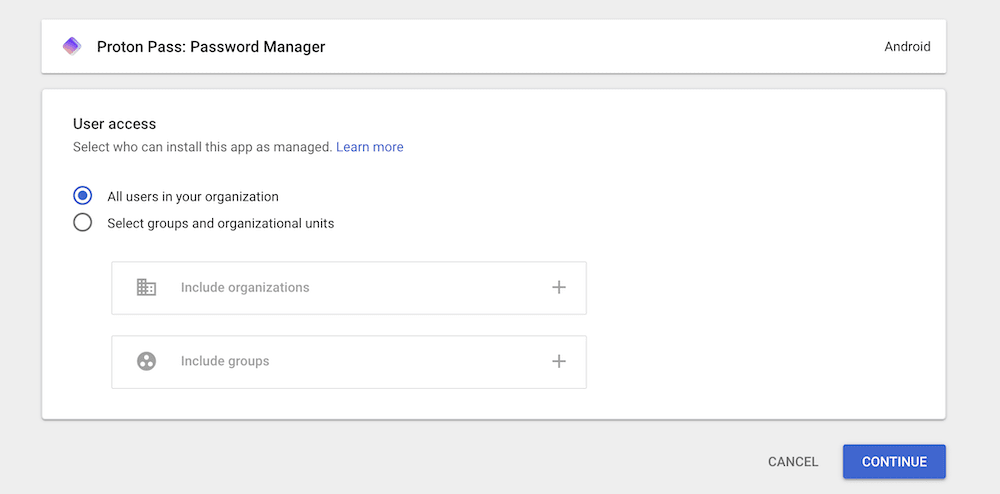
3. Choose whether you want to install Proton Pass for all users of your organization or select groups and organizational units and click Continue.
4. Select Access method → Force install, then select Finish.
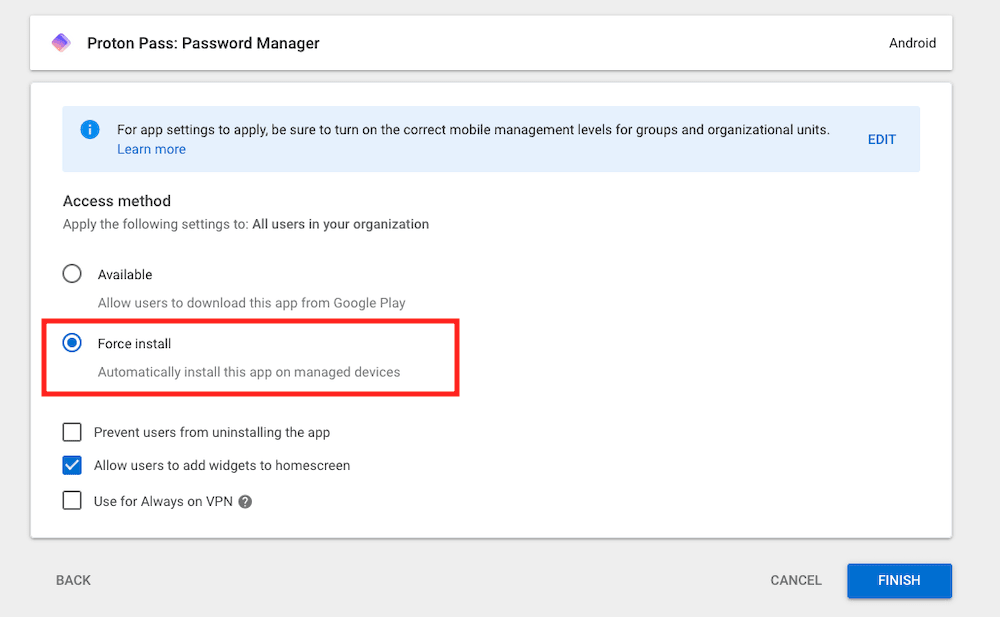
The Proton Pass app will now be automatically installed on your organization members’ managed devices.
Step three: Set up a work profile on an Android device
This step can be performed by your company’s IT department on company devices, or by members on their own devices. Android’s profiles feature ensures that users can keep their work and personal lives separate. Please note that this guide was created using a Samsung OneUI phone, and some details may differ on other devices.
1. On the Android device, open the Settings app and go to Password & Accounts → Add Account (or Accounts and backup → Manage accounts → + Add account on Samsung devices).
2. Select Google and sign in using the username and password you generated in step one.
3. You’ll be prompted to create a new, strong, permanent password for this account. If this process is being performed by an IT department (or similar), be sure to securely share the username and new password with your team member. Tap Next when you’re ready.
4. Agree to Google’s terms of service to finish creating the managed Google account. Tap Next to continue.
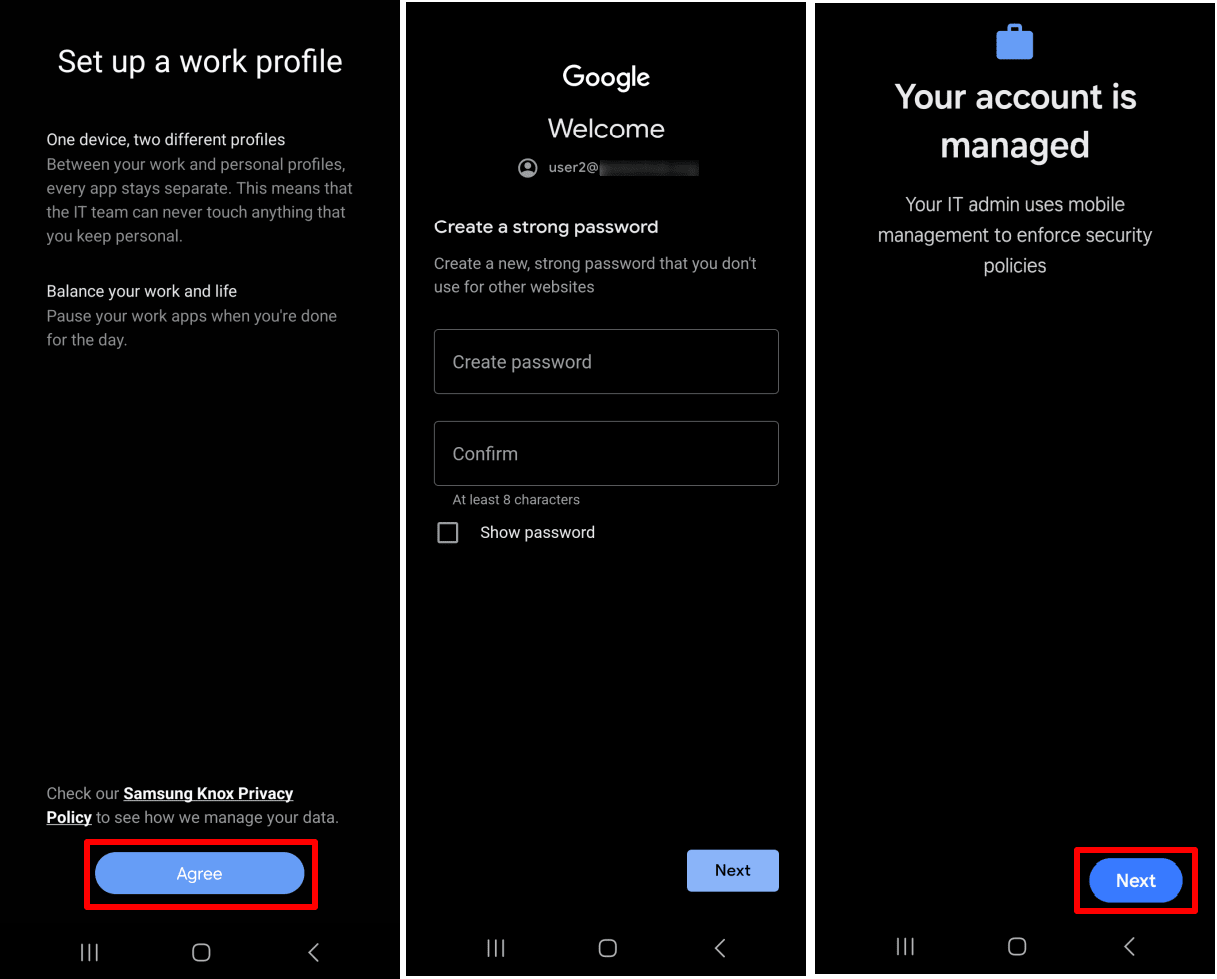
5. You’ll now create a work profile on the device. This allows you (or the staff member the device is issued to) to keep your personal and work lives separate. Note that data in your work profile will be visible to your IP administrator. Tap Agree to proceed and tap Next once the new work profile has been created.
6. If you haven’t set up a screen lock for this device, you’ll prompted to do so. Once this is done, tap Install work apps → Install.
7. Assuming Proton Pass has already been configured for your organization (see step two above), you’ll see the Proton Pass app listed here. Tap Done.

You can now open the Proton Pass app from your work profile. To do this, swipe up from your home screen or tap on the circle-shaped dotted icon at the bottom of your home screen to open your app drawer → Work.

Additional configuration options
MDM for Proton Pass on Android is now set up. Below, we look at a more advanced option.
How to manage app permissions
The Proton Pass app doesn’t require any access to Android device features and therefore doesn’t ask for permission to access them. However, if you want to manage what access it has anyway:
1. Sign in to admin.google.com(new window) and go to Apps → Web and mobile apps → Proton Pass → Runtime permissions.

2. Use the dropdown menu next to each Android feature to select Allow, Deny, or Prompt user (default).
