
How to create and manage groups
- Reading
- 3 mins
- Category
- Proton VPN for Business
As a Proton VPN for Business administrator, you can create user groups and customize each group’s access to Gateways and shared servers. If you’re on a Professional or Workspace bundle plan, you can also assign admin roles to each group.
- How to create a group
- How to add users to a group
- How to remove a user
- How to customize VPN access for groups
- How to assign admin roles to a group
- How to edit a group
- How to delete a group
- Groups and custom domains
Before you get started, you’ll need to create your Proton VPN for Business organization(new window) and add some users(new window).
How to create a group
1. Sign in to account.proton.me and select the VPN app.
2. In the sidebar, go to Organization → Groups, then click + New group.

3. Give your group a Name, and add a short description in the Purpose field. Click Save when you’re done.

How to add users to a group
To add users to a group:
1. Sign in to account.proton.me and select the VPN app.
2. In the sidebar, go to Organization → Groups, then click + Add user.

3. Start typing a username or email address into the Group members field, then select your user’s email address from the list. To add all users, click Add all organization members.

4. Click Add when you’re done and enter your password to continue. Invited users will receive an email invitation to join the group.
How to remove a user
1. Sign in to account.proton.me and select the VPN app.
2. In the sidebar, go to Organization → Groups and select the group you want to manage.
3. Click the three dots (⋮) next to the user’s name, then select Revoke invitation.

How to customize VPN access for groups
You can assign groups access to your organization’s Gateways and shared servers.
- How to add and remove users from a Gateway(new window)
- How to manage group access to shared servers(new window)
How to assign admin roles to a group
If you’re on a VPN Professional, VPN and Pass Professional, or Workspace bundle plan, you’ll also be able to assign admin roles to groups. Once a group is assigned an admin role, all current and future members of that group will automatically gain the accesses and permissions of that role.
How to edit a group
To edit a group’s name and/or purpose after its been created:
1. Sign in to account.proton.me and select the VPN app.
2. In the sidebar, go to Organization → Groups and select the group you want to edit.
3. Click the Edit group (pen) button.

How to delete a group
To delete a group:
1. Sign in to account.proton.me and select the VPN app.
2. In the sidebar, go to Organization → Groups and select the group you want to manage.
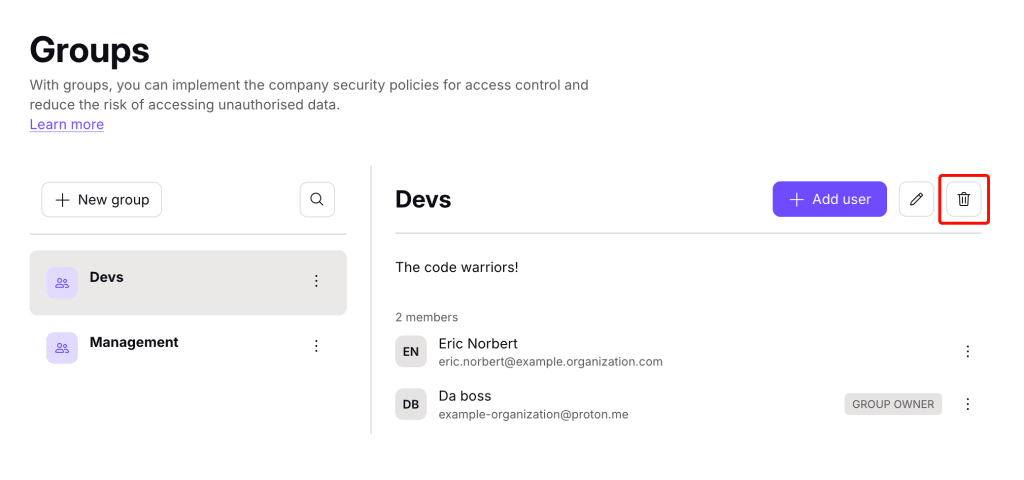
3. Click the Delete (trash) button and confirm.
Groups and custom domains
However, if you have a custom domain (available with Proton Workspace), each group will get an email address under your custom domain.
Provisioning groups through SCIM
If your organization uses an IdP (identity provider) such as Okta or Microsoft Entra, you can create and manage groups there instead of in Proton. Group and membership changes made in your IdP are mirrored automatically in Proton, so there’s no need for manual updates.
This is especially useful for onboarding and offboarding: when someone joins or leaves a team, their access updates automatically without someone having to grant or revoke permissions each time.
To set up SCIM for your organization, see: