How to use a custom domain from OVH with Proton Mail
- Reading
- 9 mins
- Category
- Domain setup
If you have purchased a custom domain from OVH (such as yourdomain.com), you can use it to send and receive emails with your Proton Mail(new window) account (for example, using the yourname@yourdomain.com email address).
To do this, you must have a paid Proton plan. The number of custom domains you can use with Proton Mail depends on your plan.
- Proton Mail Plus: 1 custom domain
- Proton Unlimited: 3 custom domains
- Proton Duo: 3 custom domains
- Proton Family: 3 custom domains
- Proton Visionary (legacy): 10 custom domains
- Proton Mail Essentials: 3 custom domains
- Proton Mail Professional (now deprecated): 10 custom domains
- Proton Workspace Standard: 15 custom domains (by default with the option to add more)
- Proton Workspace Premium: 20 custom domains (by default with the option to add more)
The procedure for setting up your custom domain for use by your Proton Mail account is as follows:
- Add your domain to your Proton Mail account.
- Verify your domain so that Proton knows it is genuinely yours.
- Create new users and add team members to your account.
- Configure your domain registrar’s DNS records so that Proton Mail handles the emails sent and received using that domain.
- Set up your email address.
Add your domain
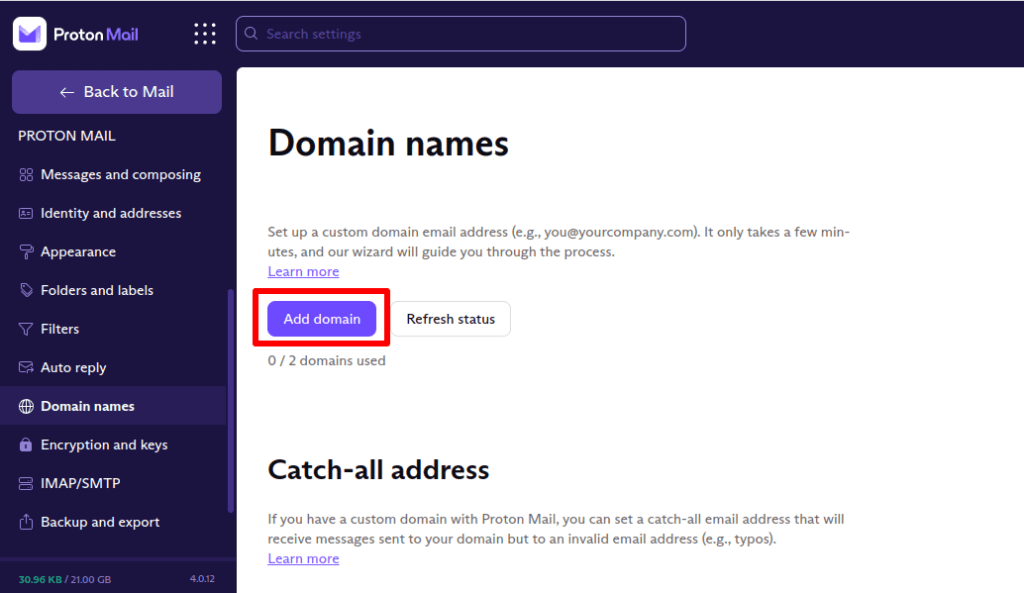
1. In your browser, log in to your Proton Mail account and select Settings → All settings → Proton Mail → Domain names → Add domain.
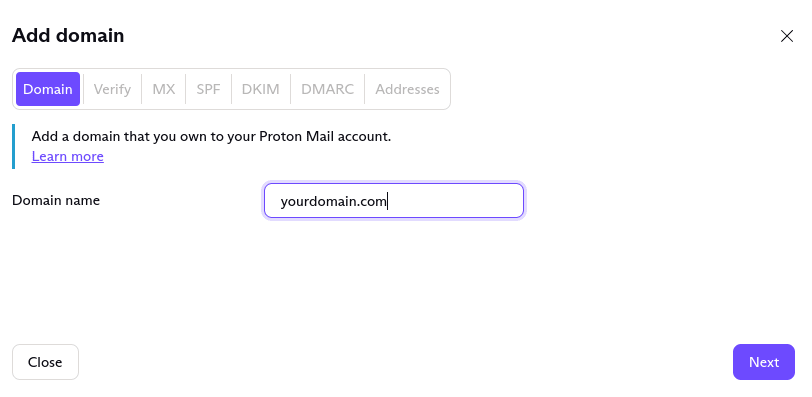
2. Enter your domain name, click Next (bottom right of the page). You might be asked to re-enter your Proton Mail password for security reasons.
Verify your domain
The first thing you have to do after adding a custom domain name is to show Proton Mail that you control this domain. You can do this by adding a TXT record with a unique code that Proton Mail has generated to your domain’s DNS records in your registrar’s domain management portal.
Proton Mail servers will then look up all the TXT records for your domain and see if any match the verification code. If we find a match, then verification succeeds, and you can move on to the next steps.
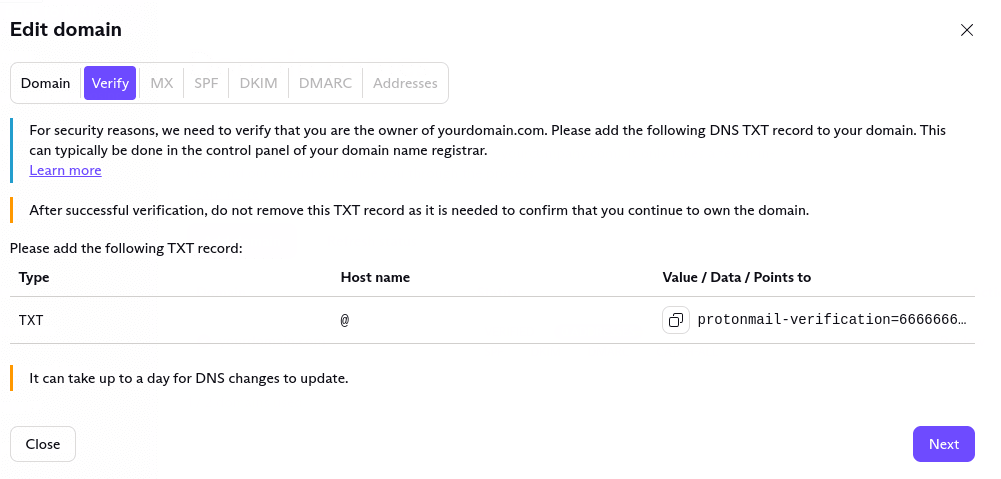
Once you click Next, you will be taken to the Verify tab. You can also reach it from Settings → All settings → Proton Mail → Domain Names → Domain by clicking on the Actions → Review button and selecting the Verify tab.

In the Verify tab, your Host Name (@) and TXT verification record are shown to the right of your newly added domain.
Now:
1. Log in to your OVH account, go to Domains, select the DNS zone tab, and Add an entry.
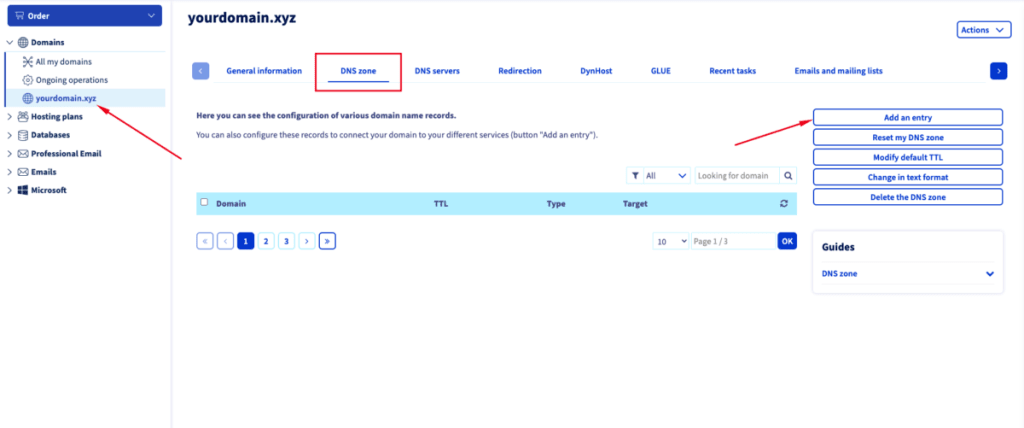
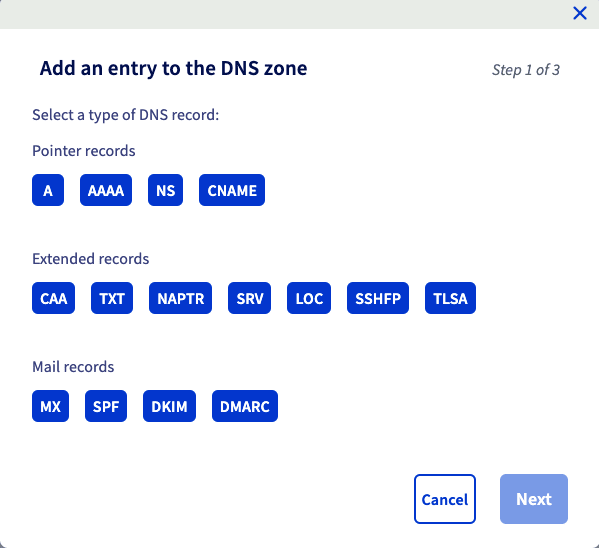
2. Select the TXT record type and go Next.
3. Create the following record:
- Subdomain: Leave empty.
- TTL: Select a low value to update your DNS record faster.
- Value: Copy and paste the value from the Value / Data / Points to column of the Verify tab in the Proton Mail Edit Domain console.
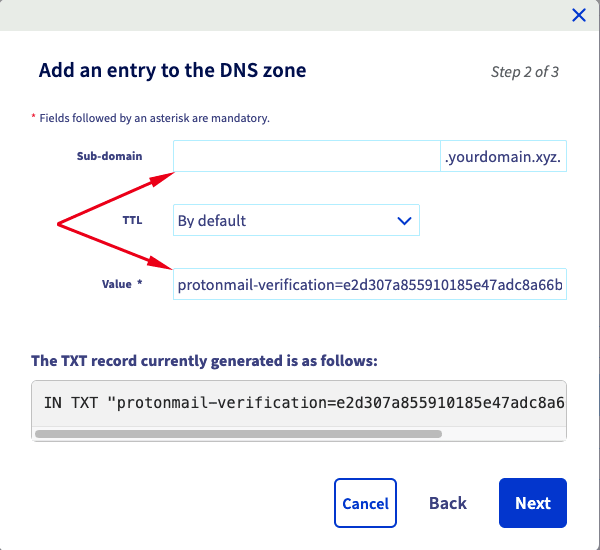
4. Click Next to save the record.
Wait a few minutes, then click Next in the Proton Mail Edit domain console to trigger a DNS check by our servers. If it succeeds, you can now move on to the next step (creating an MX record). If it didn’t succeed, don’t worry; the process can take a while, so try again in an hour.
Create an organization
Now that you have a domain, you can create an organization and add users to it.
Share login information with your team members
Before you change your MX records, we recommend informing your team members of the upcoming change. After you change the MX records, emails will be delivered to their Proton Mail inboxes instead of their old inboxes.
Create MX records in OVH to activate your domain
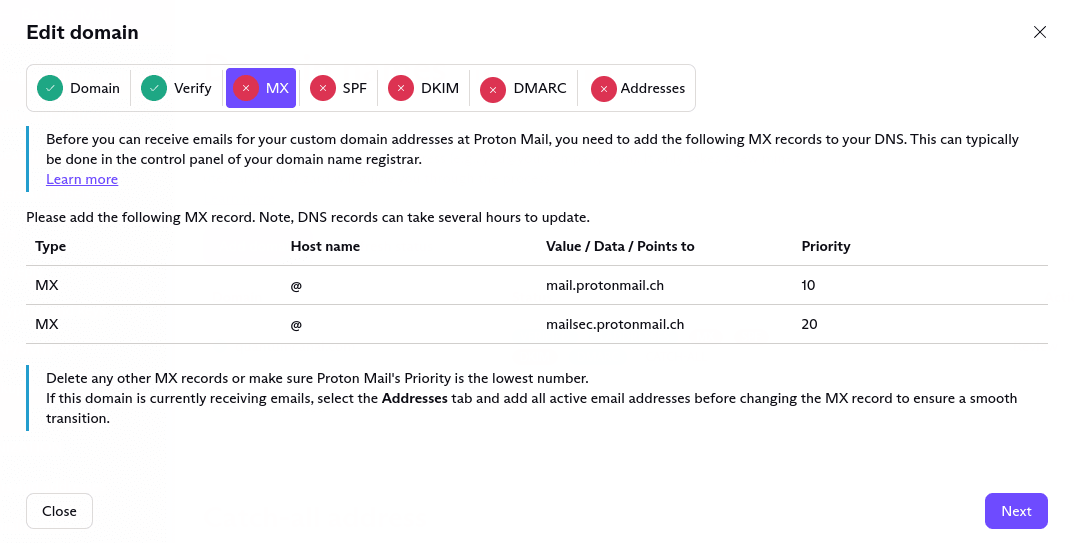
Once your domain is verified, click Next to go to the MX tab (or come back to this page later and simply go directly to the MX tab). The mail exchanger (MX) record is vital for email operation: it tells the internet which server(s) should receive your domain’s email.
If you are setting up a new domain, go ahead and add the specified MX records in your OVH control panel. To do this:
1. Go to DNS zone in Domains and Add an entry.
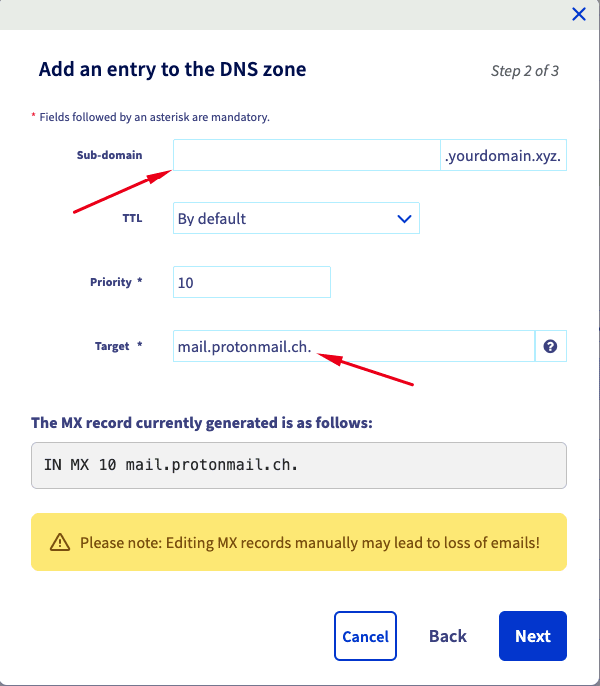
2. Select the MX record type. Then, enter and save the following values:
- Subdomain: Leave empty.
- TTL: Select a low value to update your DNS record faster.
- Priority: 10
- Target: mail.protonmail.ch
Note: Include the dot (.) at the end of the target field.
3. Create a second MX record using these values:
- Subdomain: Leave empty.
- TTL: Select a low value to update your DNS record faster.
- Priority: 20
- Target: mailsec.protonmail.ch
Note: Include the dot (.) at the end of the target field.
Click Next when you are done.
If your domain currently has existing mailboxes, we recommend adding all used email addresses before switching your MX records to Proton Mail to ensure a smooth transition. We describe how to do this below.
This will help you avoid disruption to your email delivery because Proton Mail will only accept mail for addresses that you have added. mail.protonmail.ch points to Proton Mail’s mail servers, so once you have made this change, you are telling the internet to send email for your domain to your Proton Mail account.
If you have MX records for multiple services, the email will be delivered to the service with the highest priority (lowest value). If you have other MX records, you should either delete them or make sure mail.protonmail.ch‘s priority is a smaller number (higher priority) than the other MX records.
Again, it may take up to a day for MX changes to propagate, and email may still go to your old MX during this transition. Once we detect your domain’s top MX record is pointing to Proton Mail, the MX tab will show a green tick icon.
Set up your addresses
If you are changing an existing domain to deliver emails to your Proton Mail inbox, you should set up all existing email addresses before filling in the MX records (as described above).
Select the Address tab → Add address.
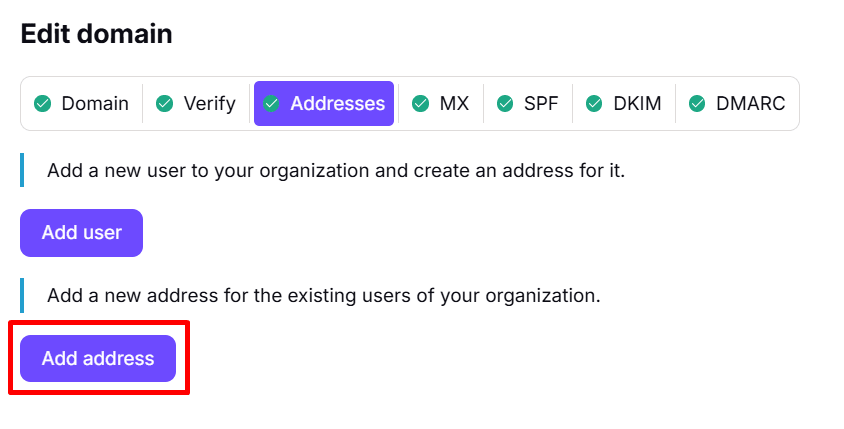
This will take you to the Organization section of your Proton Mail accounts page. Click on Add Address to create a Proton Mail email address using your custom domain. If you have more than one custom domain, you can select which one to use from the dropdown list.

Create SPF, DKIM, and DMARC records
For security reasons, we recommend adding SPF and DKIM records. Setting up DMARC is an optional, advanced feature.
Learn more about SPF, DKIM, and DMARC
Setting up SPF and DMARC records in the OVH console is similar to setting up TXT records.
1. Go to DNS zone in Domains and Add an entry.
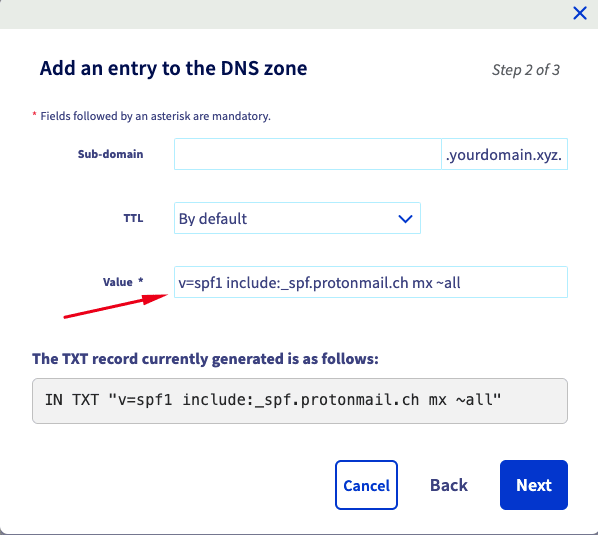
2. To set up the SPF record, select the TXT record type. Then, enter and save the following values:
- Subdomain: Leave empty.
- TTL: Select a low value to update your DNS record faster.
- Value: v=spf1 include:_spf.protonmail.ch mx ~all
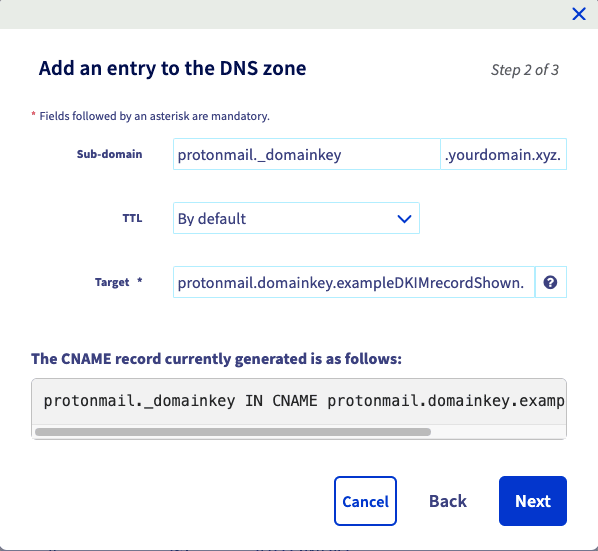
3. To set up the DKIM record, select the CNAME record type. Then, enter and save the following values:
- Subdomain: protonmail._domainkey
- TTL: Select a low value to update your DNS record faster.
- Target: Copy and paste the value from the Value / Data / Points to column of the DKIM tab in the Proton Mail Edit Domain console.
To add a second and third DKIM record, repeat these steps with the appropriate record names “protonmail2._domainkey” and “protonmail3._domainkey”.
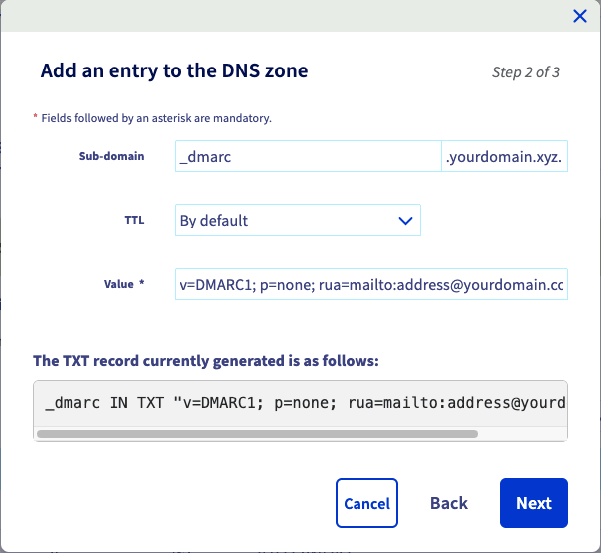
4. To set up the DMARC record, select the TXT record type. Then, enter and save the following values:
- Subdomain: _dmarc
- TTL: Select a low value to update your DNS record faster.
- Value: Copy and paste the value from the Value / Data / Points to column of the DMARC tab in the Proton Mail Edit Domain console.
You can now send and receive emails using your custom domain from OVH with your Proton Mail account!
Setup guides for other domain registrars are also available for:
If you own a domain from a different registrar, please see our generic guide How to use a custom domain with Proton Mail.