
Deleting your Facebook account is permanent after a 30-day grace period; deactivation is reversible. Here’s how to do either, plus how to export your data first.
Before you wipe Facebook of your data, consider downloading a copy of it and, if you’re not ready to fully commit, making your account private instead. There are also ways to keep using Facebook more safely if you’re not ready to leave.
- How to permanently delete your Facebook account and data
- Download your data before deleting
- Temporarily deactivate your Facebook Account
- How to deactivate Messenger
- Memorialize your account
- Protect your privacy on Facebook
- Adjust your Meta AI settings
How to permanently delete your Facebook account and data
Ready to say goodbye? Deleting your account and all its associated data takes just a few steps, and the process is similar to deleting an Instagram account, since both apps are owned by Meta.
Before you start, understand what you’re giving up. You won’t be able to reactivate your profile once it’s deleted, and all the photos, videos, and posts you’ve shared will be gone for good. The same applies to any pages or groups you run exclusively (you can hand control of these to another user first if you want them to continue). You’ll also lose access to Facebook Messenger, and you’ll need another way to log into any third-party apps or services you originally signed up for using your Facebook account.
Note that some information may still be visible to others after deletion — messages you sent to friends, for instance, remain in their inboxes even after your account and its copy of the conversation are gone.
Simply deleting the Facebook app from your phone doesn’t touch your account or your data; it just removes the app. To actually remove your profile, you need to go through account deletion.
1. In your browser, sign in to accountscenter.facebook.com(หน้าต่างใหม่).
2. Go to Manage accounts.
3. Select the Manage button next to account you wish to delete.

4. Select Deactivation or deletion.

5. Select Delete account and Continue.
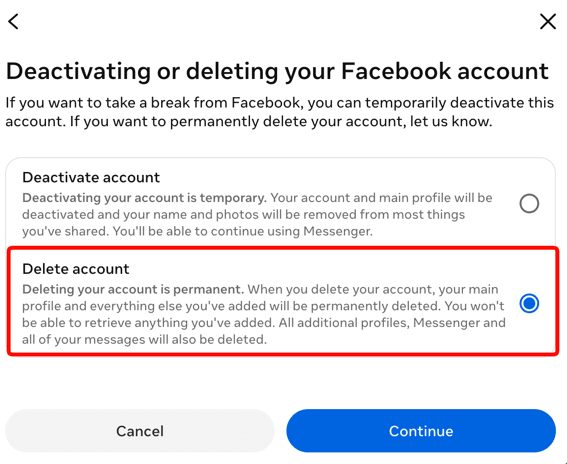
6. Follow the prompts, enter your password, and confirm
Once you confirm, your account enters a 30-day grace period. If you log back in during that window, the deletion is automatically cancelled. After 30 days, the deletion is permanent and can’t be undone.
Download your data before deleting
Before you delete your account, save anything you want to keep. Once deletion is complete, you won’t be able to get your photos, posts or messages back.
To download your data:
1. In your browser, sign in to accountscenter.facebook.com(หน้าต่างใหม่).
2. Go to Your information and permissions → Export your information.

3. Click Create export.
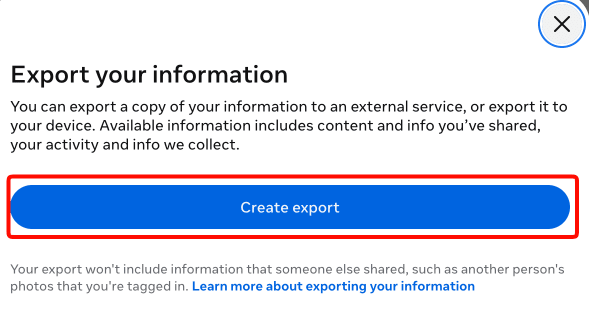
4. Choose a Meta profile.

5. Choose whether to export locally onto the device you’re using, or to an external (cloud) service.

6. You can customize the information you wish to export by selecting the exact data points, a date range, format and quality level for media downloaded. Higher quality photos and videos will take up more room.

Facebook lets you export the following data:
- Your Facebook activity
- Personal information
- Connections
- Logged information
- Security and login information
- Apps and websites off of Facebook
- Preferences
- Ads information
- Data logs
Click Start export when you’re done.
Temporarily deactivate your Facebook Account
If you’d rather take a break than commit to permanent deletion, you can deactivate your account instead. Deactivation hides your profile, posts, and photos from other users, but keeps everything stored on Facebook’s servers. You can reactivate at any time simply by logging back in, and your account will be restored exactly as it was.
This is a good option if you want to step back from the app without losing your data, though it doesn’t offer the privacy benefits of full deletion, because your information remains on Facebook’s servers.
To deactivate:
1. In your browser, sign in to accountscenter.facebook.com(หน้าต่างใหม่).
2. Go to Manage accounts.
3. Select the Manage button next to the account you wish to deactivate.
4. Select Deactivation or deletion.
5. Select Deactivate account, followed by Continue.
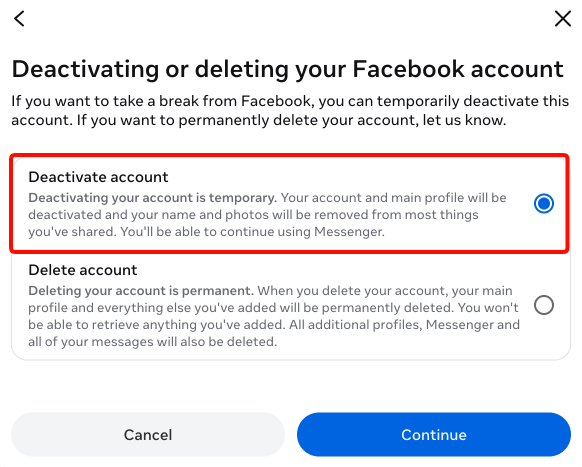
6. Enter your Facebook password and select a reason for deactivating your account.
7. Click Continue to finalize the deactivation process.
How to deactivate Messenger
If you want a break from Messenger without deleting anything, you can deactivate it. Because Messenger is connected to your Facebook account, you’ll need to deactivate Facebook first. The option to deactivate Messenger then becomes available. These steps work in the Messenger app on iPhone or Android.
1. Open Messenger app and tap Menu → Settings.
2. Tap Accounts Center → Personal details → Account ownership and control.
3. Tap Deactivation or deletion and select your account.
4. Choose Deactivate account, enter your password, then follow the prompts to confirm.
Deactivating doesn’t delete your messages, which stay visible to people you’ve chatted with until you reactivate. To come back at any time, just log in with your username and password.
Memorialize your account
Facebook also lets you plan for what happens to your account after you die. You can designate a legacy contact, typically a family member or close friend, who can manage a limited version of your profile once your account is memorialized.
This person will be responsible for informing Facebook of your passing by providing a death certificate or obituary with a photo. Once the death has been confirmed, your profile will be changed so that friends can still post and see your shared images, posts, and videos, but no one else will be able to login and post as you.
Your legacy contact can pin a tribute post to the top of your memorialized timeline, respond to new friend requests, and update your profile or cover photo. They cannot log in as you, read your private messages, or edit or delete your existing posts. Memorialized profiles display “Remembering” above the name, and are protected from things like birthday reminders and friend suggestions that could otherwise be distressing to the people who knew you.
If you’d rather not have your account memorialized at all, you can instead choose to have it permanently deleted after your death.
To configure your preferences:
1. In your browser, sign in to accountscenter.facebook.com(หน้าต่างใหม่).
2. Go to Manage accounts.
3. Select the Manage button next to account you wish to memorialize.
4. Select Memorialization.
5. Choose a legacy contact, or choose to have your account deleted after your death.

Protect your privacy on Facebook
If you’d rather keep using Facebook with a bit more peace of mind, there are several ways to reduce what Meta knows about you. Using a VPN(หน้าต่างใหม่) will hide your real IP address from Meta, and therefore also your rough location (at least when using the website — the mobile app can access your GPS data). But Meta will still be able to see all your photos, photos you’ve been tagged in, posts, likes, people you’ve messaged (but not the contents of the messages themselves), groups you’ve joined, etc.
Another way to make your Facebook more private without deleting anything is to make your profile private. You can control what information is visible to the public versus only to friends, and restrict certain content, like older posts or photos, to yourself alone. Just be aware this only hides information from other Facebook users, not from Meta.
To do this, click on your profile picture → Settings & privacy → Privacy checkup.
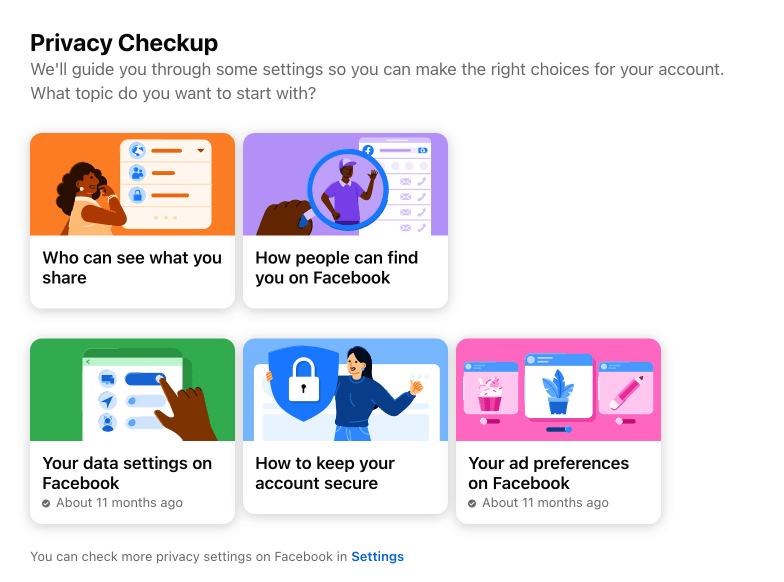
Review categories like who can see your posts, friend list, and profile information, and set each to Public, Friends, or a custom selection
You can also control whether your profile can be found in search, both on Facebook and via external search engines, and review which posts allow comments from the public.
Adjust your Meta AI settings
Meta AI shows up in a couple of different forms across Facebook, and it’s worth understanding what each one actually does with your data, since the two are easy to conflate.
The first is an opt-in feature, currently available in the US and Canada, which can scan your phone’s camera roll (with your explicit permission) to suggest AI-generated collages or photo edits. This feature is only available in the mobile app.
According to Meta, this camera-roll media isn’t used to train its AI unless you actually use the editing tools or choose to share the results, but granting permission does mean photos are uploaded to Meta’s servers on an ongoing basis. If you’d rather not participate, you can simply decline the permission prompt, or turn the feature off afterwards in the app’s camera roll settings.
The second, separate issue is that as of December 2025, Meta uses your conversations with the Meta AI chatbot itself to help personalize the ads and content you see across Facebook, Instagram, and WhatsApp. There’s no way to opt out of this.
The only exemption is for anyone in the EU, UK, and South Korea, where stricter privacy regulations mean the “feature” is not available.
Final thoughts
Deleting Facebook is simple in the sense that Meta provides a clear way to do it. What takes more thought is deciding how much of a break you actually want. Full deletion is permanent after a 30-day window, taking your data with it. Deactivation is fully reversible but leaves your information sitting on Facebook’s servers. Whichever path you choose, downloading your data first ensures you don’t lose anything you want to keep.